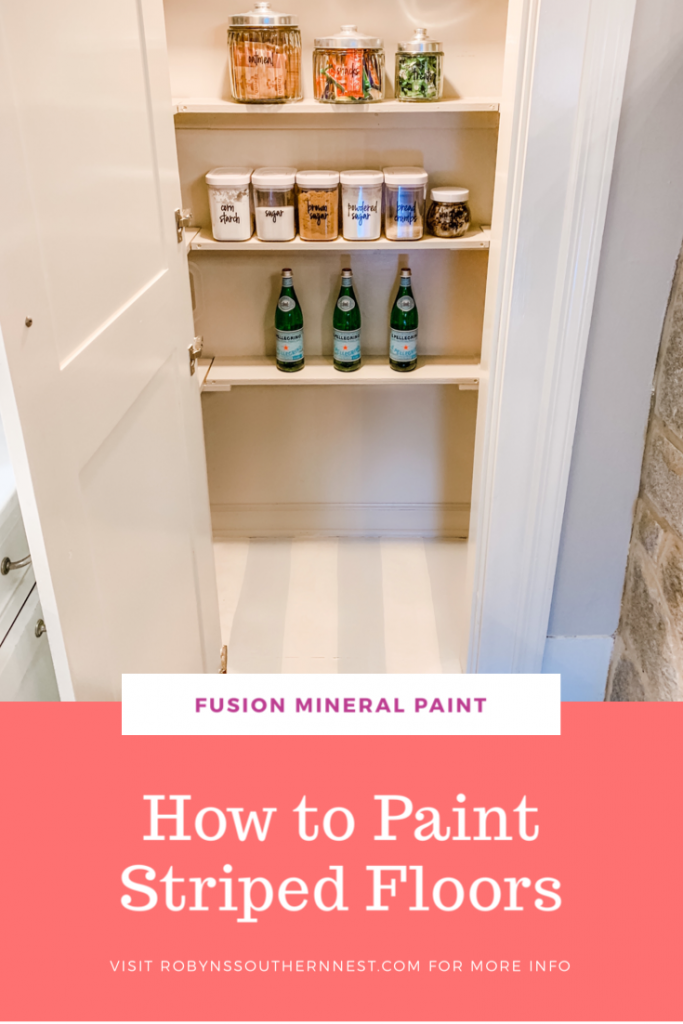
How to Paint Striped Floors with Fusion Mineral Paint
Hey friends and happy Friday! I did it….I finally did it. I painted a floor using fusion mineral paint. In our pantry there was nothing but subfloor, so I decided that had to change. I figured I would do a cute design while I was at it…because well…why not right? Stripes are always a classic look so I decided to share this little tutorial with you on how to paint striped floors with fusion mineral paint.
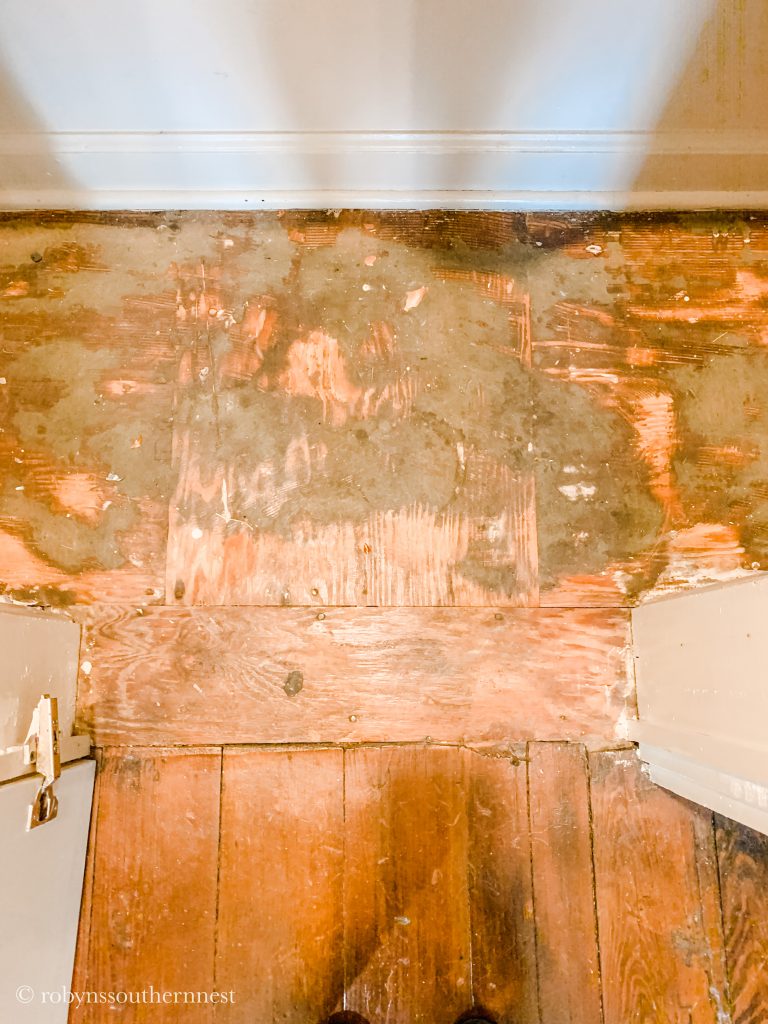
I figured if I messed up I could just paint right over it. I wasn’t as intimidated since it was such a small area of flooring here in our pantry. Here’s the before of our pantry floor. Pretty ugly right?!
First Step:
Clean your surface. I can’t stress this enough. I swept off the floor and then I wiped it down with a damp microfiber cloth. I didn’t want it super wet so I was sure to wring out the water really well before wiping it down. That way all the dust and debris held on to the microfiber cloth as I wiped. I let the floor dry out for at least 30 minutes.
Second Step:
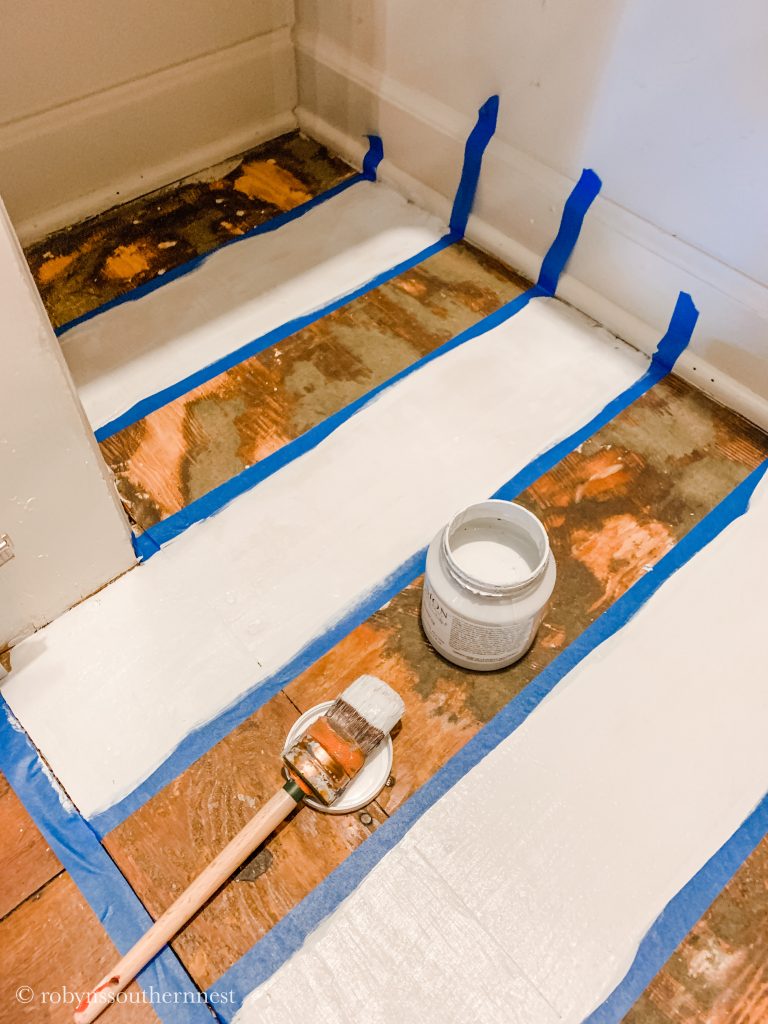
Tape off your floor using painter’s tape. This took some trial and error, but I finally figured it out. I’m going to insert a diagram below of what I did since it’s a little easier to see than to explain.

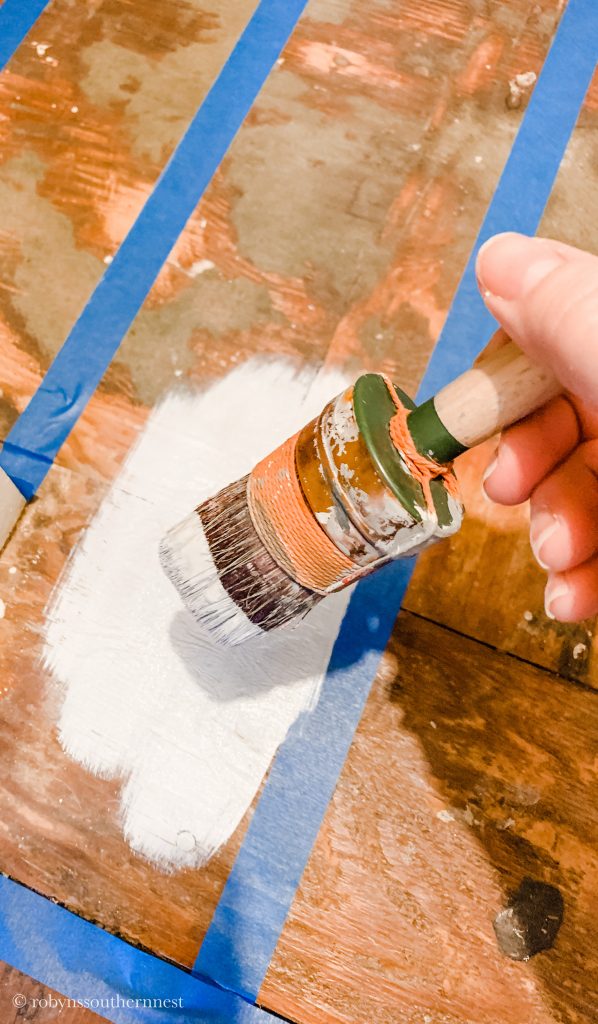
Third Step:
You can certainly paint the whole floor one color or even prime the floor first before taping everything off if you’d like to. I decided to skip this step since I was just painting subfloor. If I were painting on vinyl flooring I would certainly recommend priming first. Go in with your first color from one side to the other. Since I’m right handed I decided to start on the left side and work my way to the right.
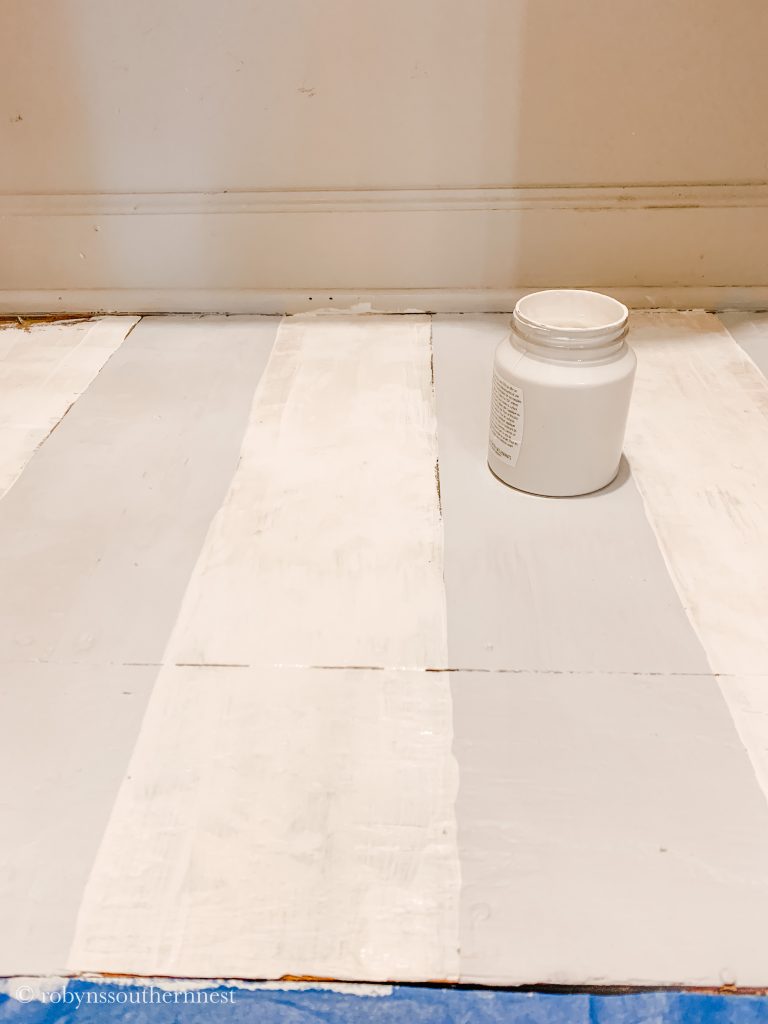
Fourth Step:
Let the first coat dry for at least 30 minutes before applying the second coat. After 30 minutes go ahead and go in with your second coat to give it a nice finish. You can certainly go in with a third coat if need be. Honestly it really just depends on what color you’re using and what color you’re painting over in my experience. As you can see below this color really went on pretty well. When you’re using fusion mineral paint less is more. You can always go back with more coats so be sure not to goop it on too thick.
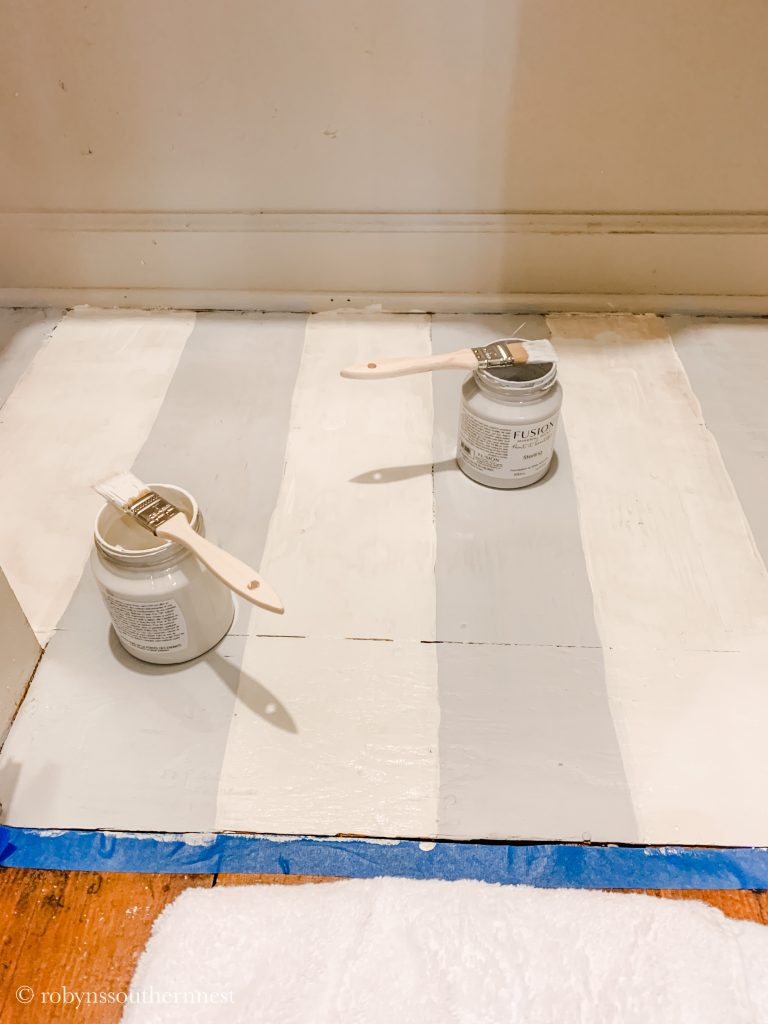
Fifth Step:
Go in with your secondary color and repeat the process. Let the paint dry for at least 30 minutes before peeling up the tape. It’s best to remove your tape before the paint dries completely.
Sixth Step:
If you need to go back with a small brush and touch up any edges this is the time to do that. There were some areas I had to free hand to get a good line. As you can see above there were some gaps so I just took a detail brush to fill in those gaps. My lines are certainly not perfect by any means but I kind of like that.
Step Seven:
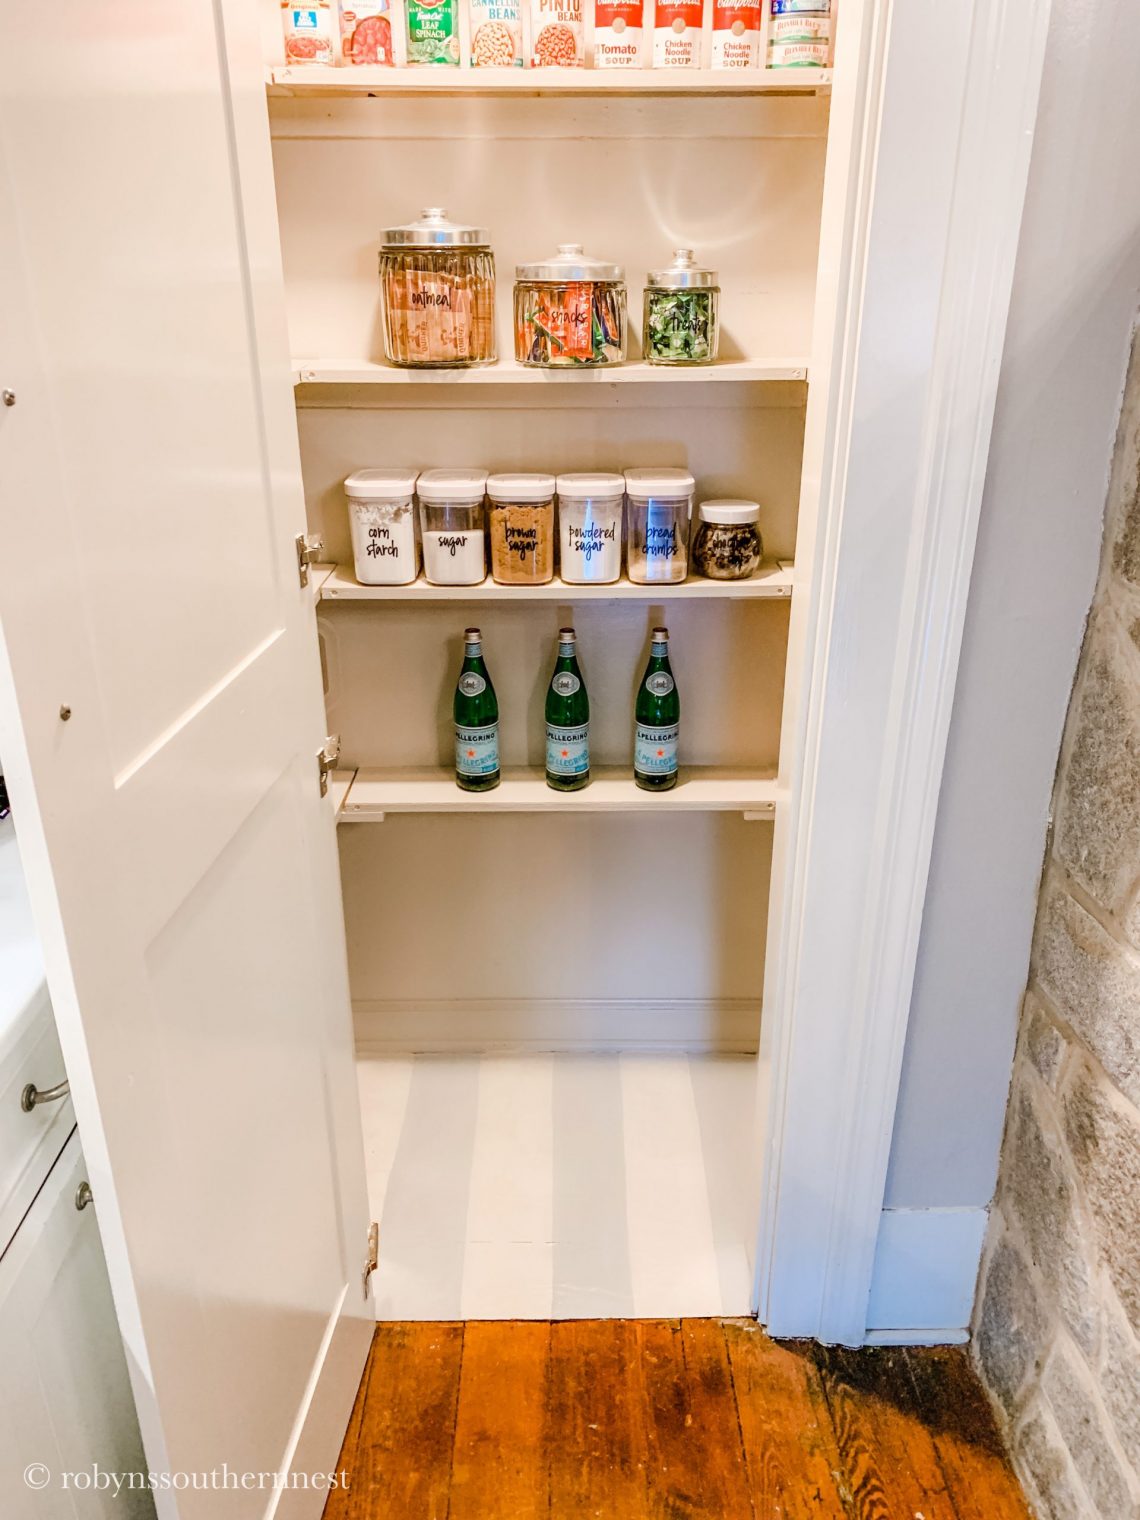
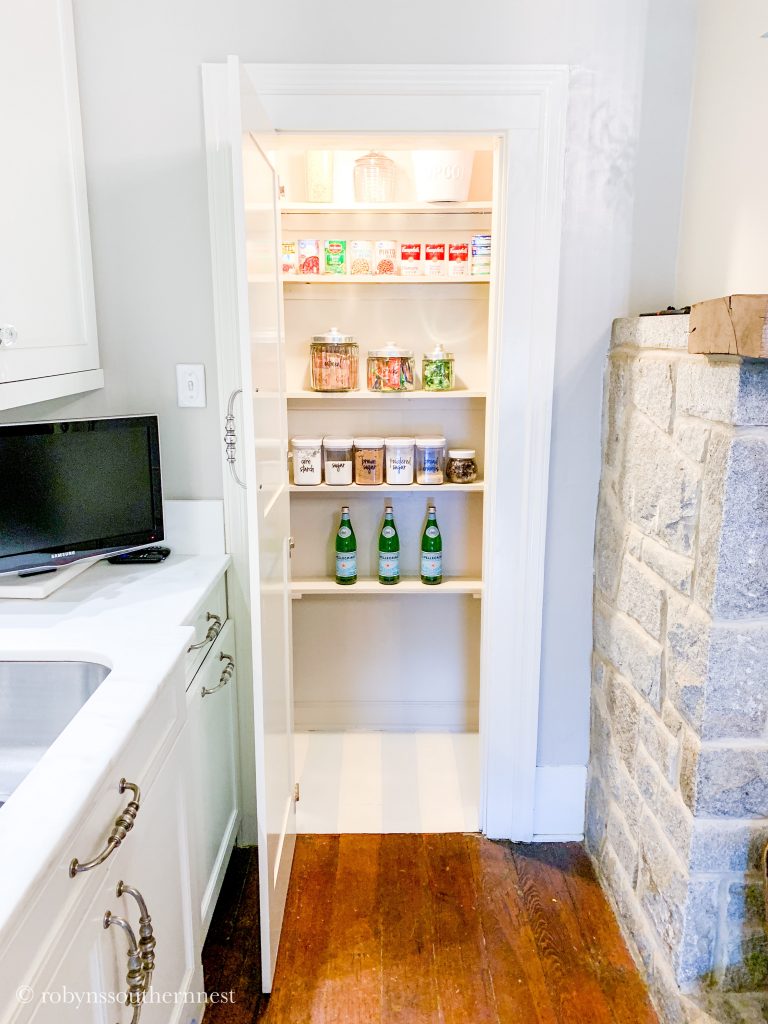
Let the paint dry for 24 hours to cure before placing anything on top or using them. The longer you wait the better. You can certainly put a sealer over top of the paint. Since our pantry floor isn’t one we walk on I figured it wasn’t necessary. Plus, I kind of want it to have that weathered and worn look to it. The more worn the better especially since we have an old house.
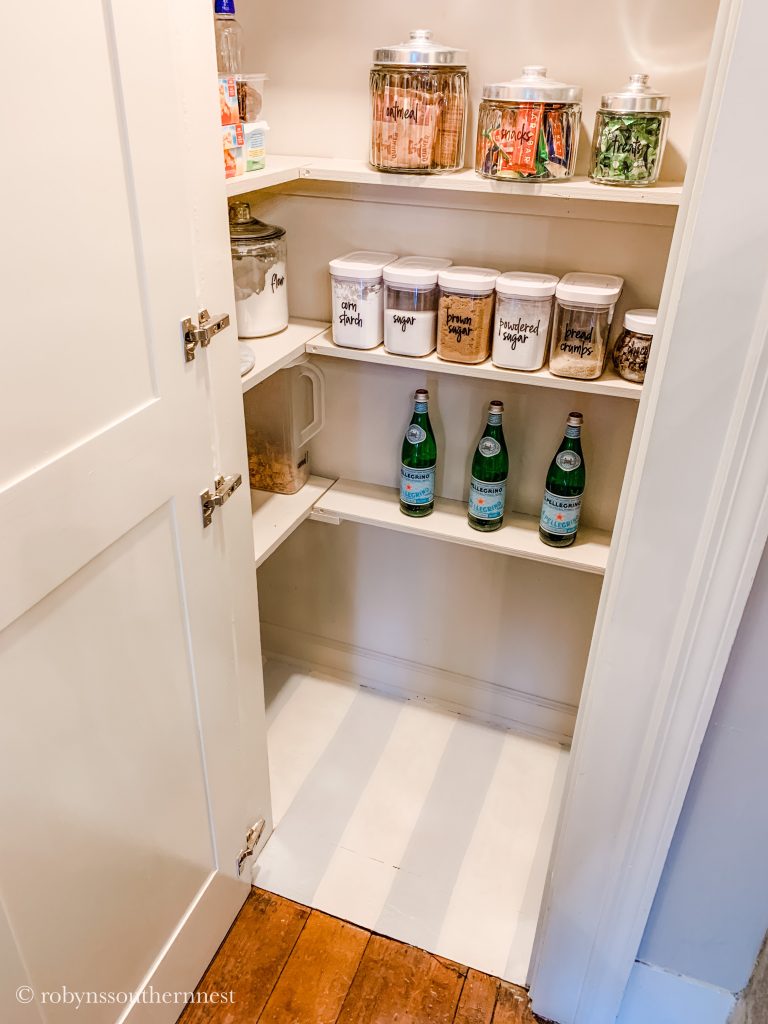
Let me know if you have any questions down in the comments. You can find all my supplies linked below including the paint colors I used for this project.
Shop Supplies
Pin For Later
Thank you for flying by today friends! You can read more of my projects with Fusion Mineral Paint by clicking here.
I hope you have a wonderful weekend!
xoxo,
Robyn
*This post contains affiliate links. Please read full disclosure above.


2 Comments
Cindy McTigue
This looks very pretty and I love the colors you chose. Great tutorial too.
Cindy
robynssouthernnest
Thank you Cindy! It was such a fun little project that made such a difference.