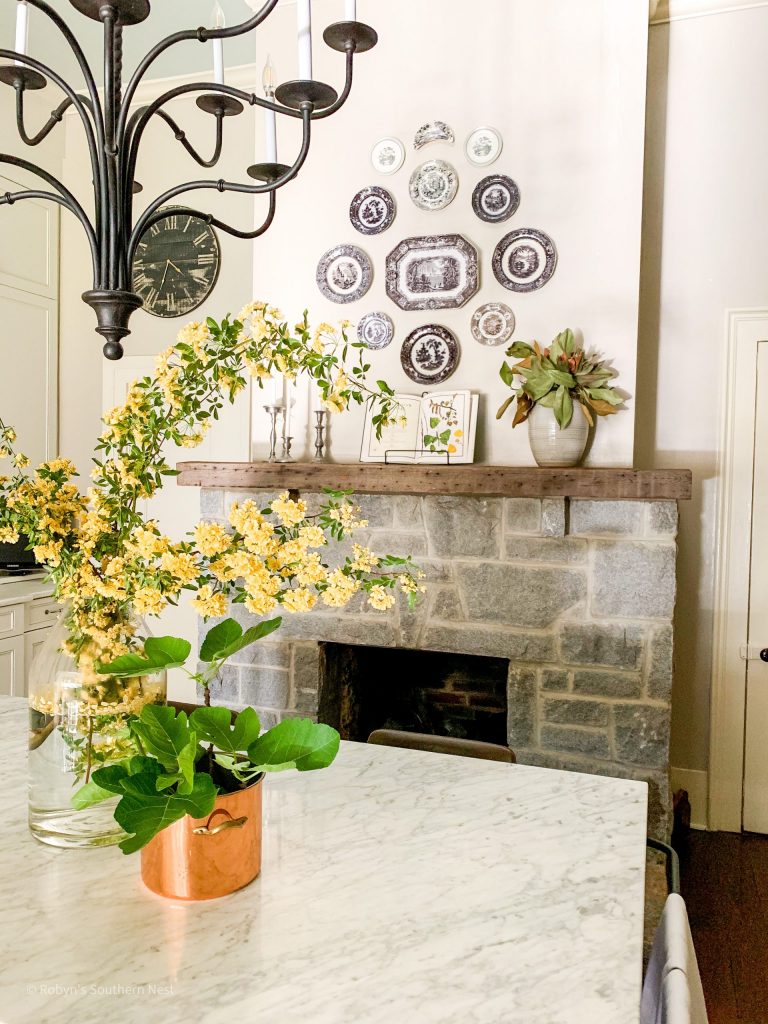
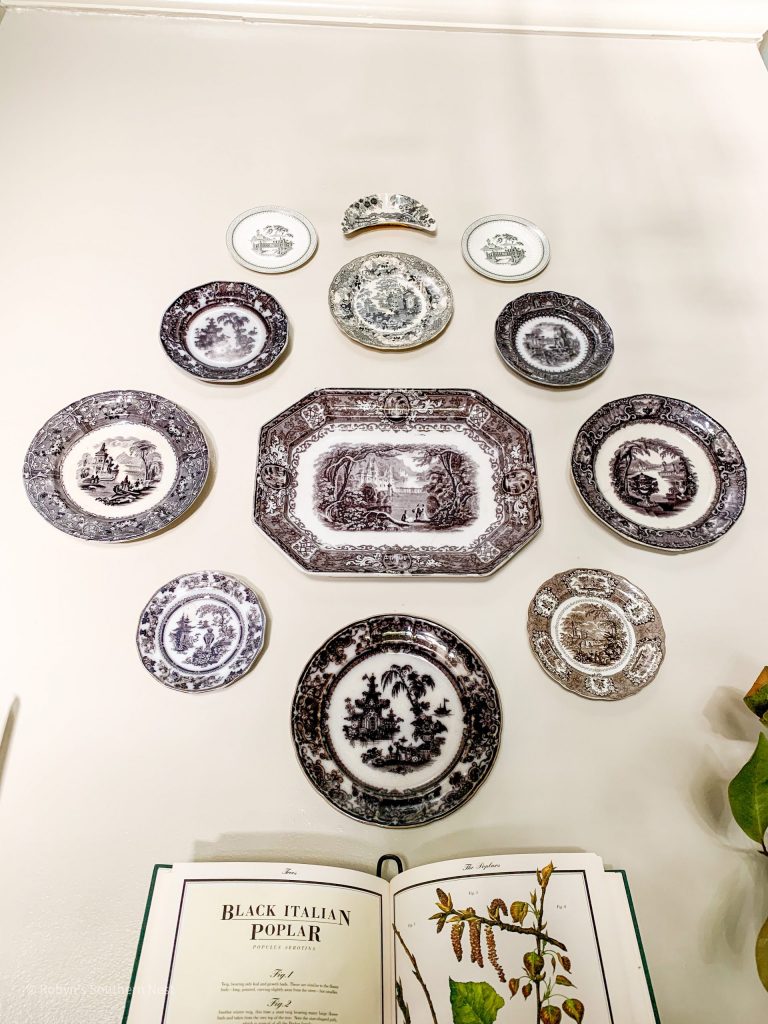
Transferware Plate Wall
This has been an ongoing project that I am finally happy to announce is finished. I wanted to take my time and collect the pieces that I loved and looked right for this plate wall. This will be a timeless install, so I wanted it to be juuuust right. I wanted to give you a few tips and tricks I’ve learned while creating a transferware plate wall like this.
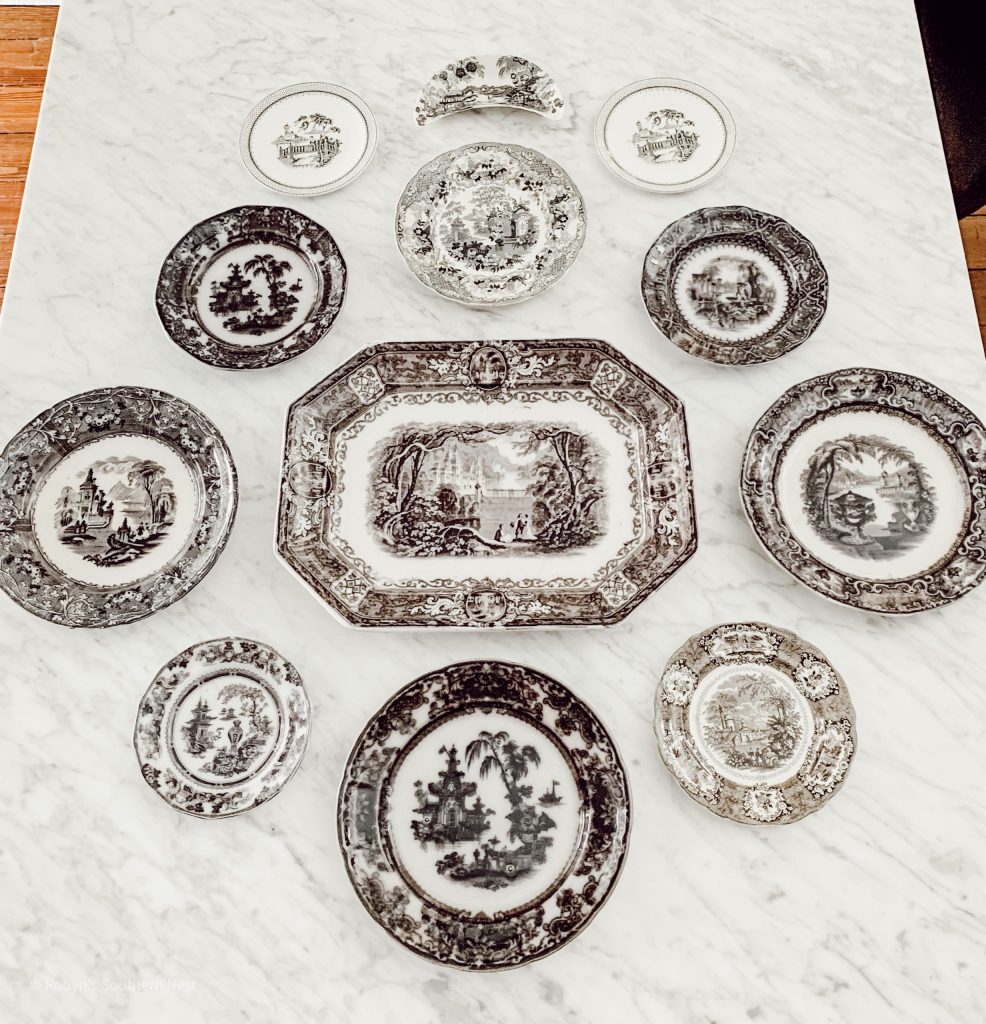
Because I was collecting the black transferware it did make it a bit more difficult since there just isn’t as much to choose from compared to the more popular blue transferware. Just keep that in mind if you want to create something similar. Ebay was definitely the way to go when it came down to finding these pieces. I would say that 85% of them came from Ebay. The rest I found at local antique stores, and one online retailer.
A Little History of Transferware
What is transferware you ask? Transferware is “Pottery decorated using the technique known as transferware or transfer ware. It was developed in England from the 1750s on, and in the 19th century became enormously popular in England, though relatively little used in other major pottery-producing countries. The bulk of production was from the dominant Staffordshire pottery industry. America was a major market for English transfer-printed wares, whose imagery was adapted to the American market; several makers made this almost exclusively.
“The technique was essential for adding complex decoration such as the Willow pattern to relatively cheap pottery, but the ease with which very detailed images could be used rather went to the head of early-19th-century potters, who tended to produce dense overcrowded designs that, though very evocative of their period, are in questionable taste. Earlier and later wares show more restrained designs. In particular, transfer printing brought the price of a matching dinner service low enough for large numbers of people to afford.”
“Apart from pottery, the technique was used on metal, and enamelled metal, and sometimes on wood and textiles. It remains used today, although mostly superseded by lithography. In the 19th century methods of transfer printing in colour were developed.” (source: Wikipedia)
How to Hang
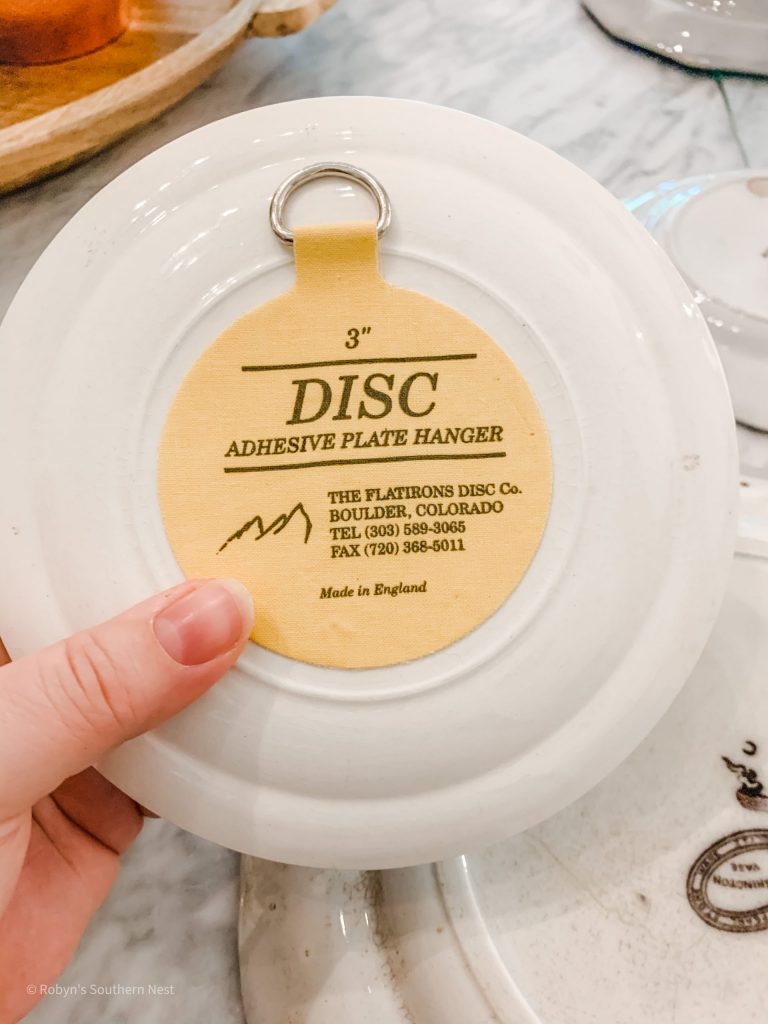
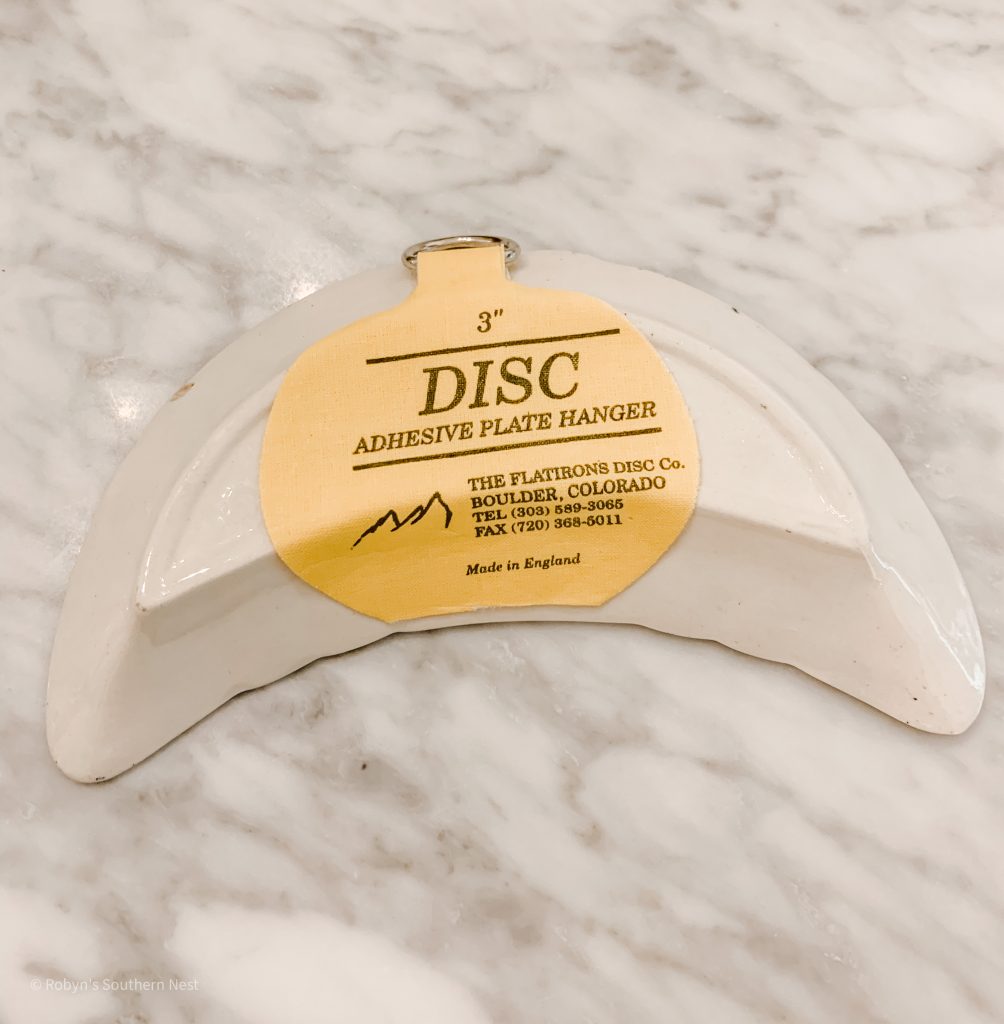
I did a lot of research on how to hang them up. I was especially nervous about the large heavy platter. So I decided to go with the plate disc hangers. For the large platter I went with two of the 5 1/2 discs side by side as shown below. I then attached picture hanger wire to each loop which made it easier than hanging two nails. For the rest of the plates I used 3 inch and 4 inch hangers. Just measure that back side of your plate to determine what sizes you’ll need.
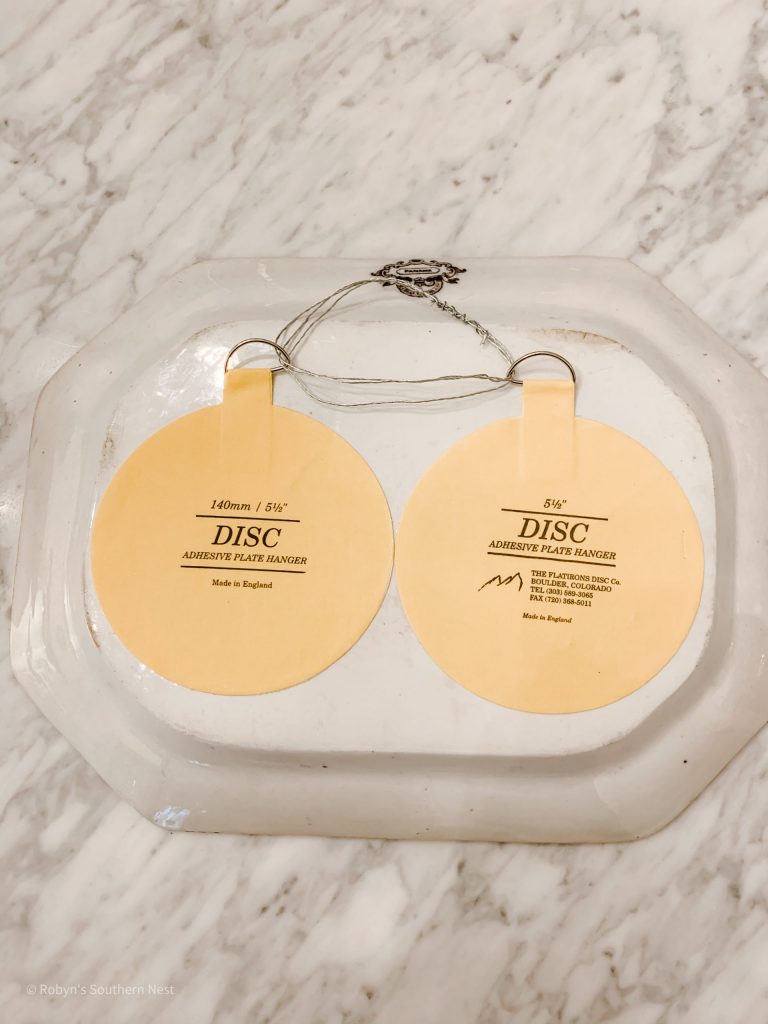
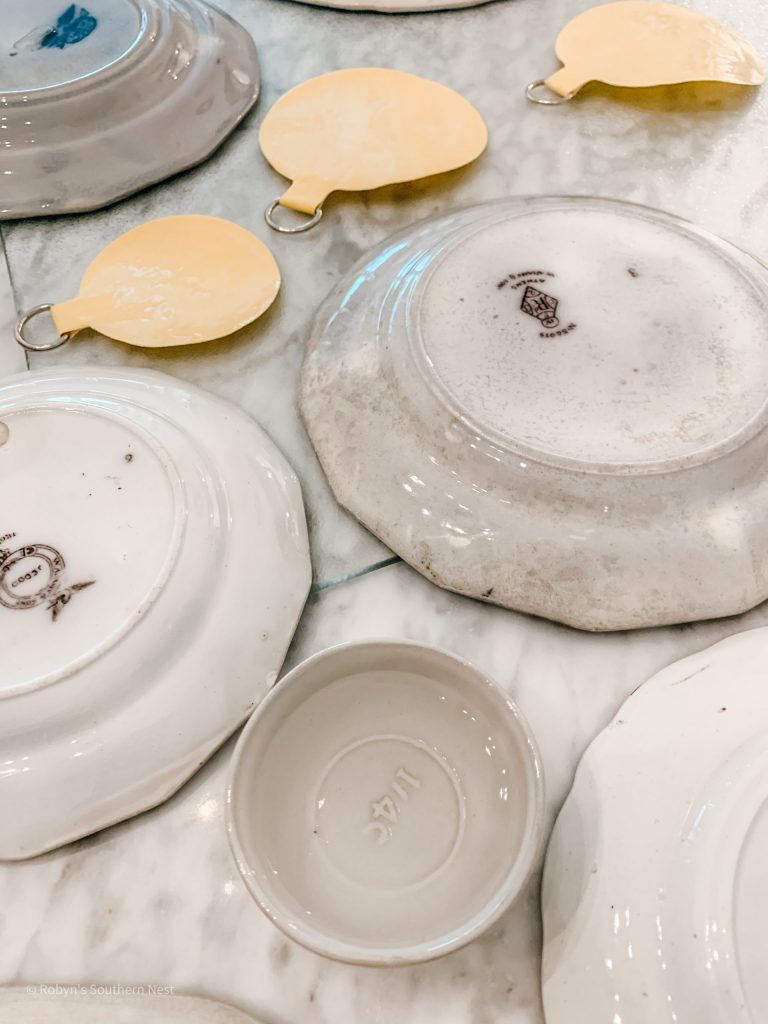

I loved these disc hangers because you can easily remove them in warm water after you’re through with them. I also liked that just the plate was showing and not the metal prongs that may damage your plates. Some of these plates I’ve collected are well over 100 years old so I wanted something that would protect the plates and not cause any scratches. After I adhered the discs following the instructions I let them sit for at least 24 hours.
For this little bone dish I used a 3″ disc hanger and just trimmed the bottom of it to fit the curve of the plate.
Tracing a Layout
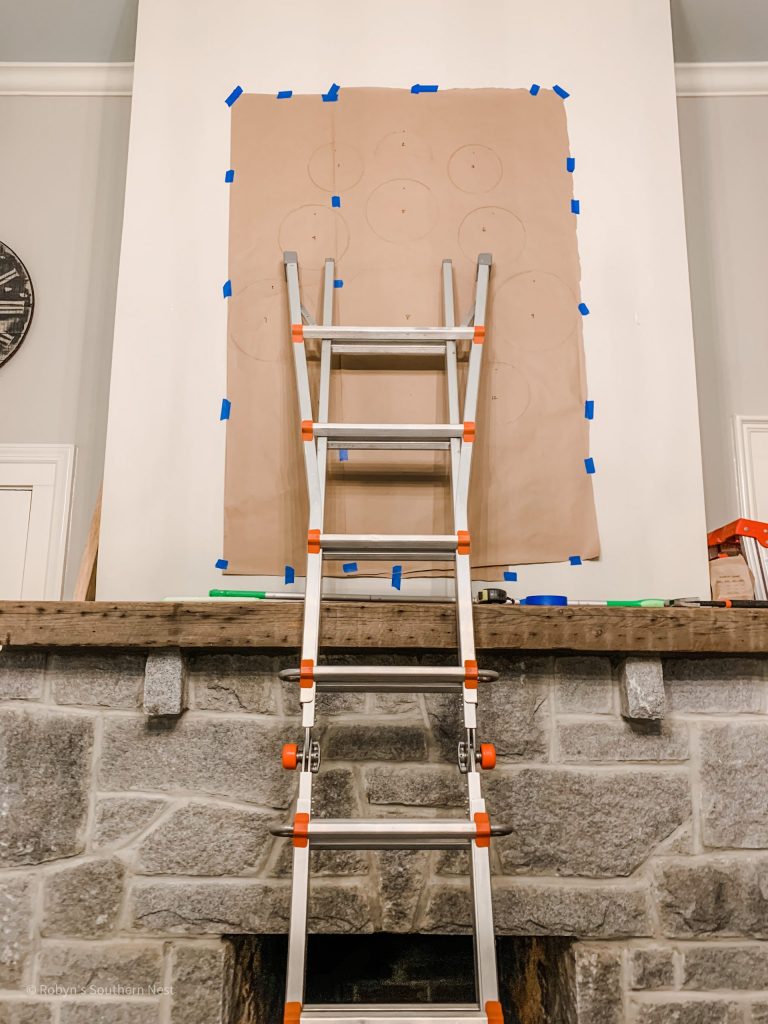
I decided the best way to visualize my layout for my Transferware Plate Wall was to trace them on paper and then mark where their hangers were on the paper as well so I could easily map out where I needed to place the nails. As far as the pattern I kind of just played around with them until they looked right. I kept their size and pattern in mind when displaying. Once I had them all traced on the paper I taped the paper up to the wall using painters tape. I then hammered in the nails where I had marked the spots. Once all of the nails were in place I then hung the plates on their repective nails. I decided to use picture hanging nails to give them more of an achor in the wall. The nails I used hold up to 20 lbs.
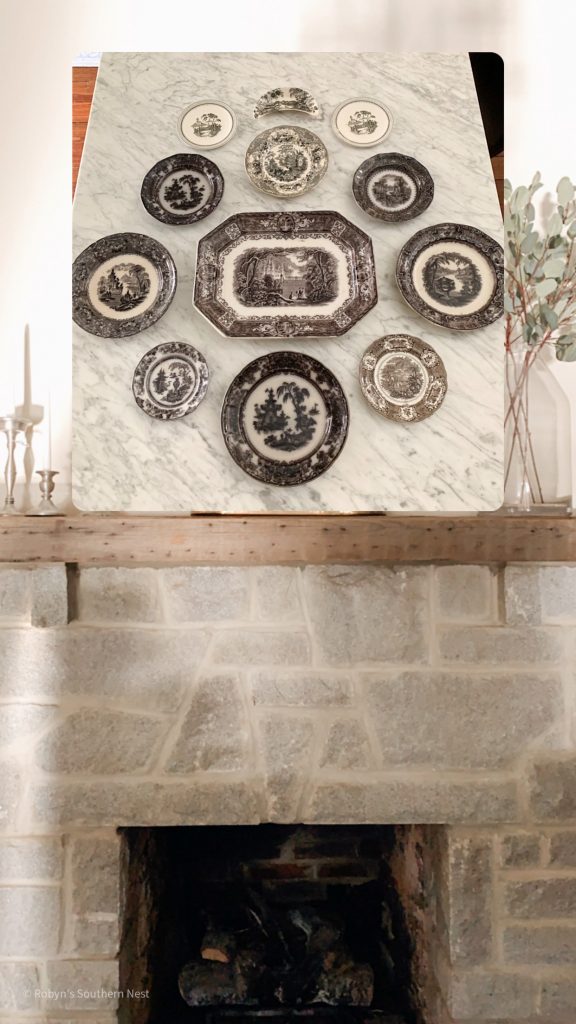
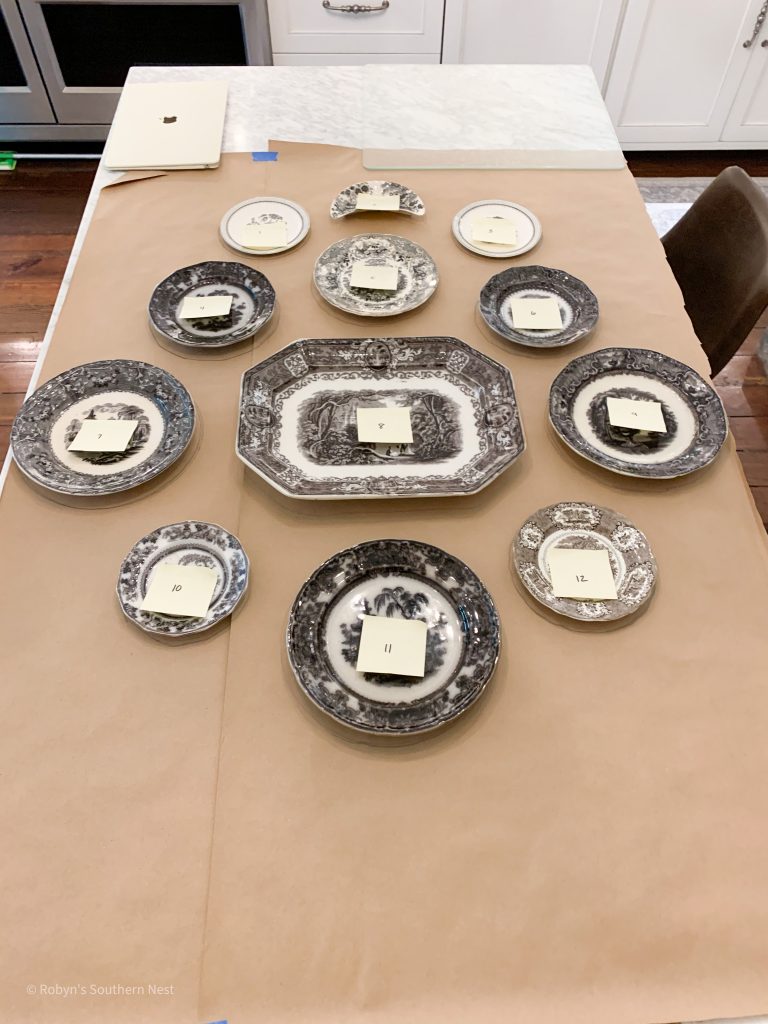
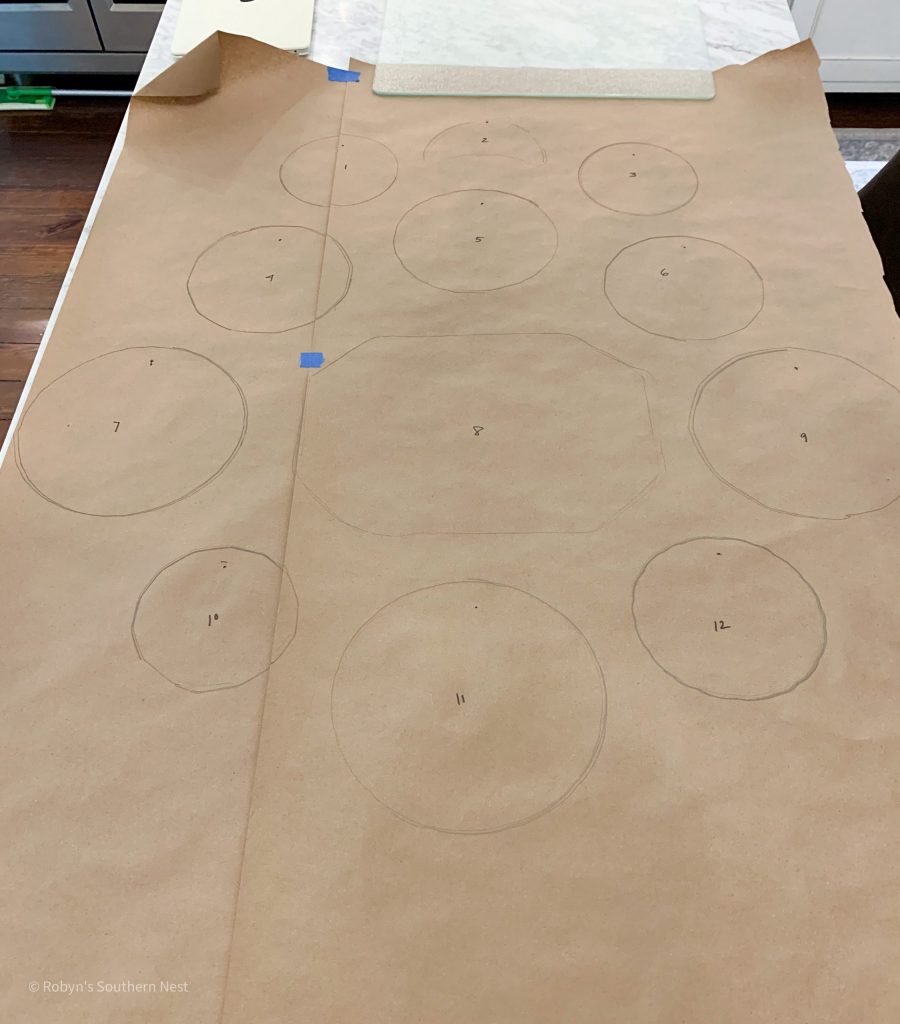
After I traced each plate on the paper I also numbered them so I remembered which plate I wanted where. I then put a corresponding sticky note on the plate to make it easier once I was ready to hang them up.
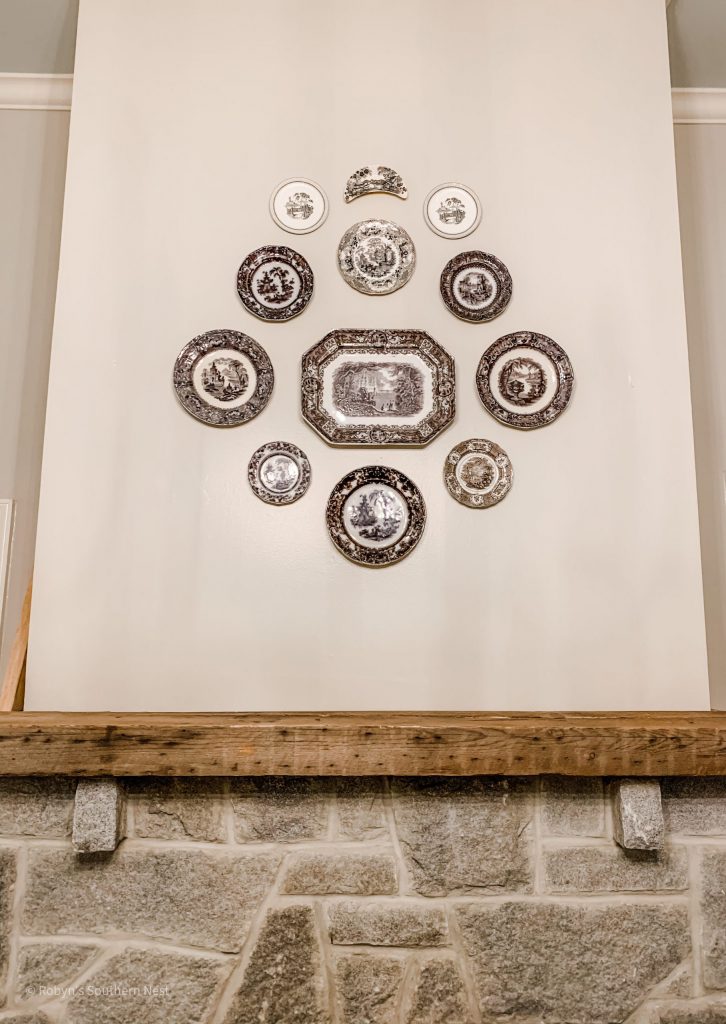
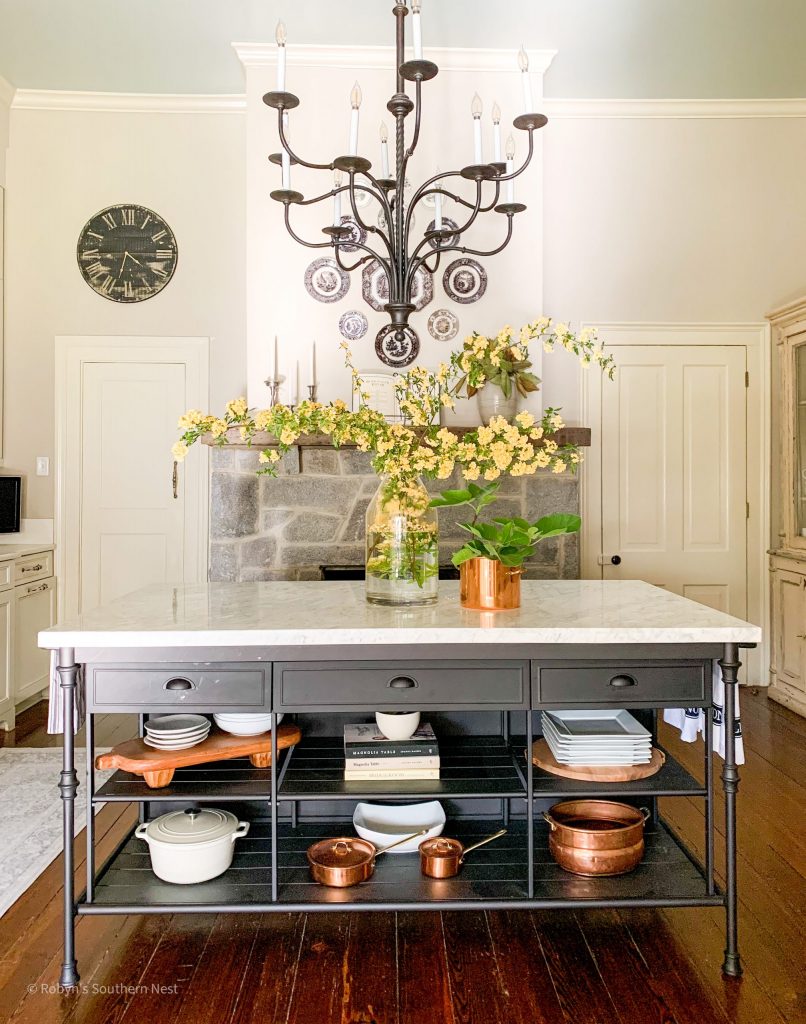
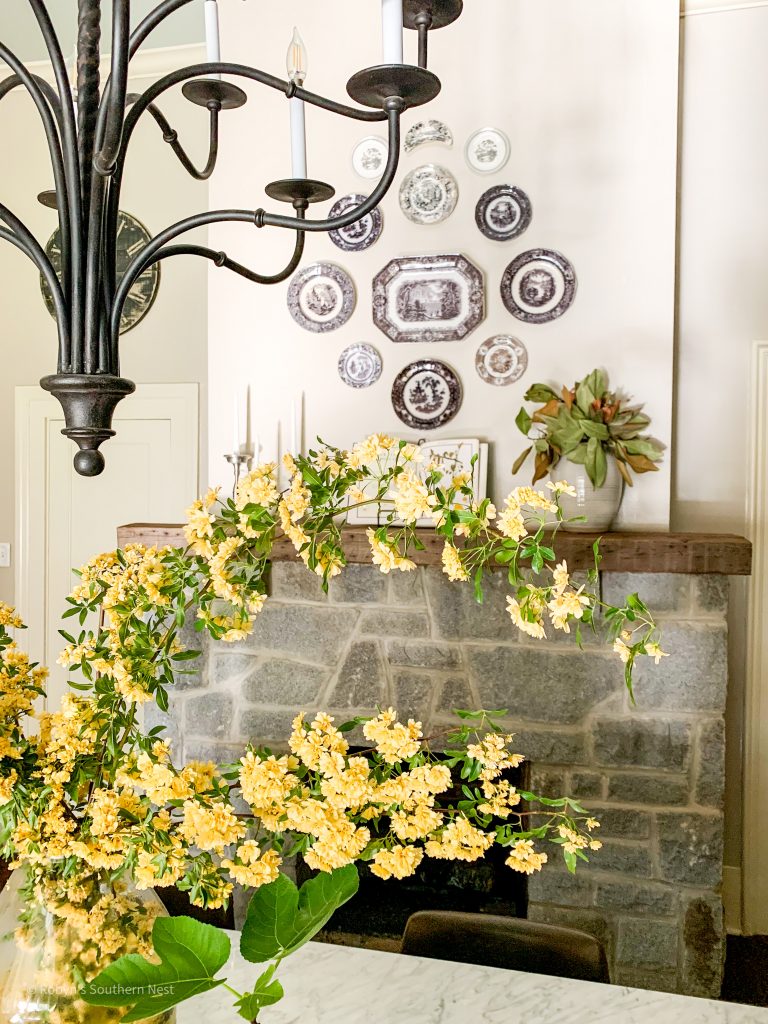
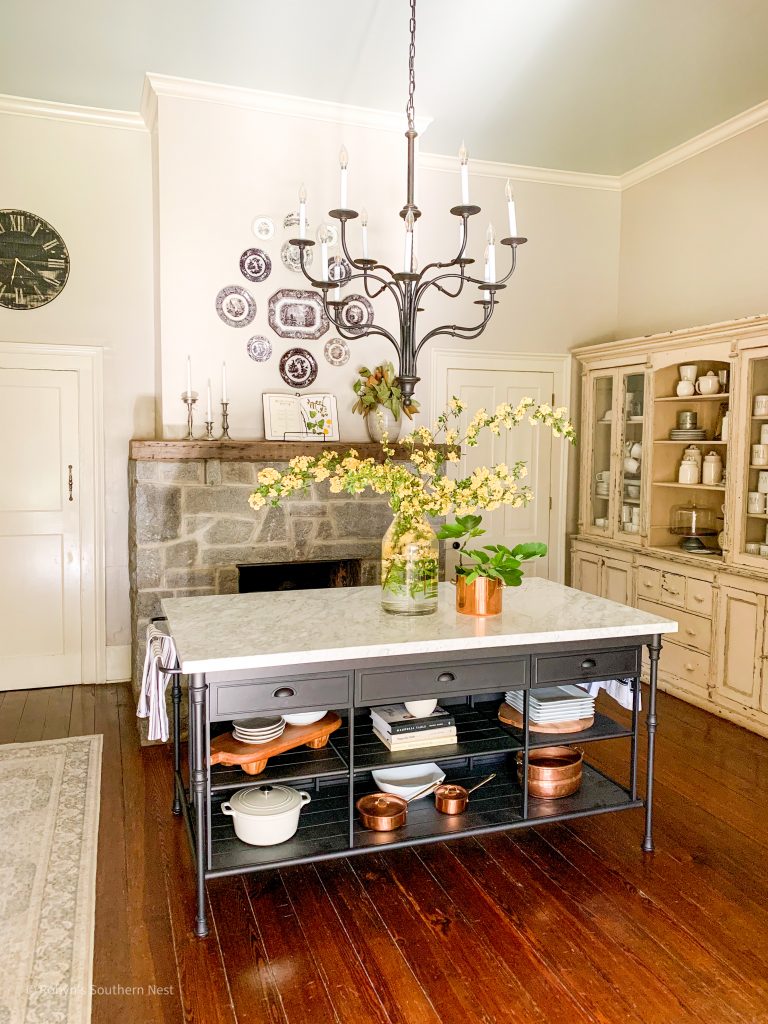
I wanted to leave enough room on either side and underneath the layout so that I had the option to add decor if I wanted to. Now let’s get to decorating shall we? I thought our Lady Banks’s Roses needed a little moment to shine. Trying to channel my inner Steve Cordony for this arrangement.
If you have any questions about this Transferware Plate Wall please feel free to leave them down in the comments.
Video Tutorial
Thanks for flying by!
xoxo,
Robyn
Pin For Later


You May Also Like

It’s Beginning to Look a Lot Like Christmas
How to Incorporate Vintage Pieces into your Home