Crafting Corner
Hey y’all and happy Friday! Yesterday I decided to tackle my cabinet above my desk in my home office since it was a hot mess in there! I’ve been wanting to create a little crafting corner above my desk for quite some time. I remember visiting my Grandma’s house and I would always sneak into her craft room. It was so amazing! She had drawers dedicated to Mr. Sketch scented markers, drawers for all her fabrics, and all different kinds of paper. Everything had its place and I loved it! It was like a dream. I must get my organizing abilities from her for sure! In this mess of a process I found all sorts of things I literally forgot about, as you will see below.
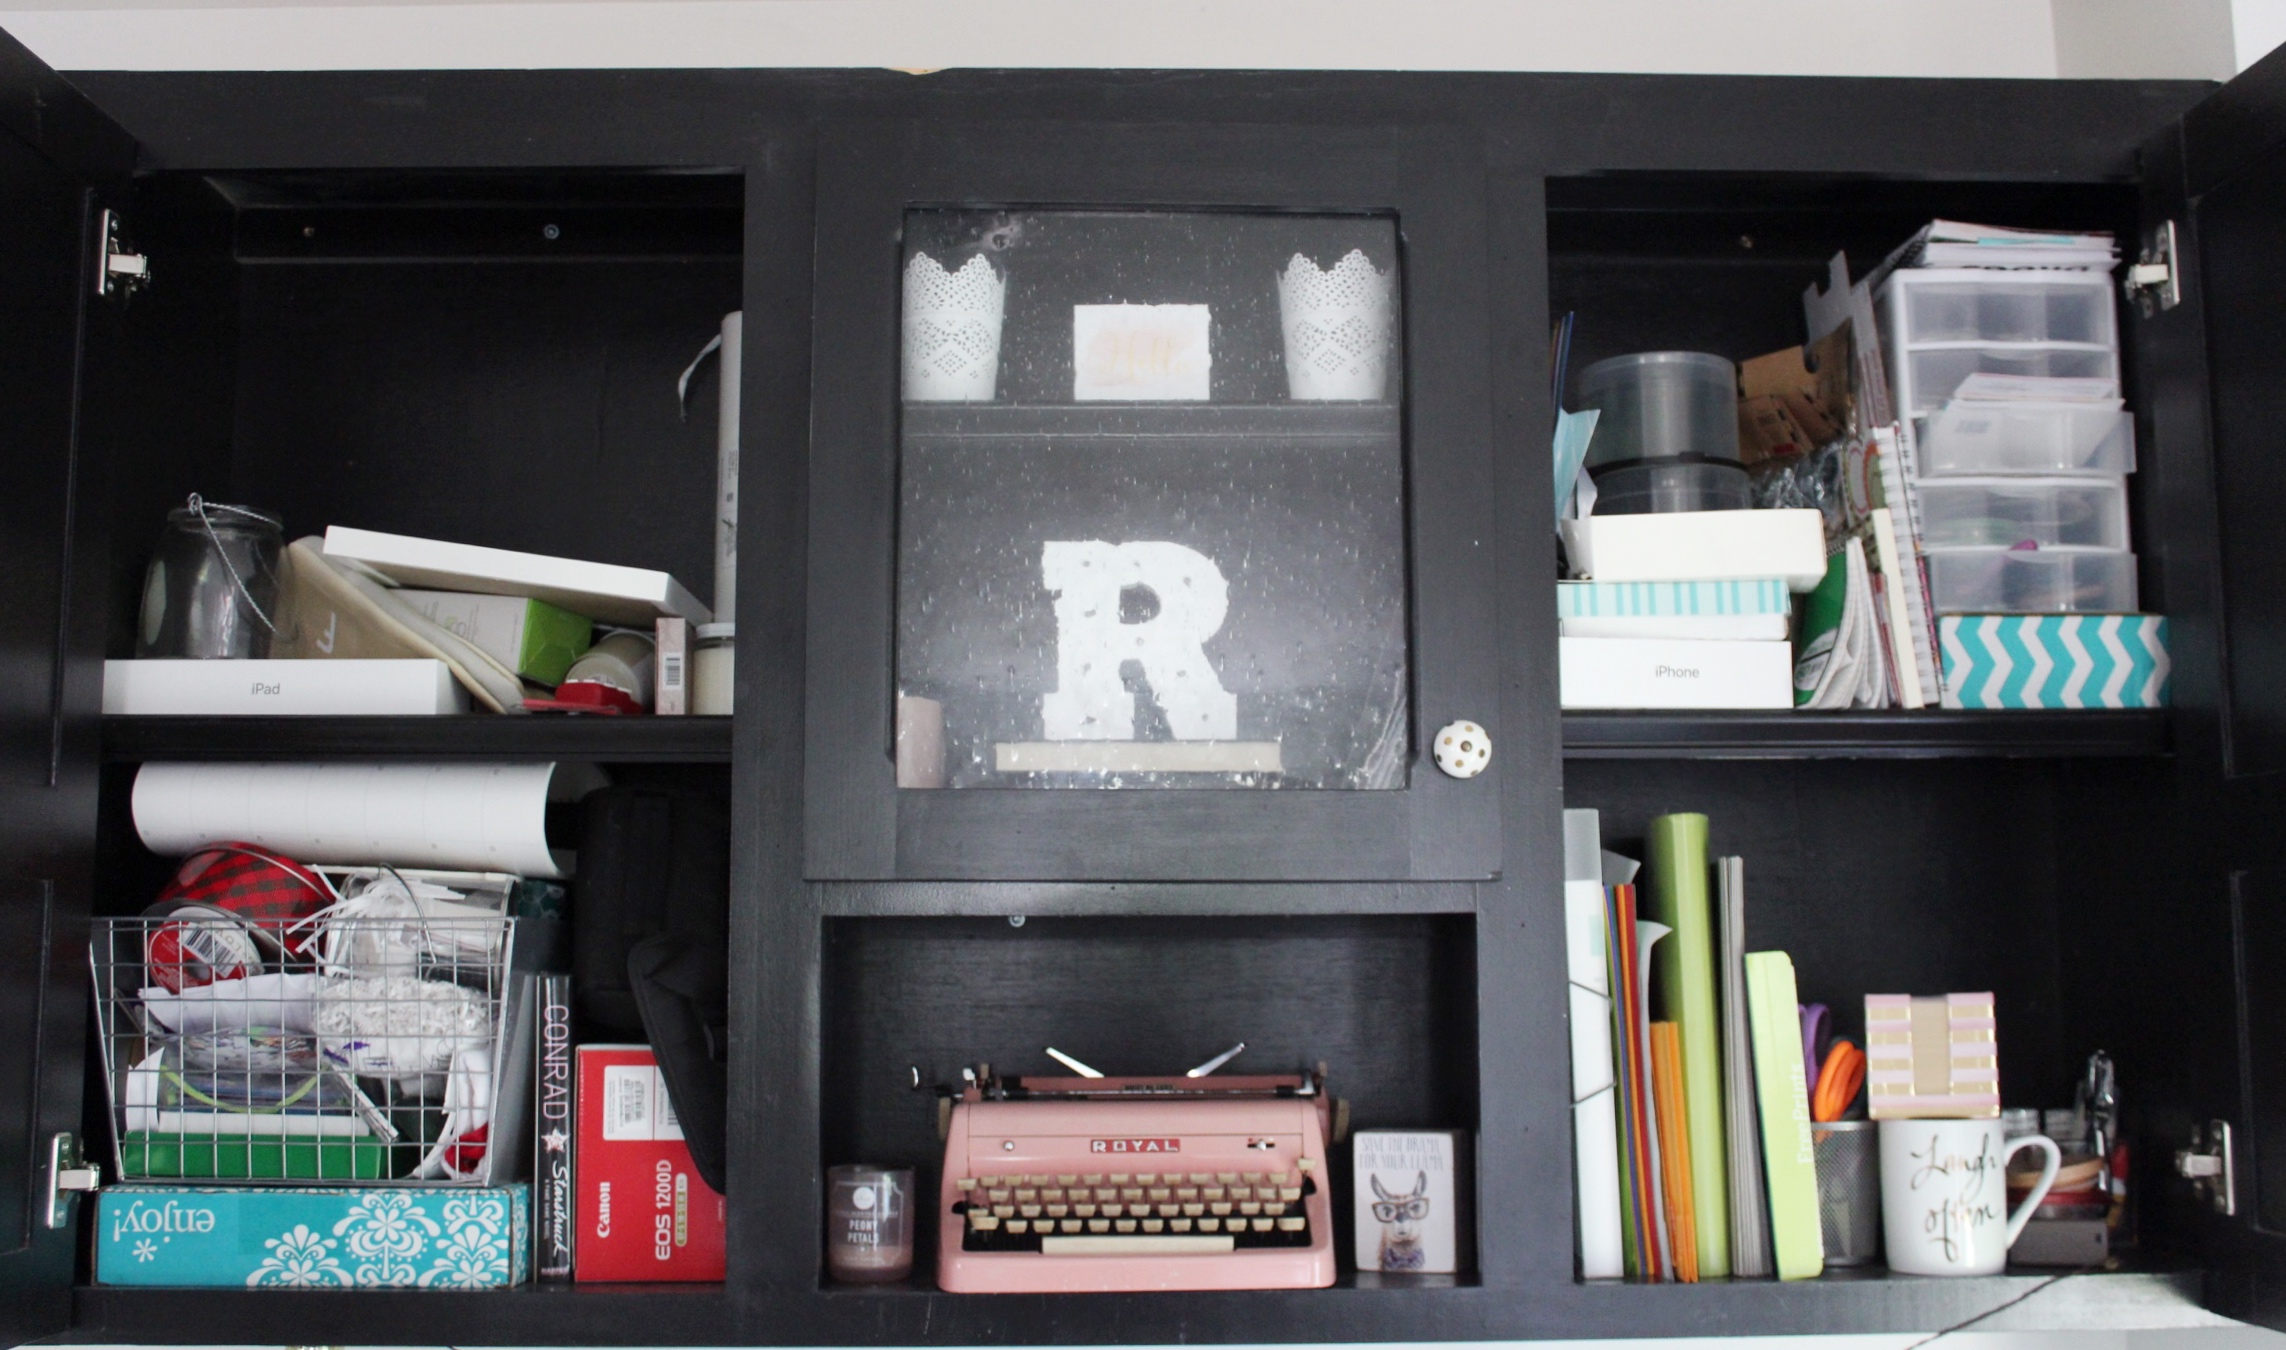
Here’s a little before of what this beast looked like before. I call it organized chaos….not!
I always have to make a mess before I completely organize a space! You have to get down and dirty!
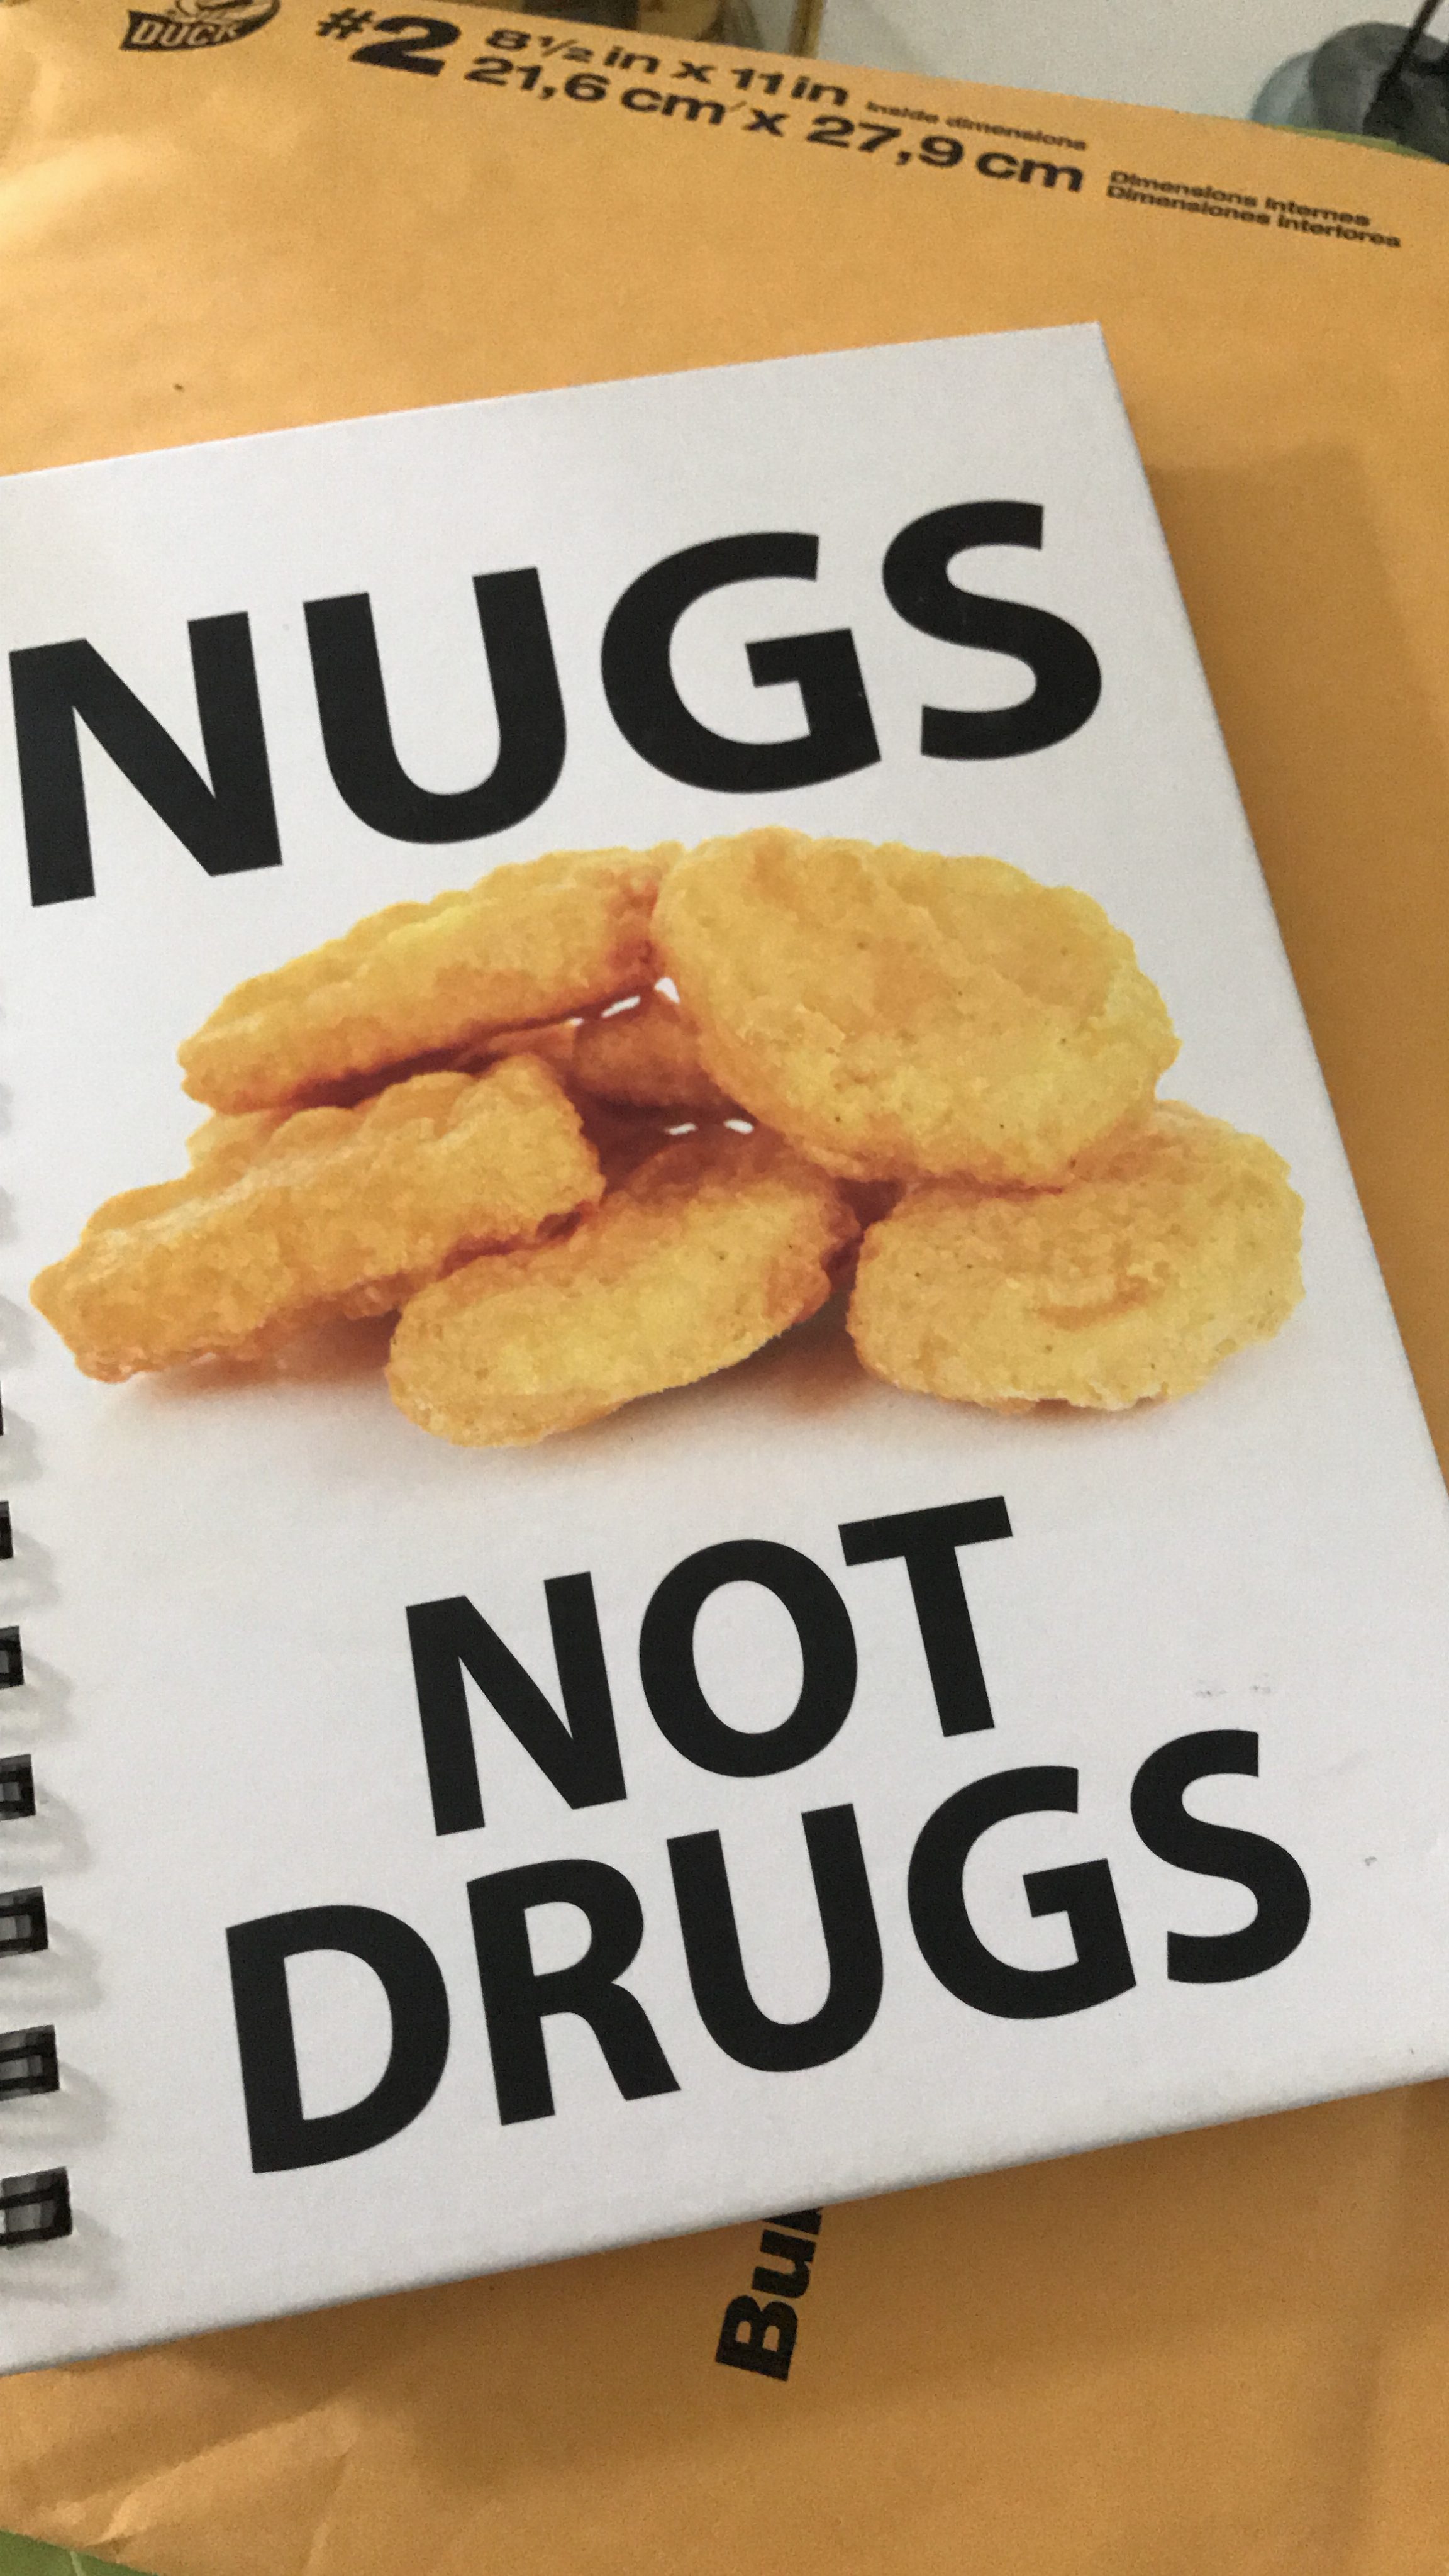
I found this funny “Nugs Not Drugs” notebook as well as my high school diary! Oh to be a teenager again!
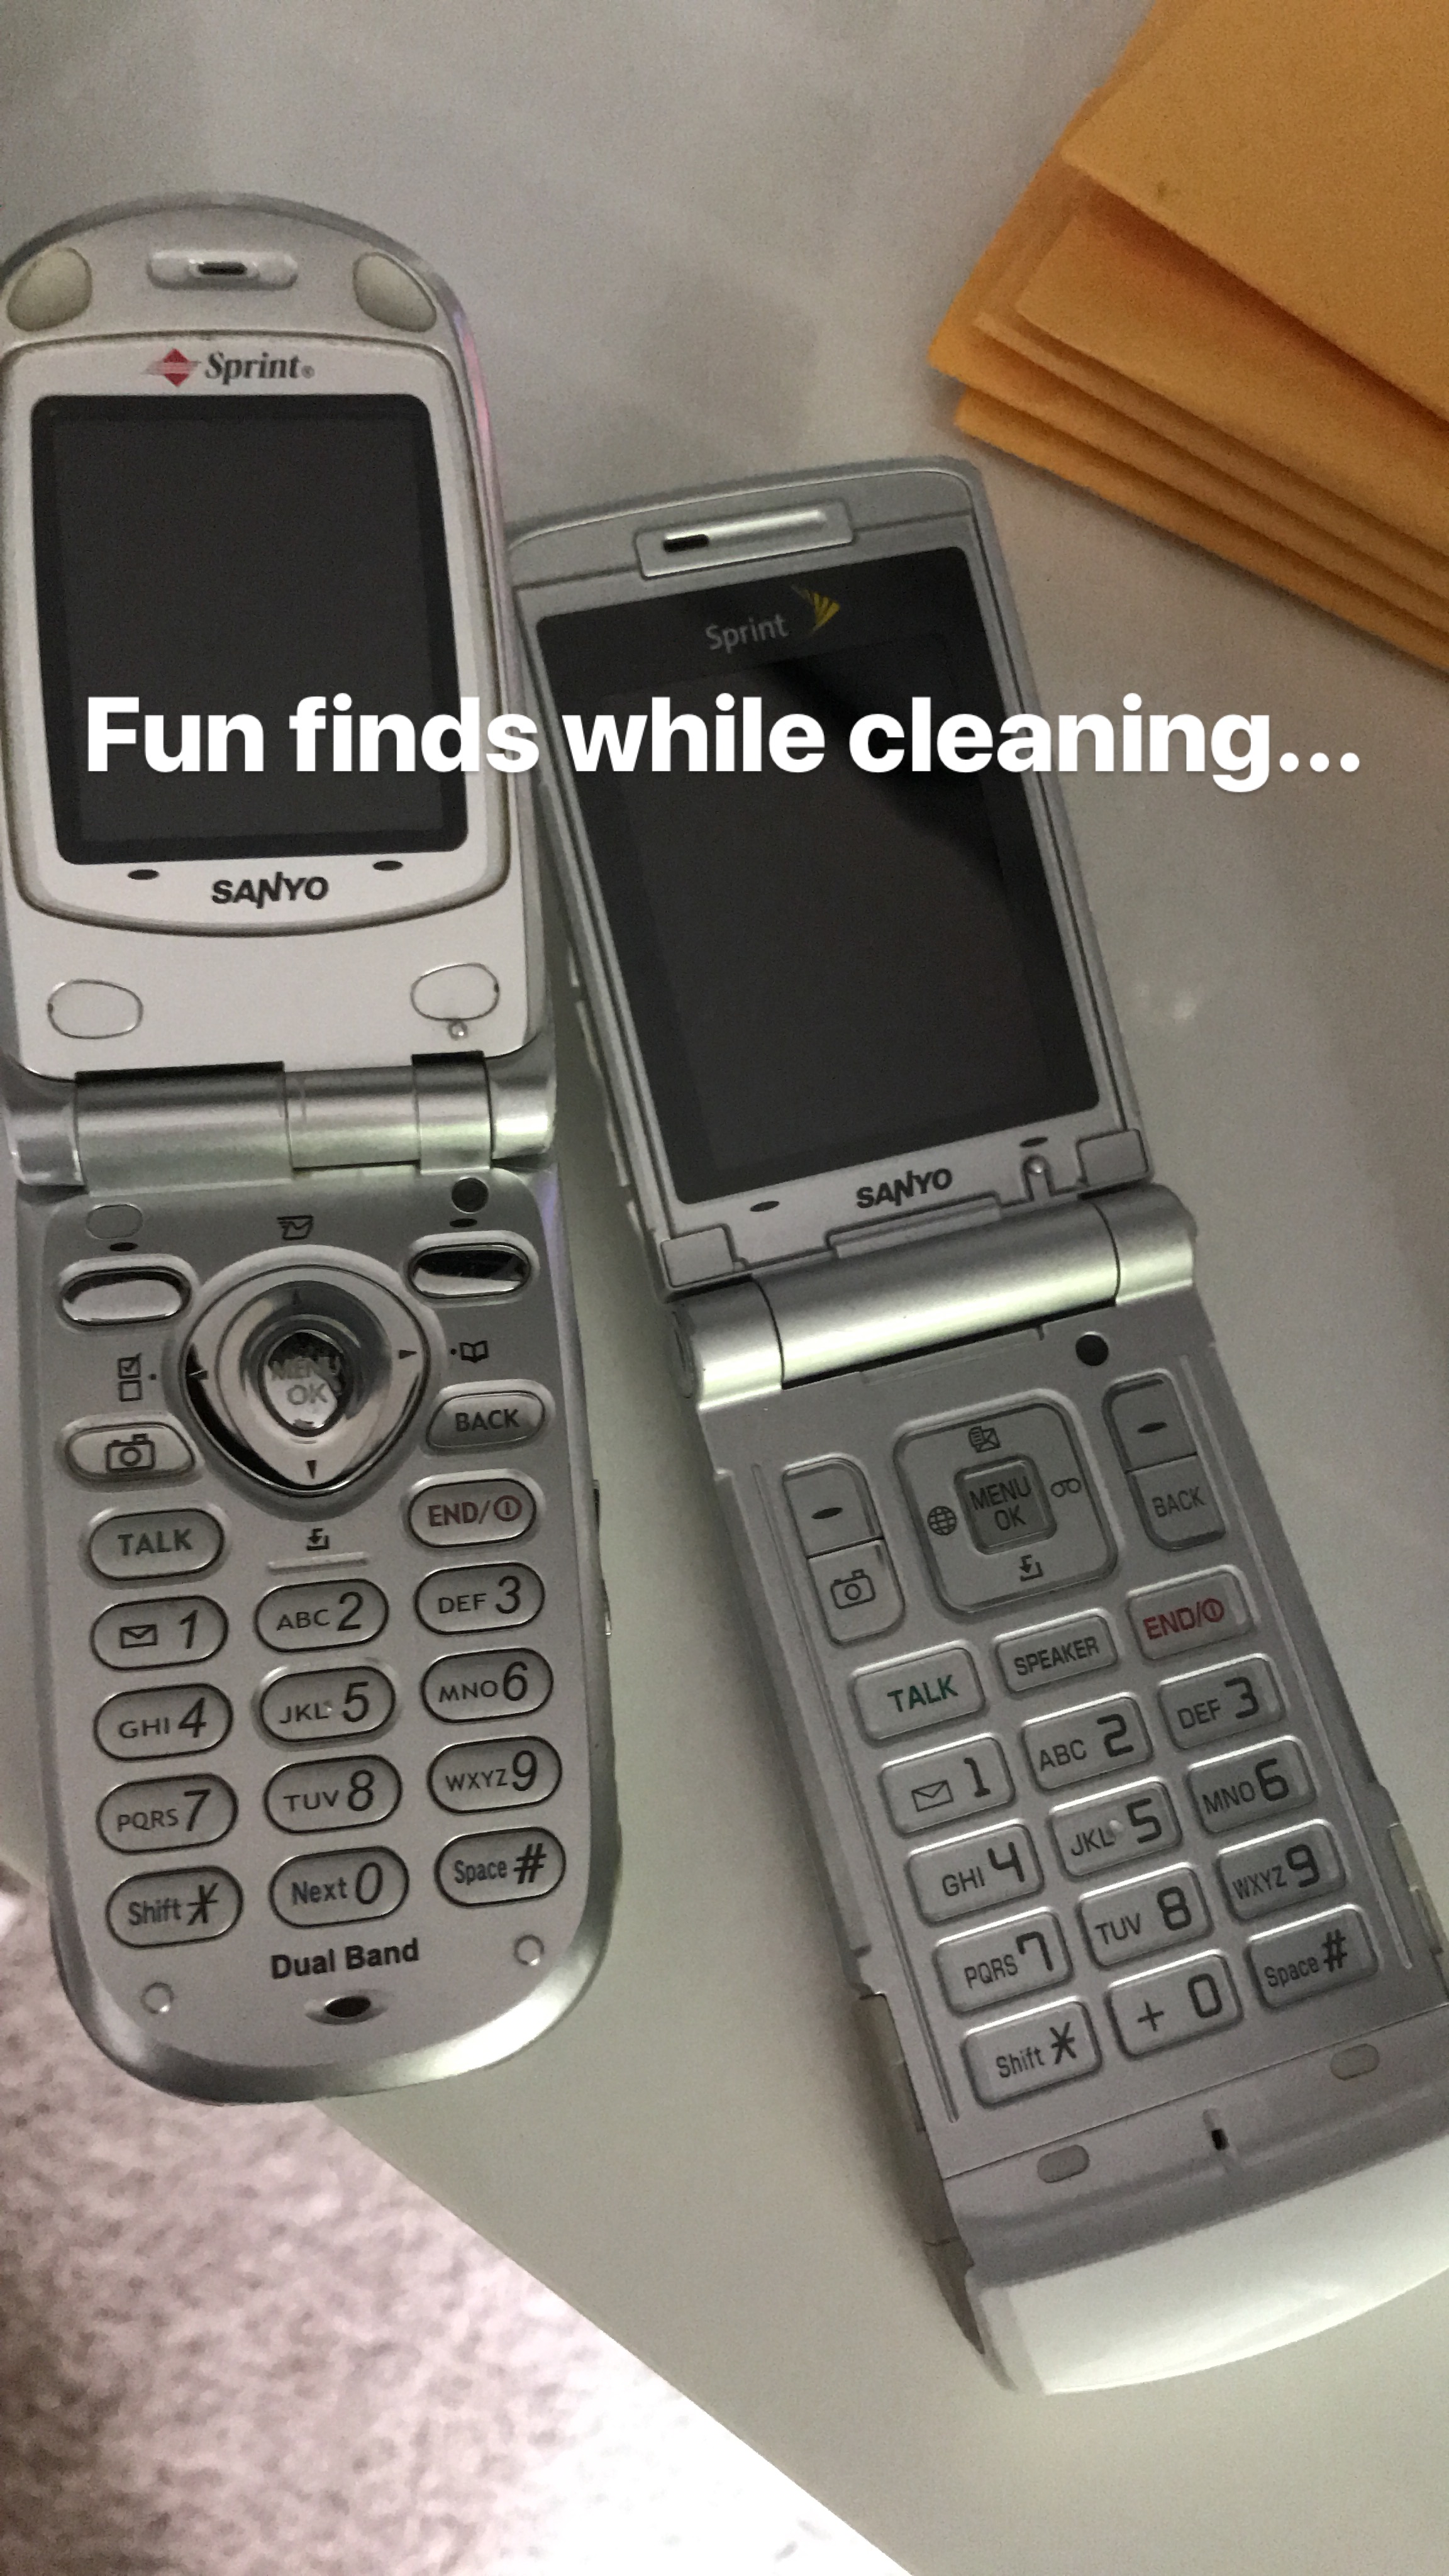
I found these old cell phones that for whatever reason I can’t part with. Call me crazy! Weren’t they just so tiny and cute?!
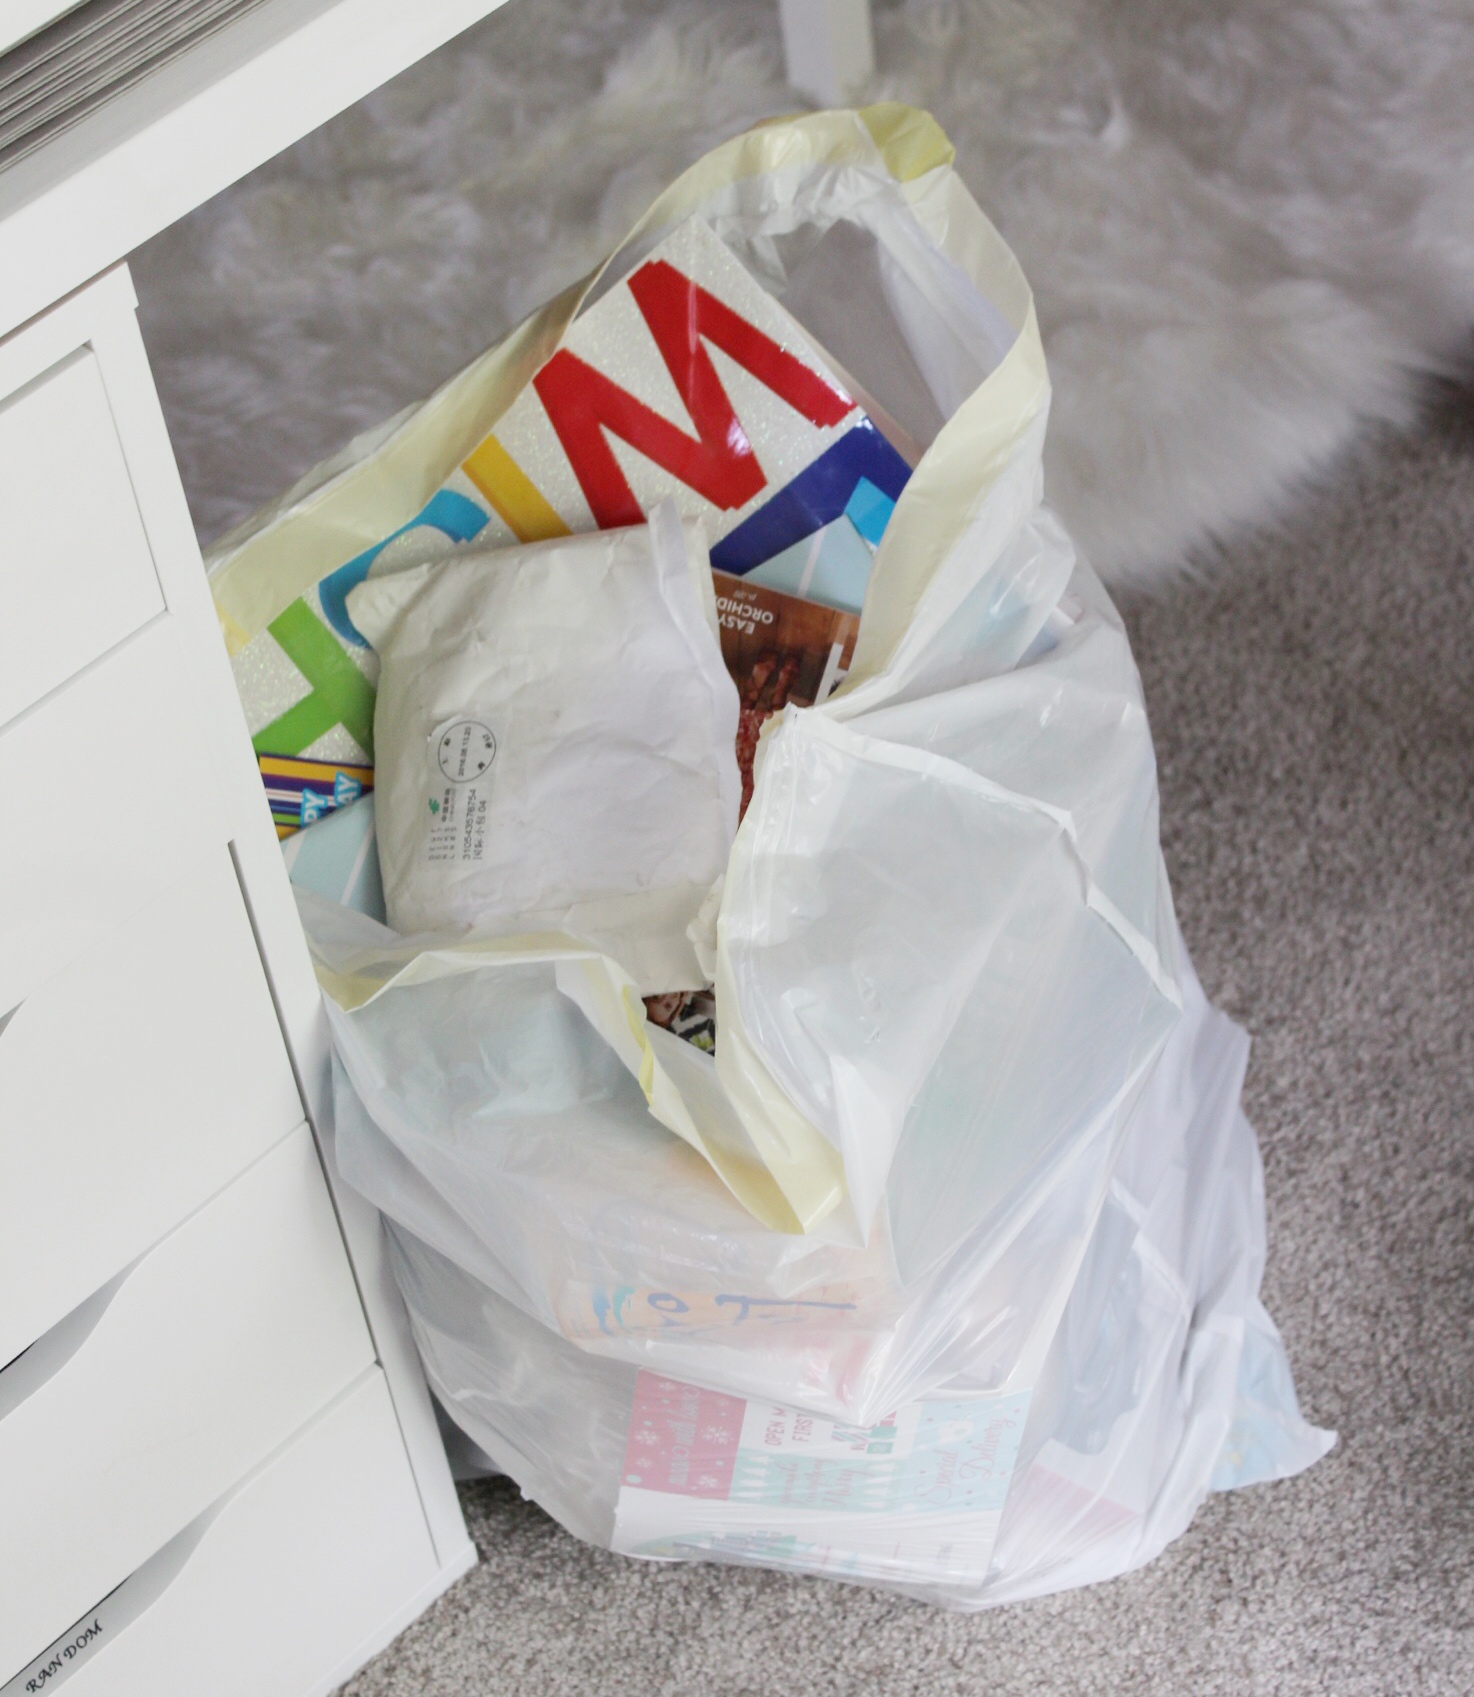
After sorting through everything I managed to fill up a whole trash bag!
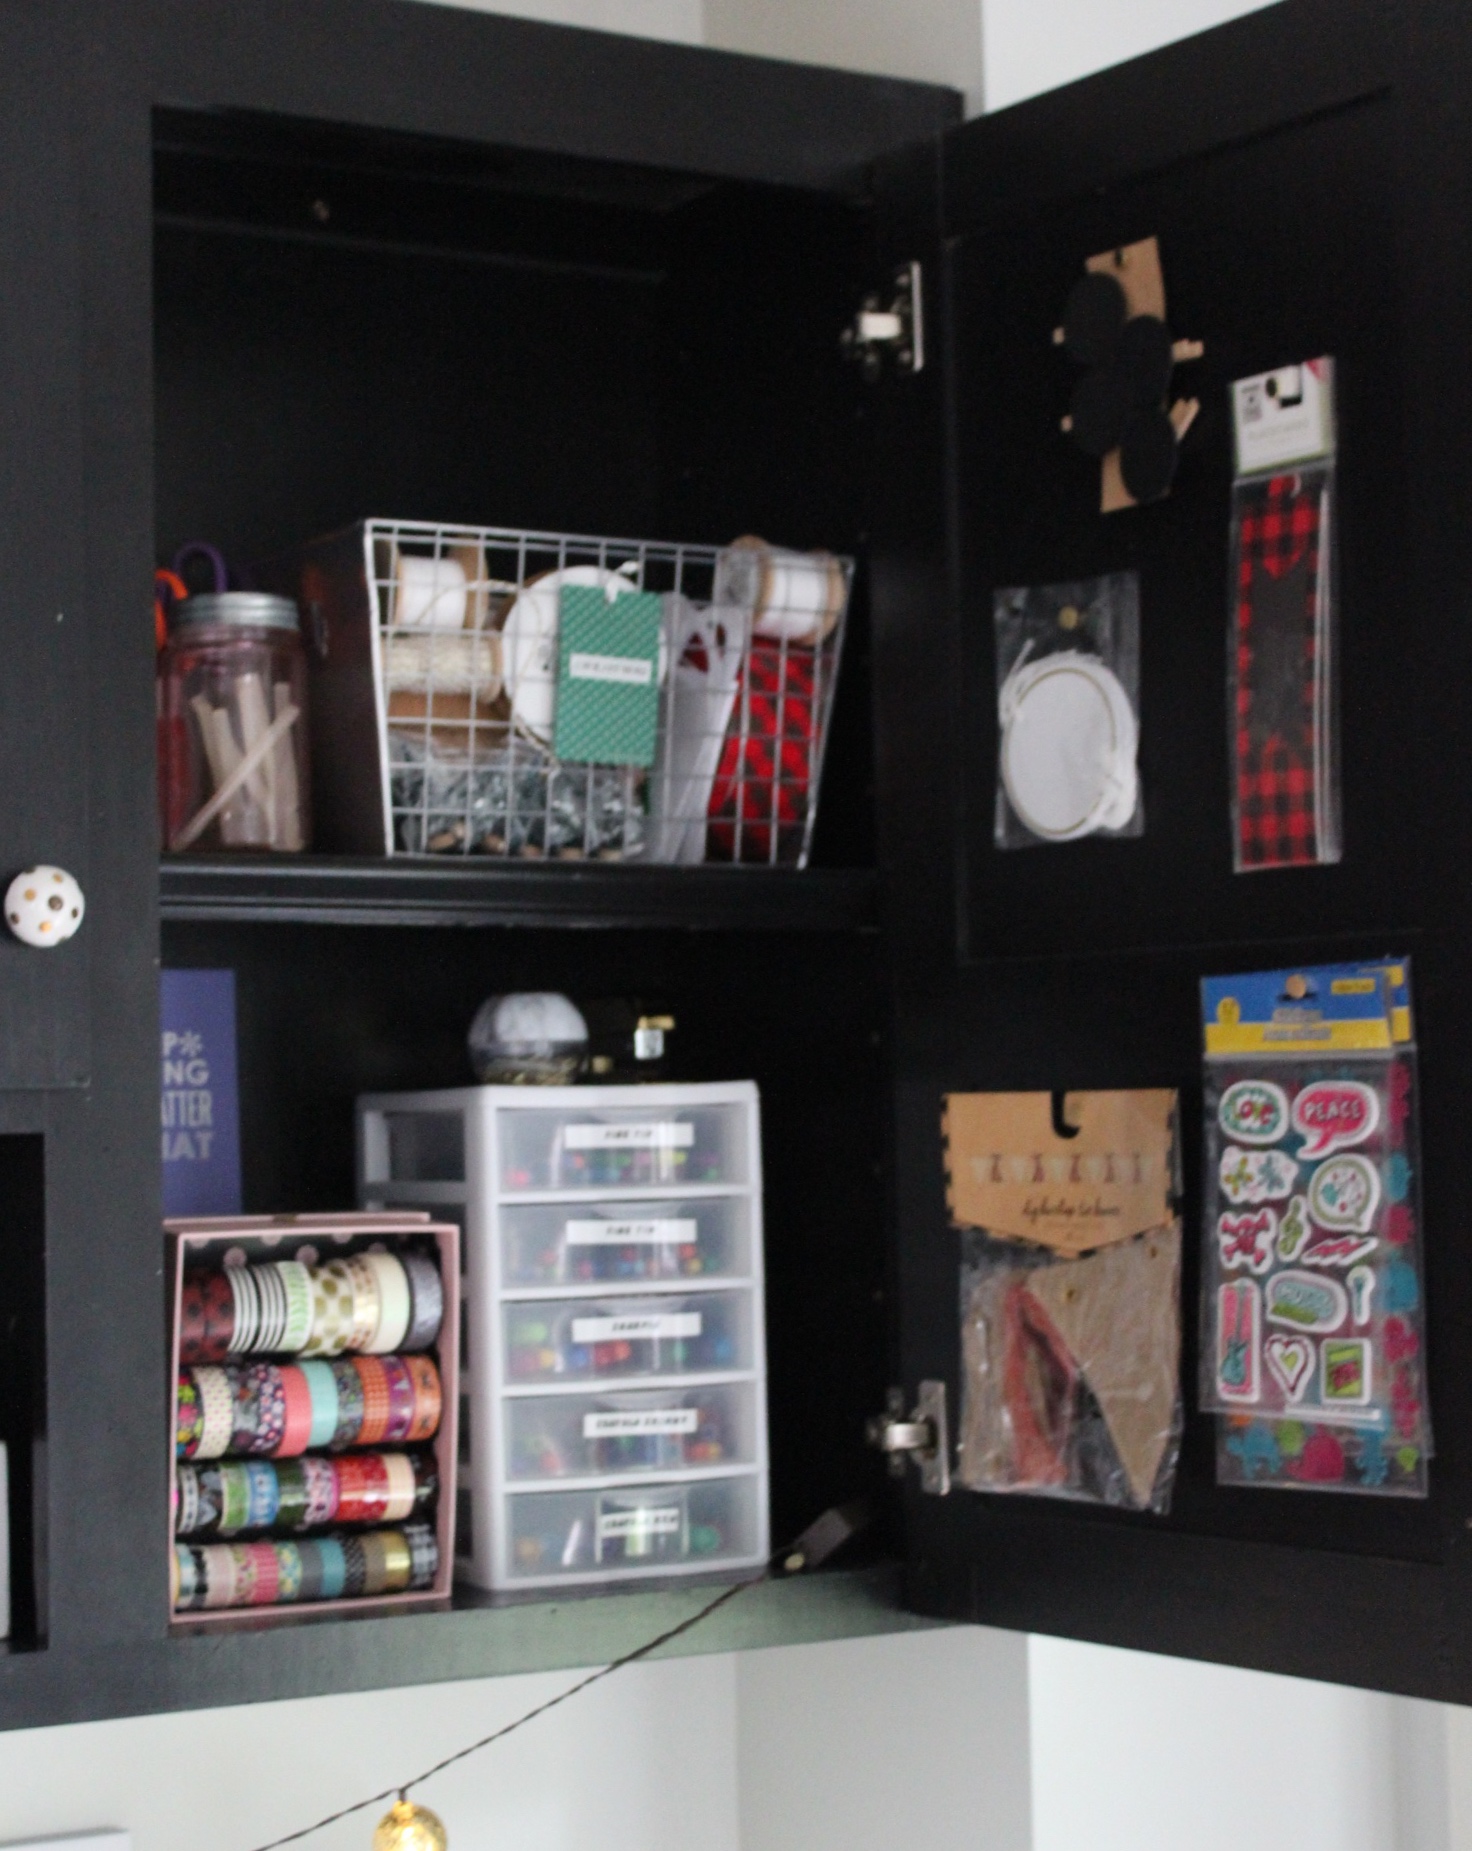
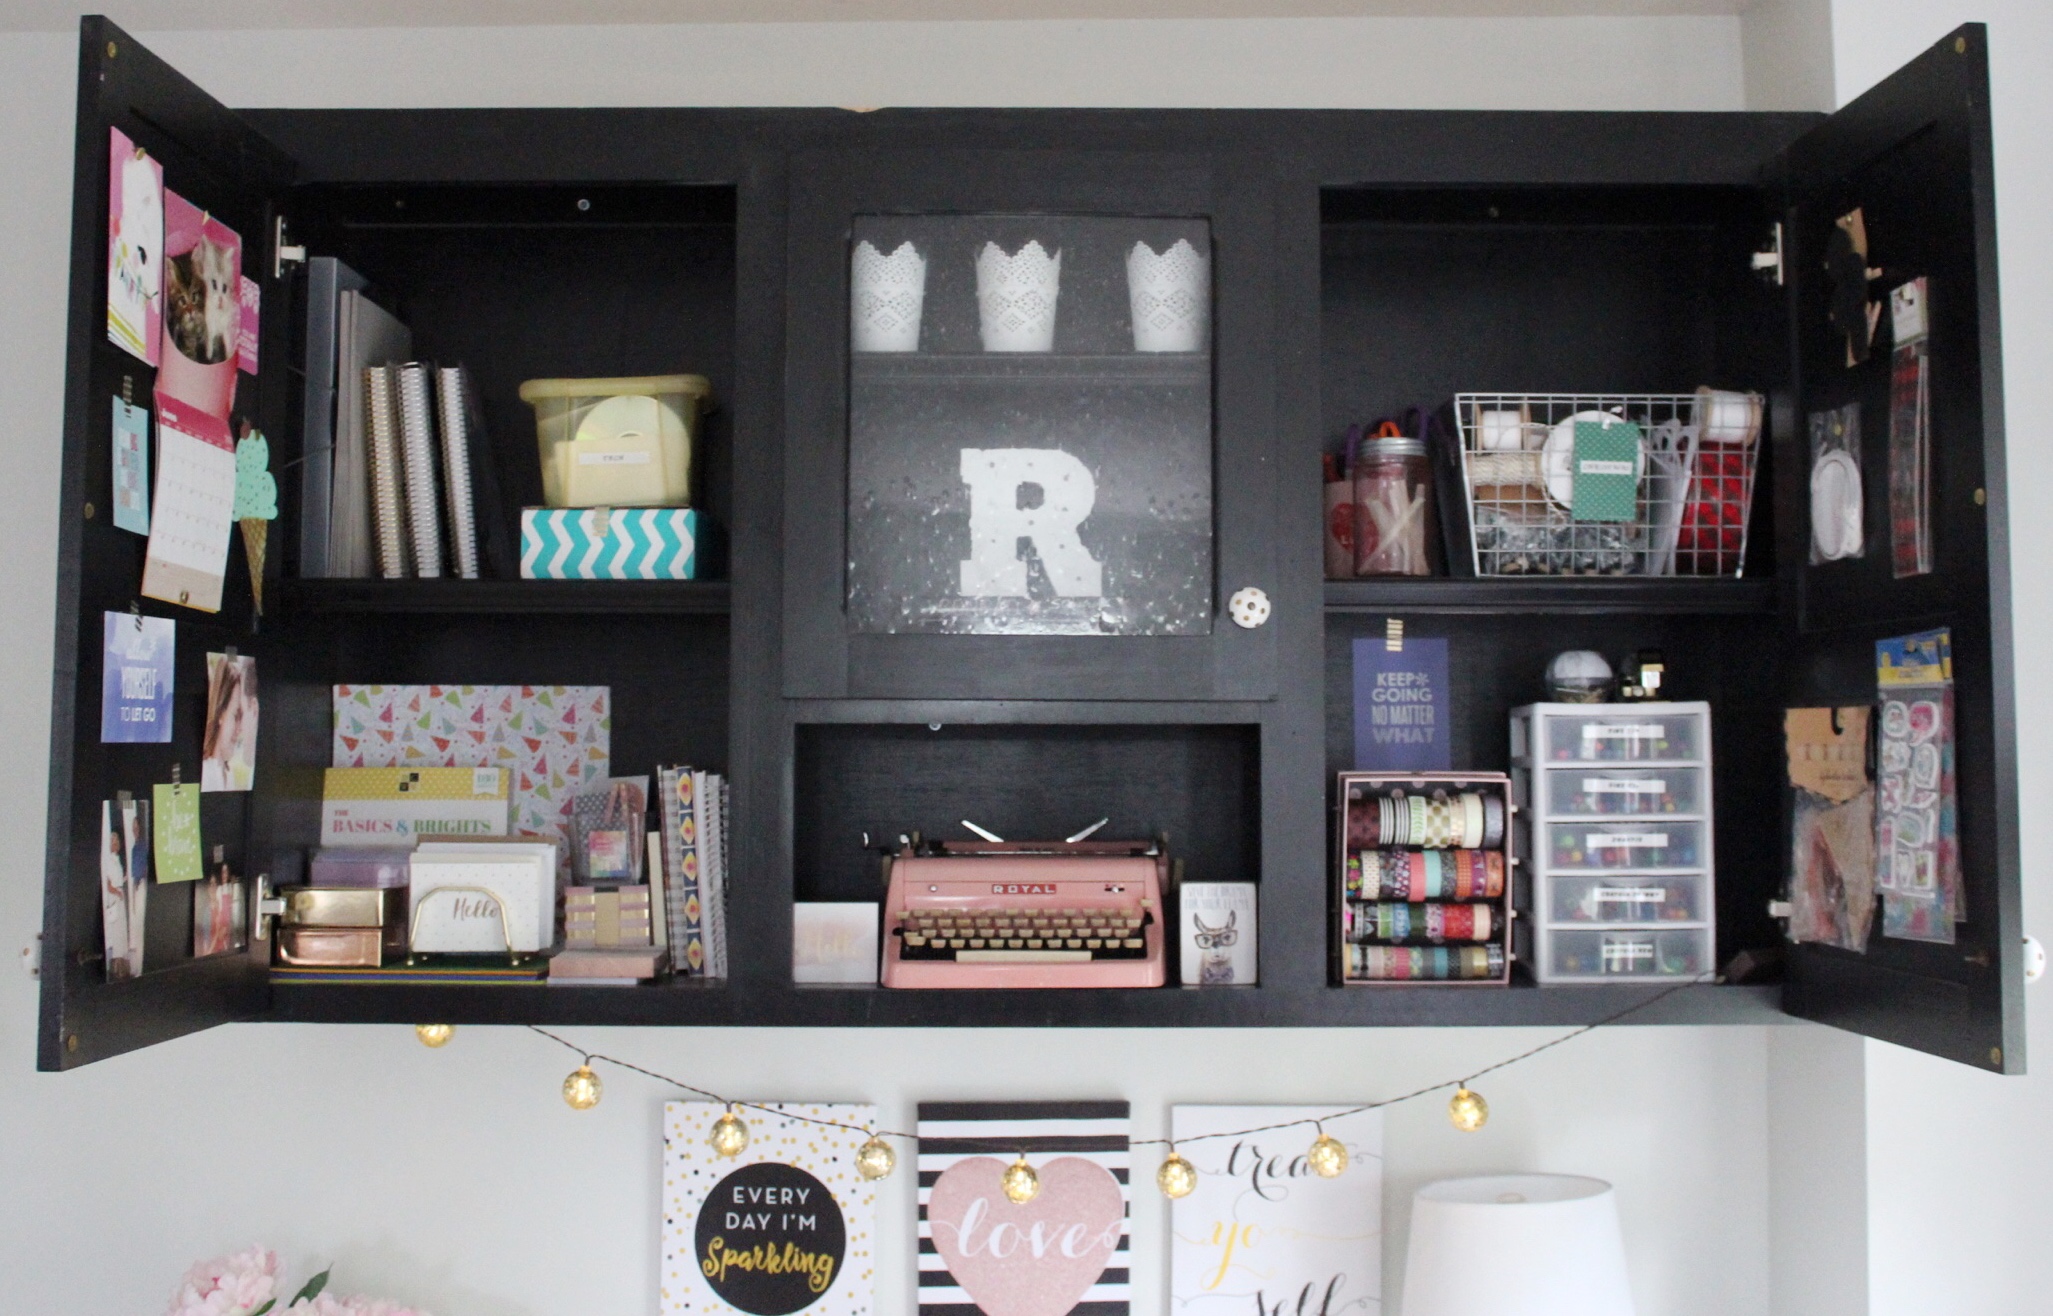
The cabinet has 4 shelves so I knew I wanted to section it off by category. So the top left is some of my tech stuff, my old planners that I can’t part with since I consider them like a scrapbook, and then some of my jewelry making supplies.
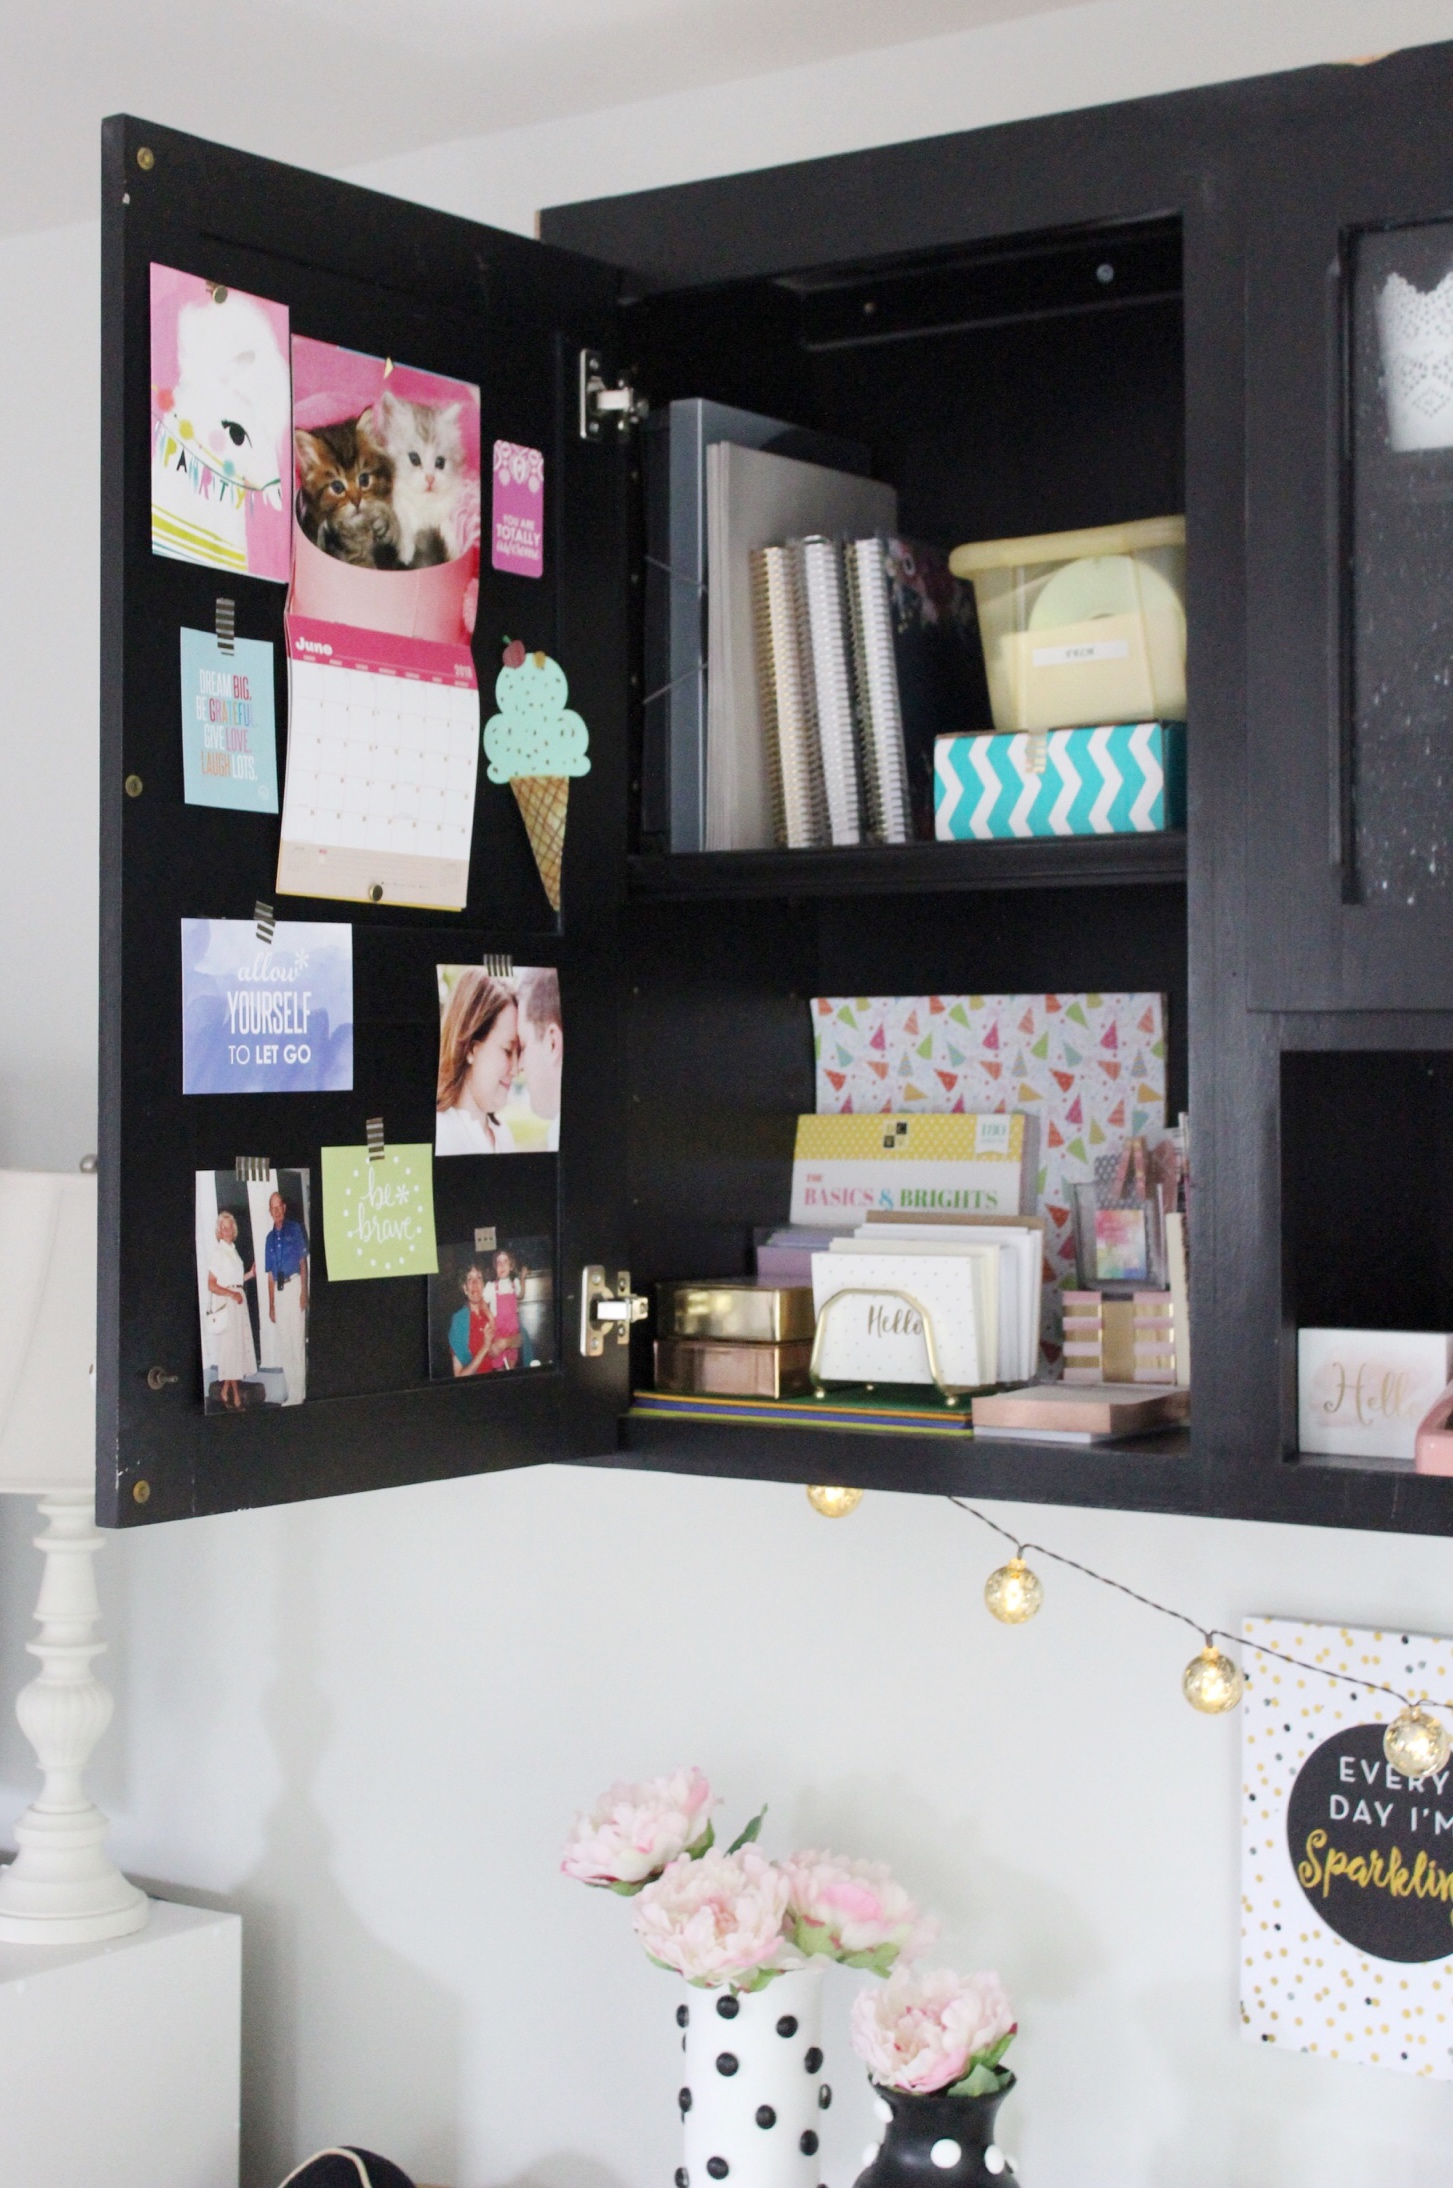
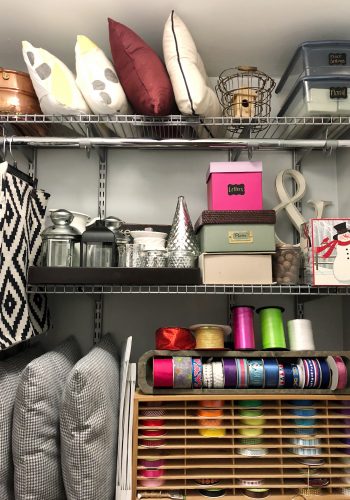
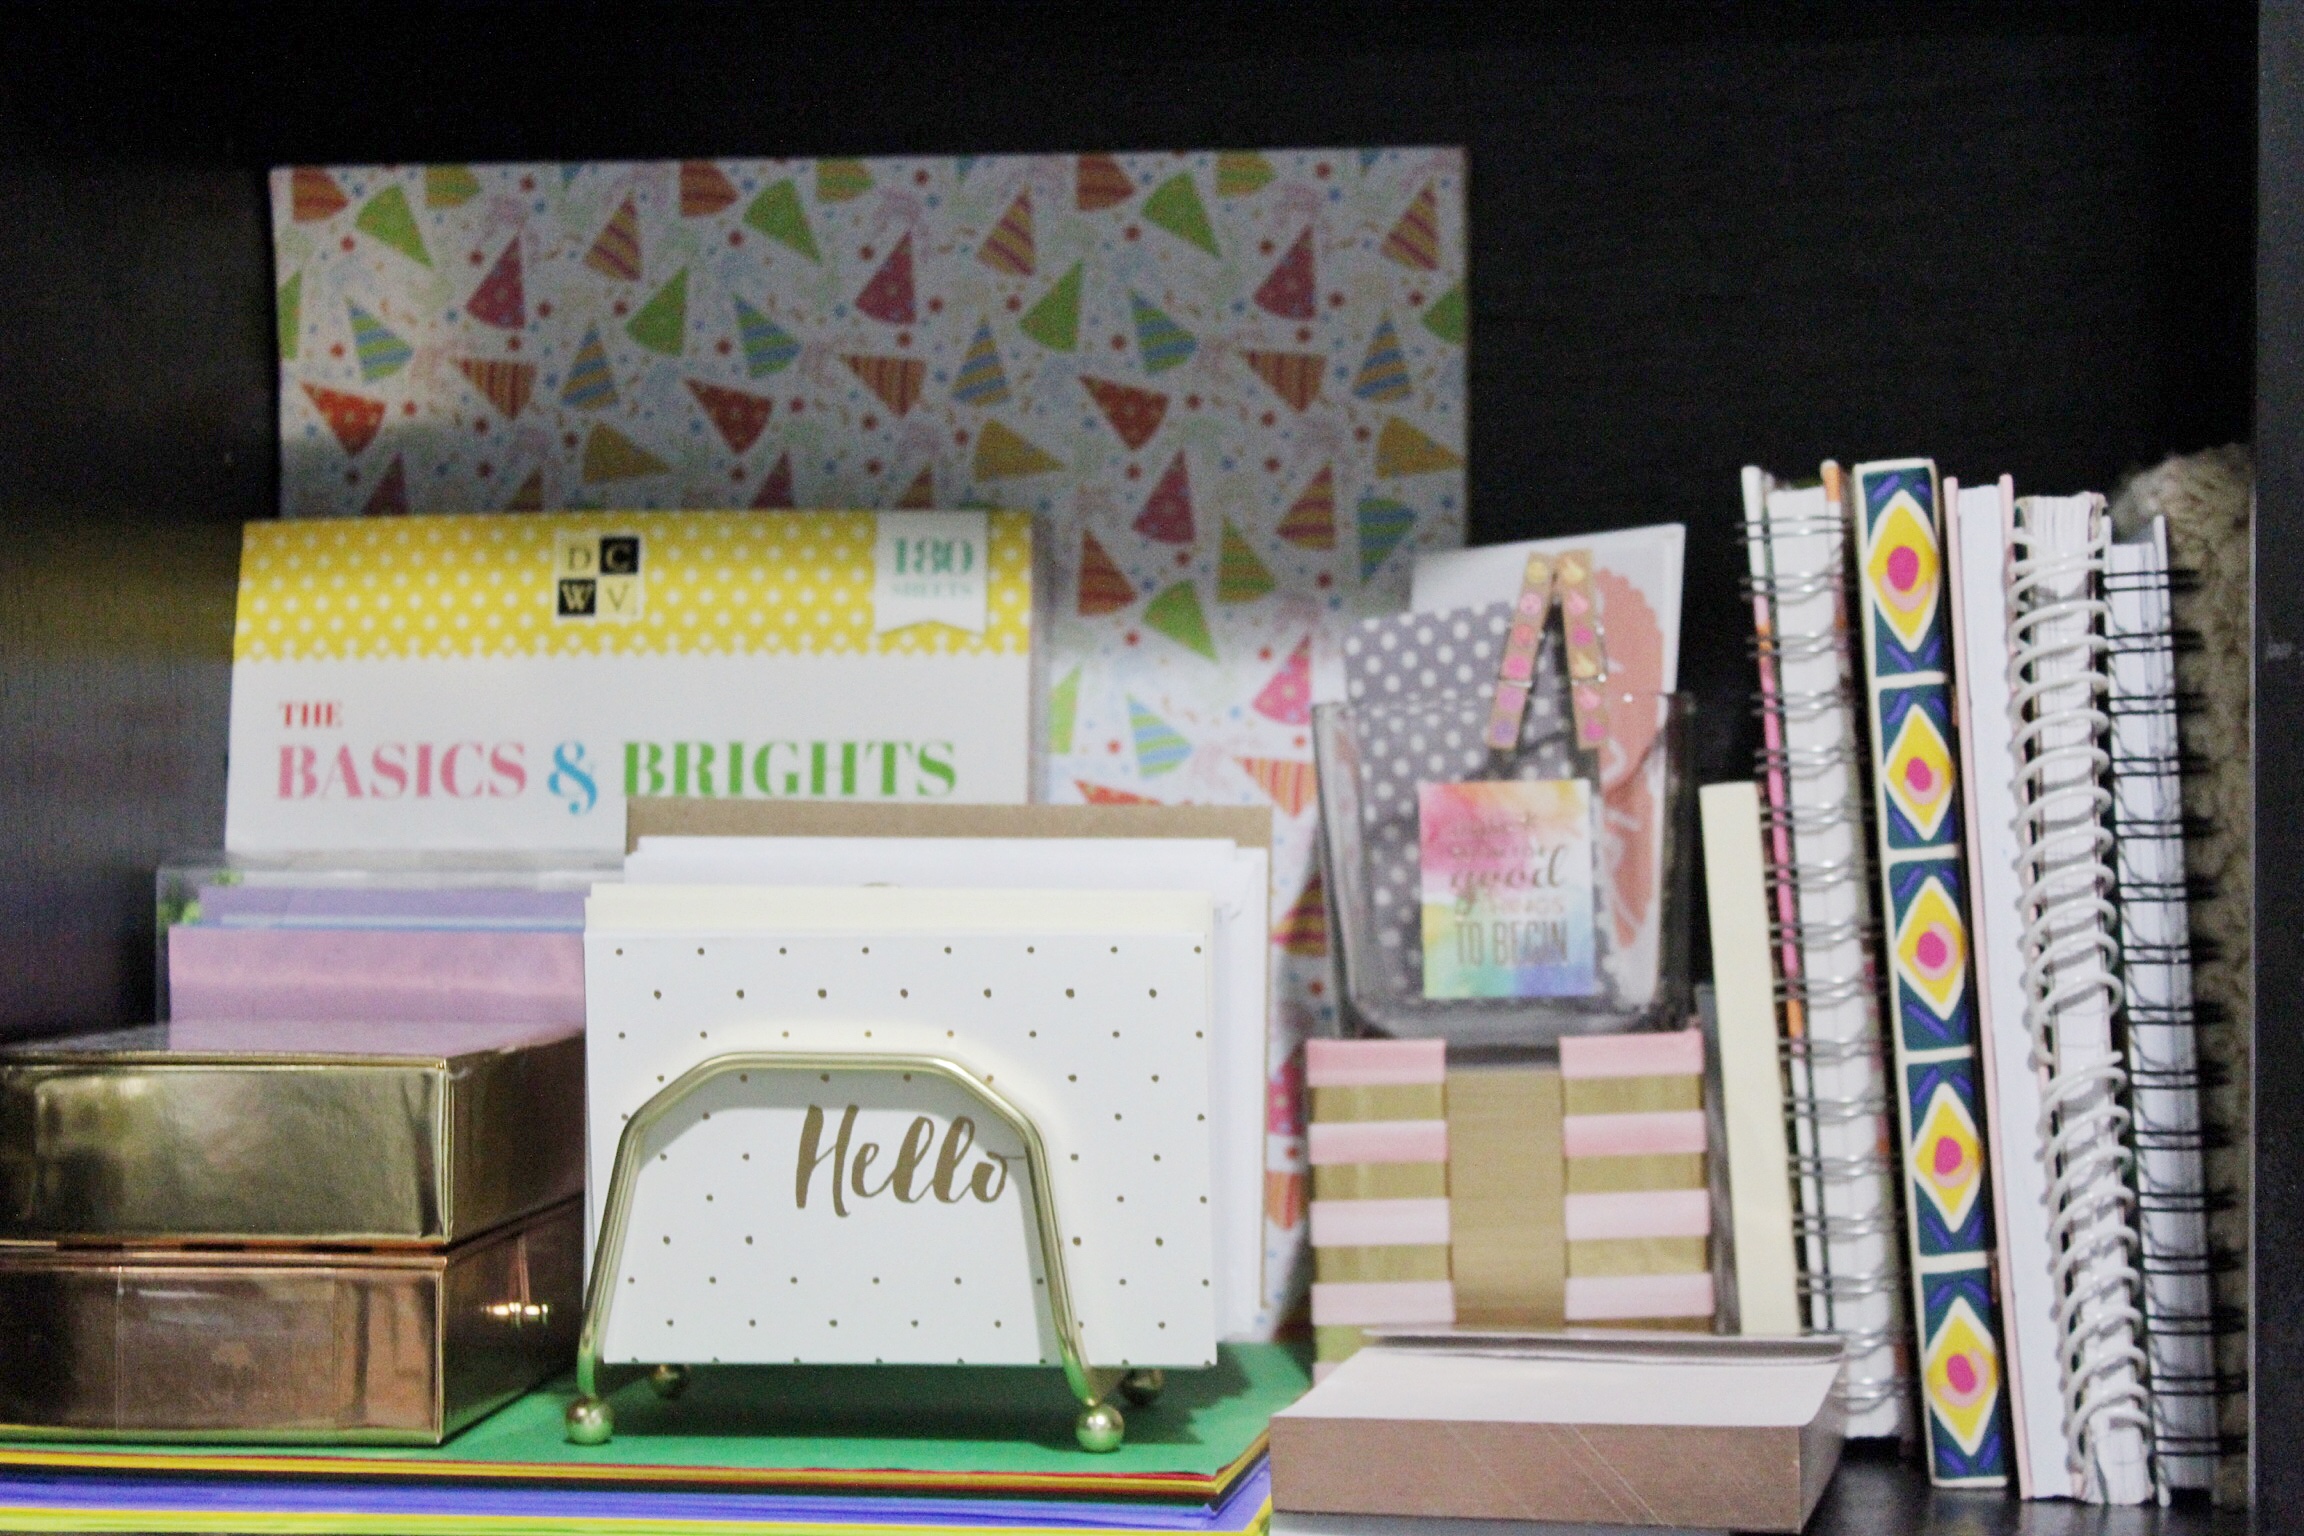
The bottom left is anything paper related like stationary, scrapbook paper, and notebooks galore!
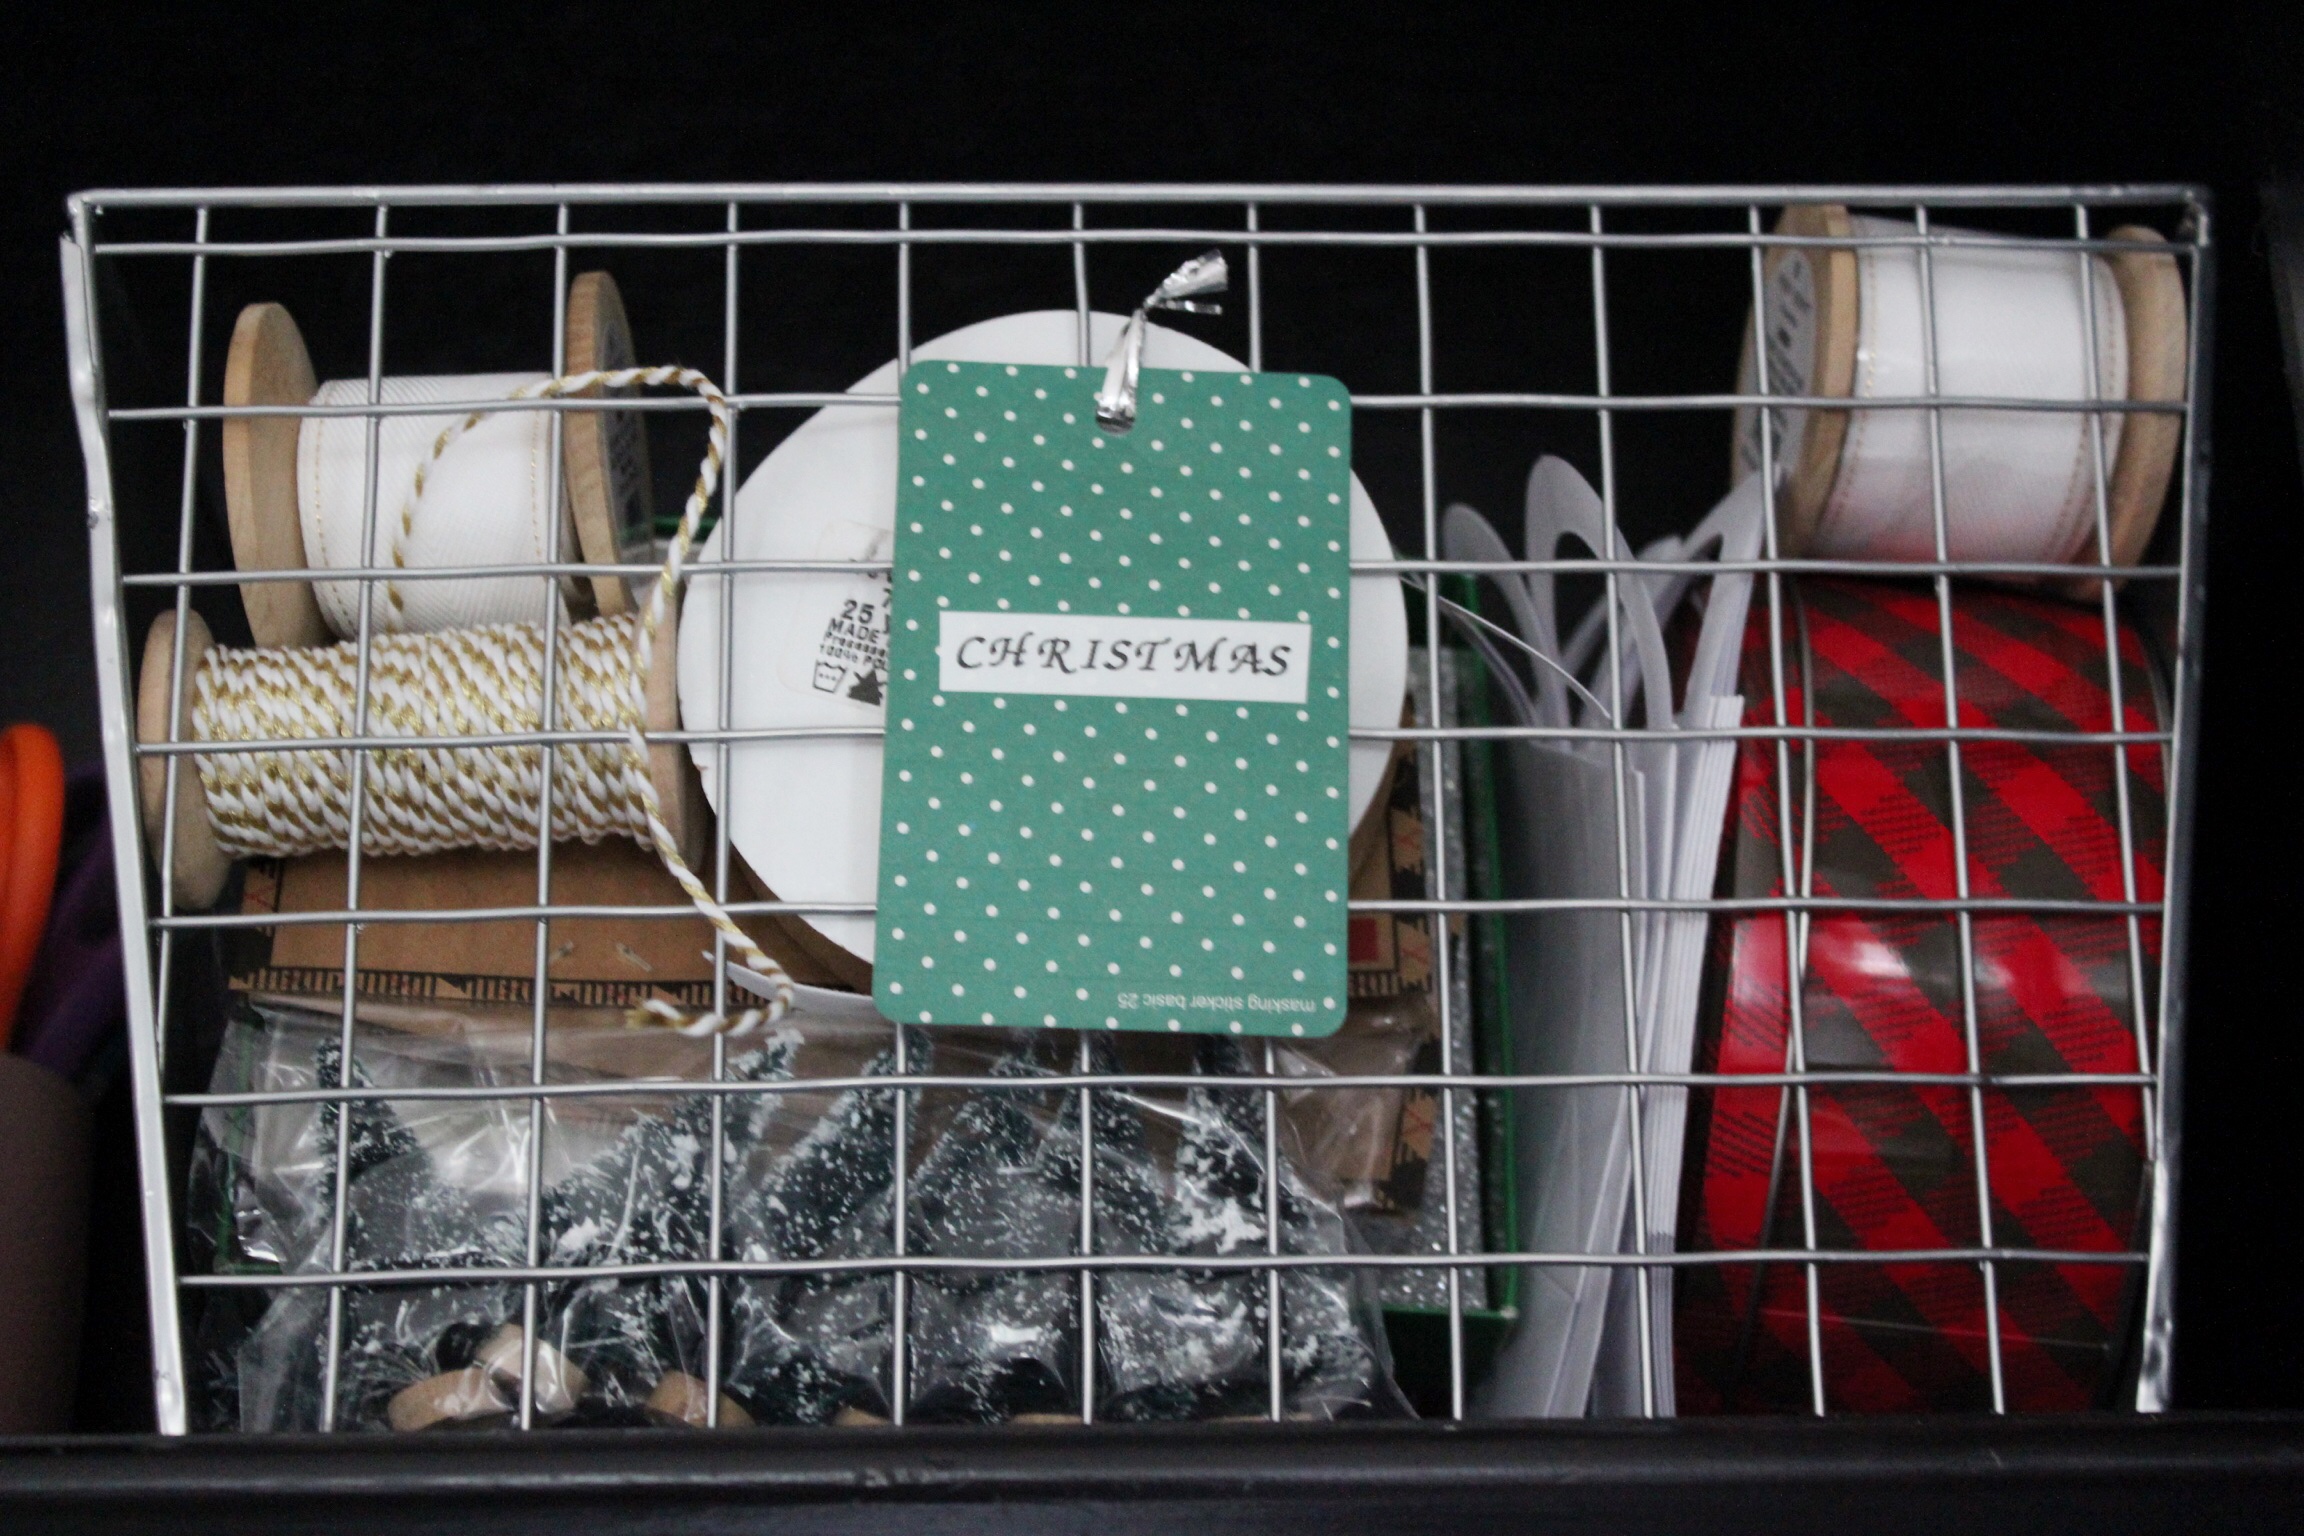
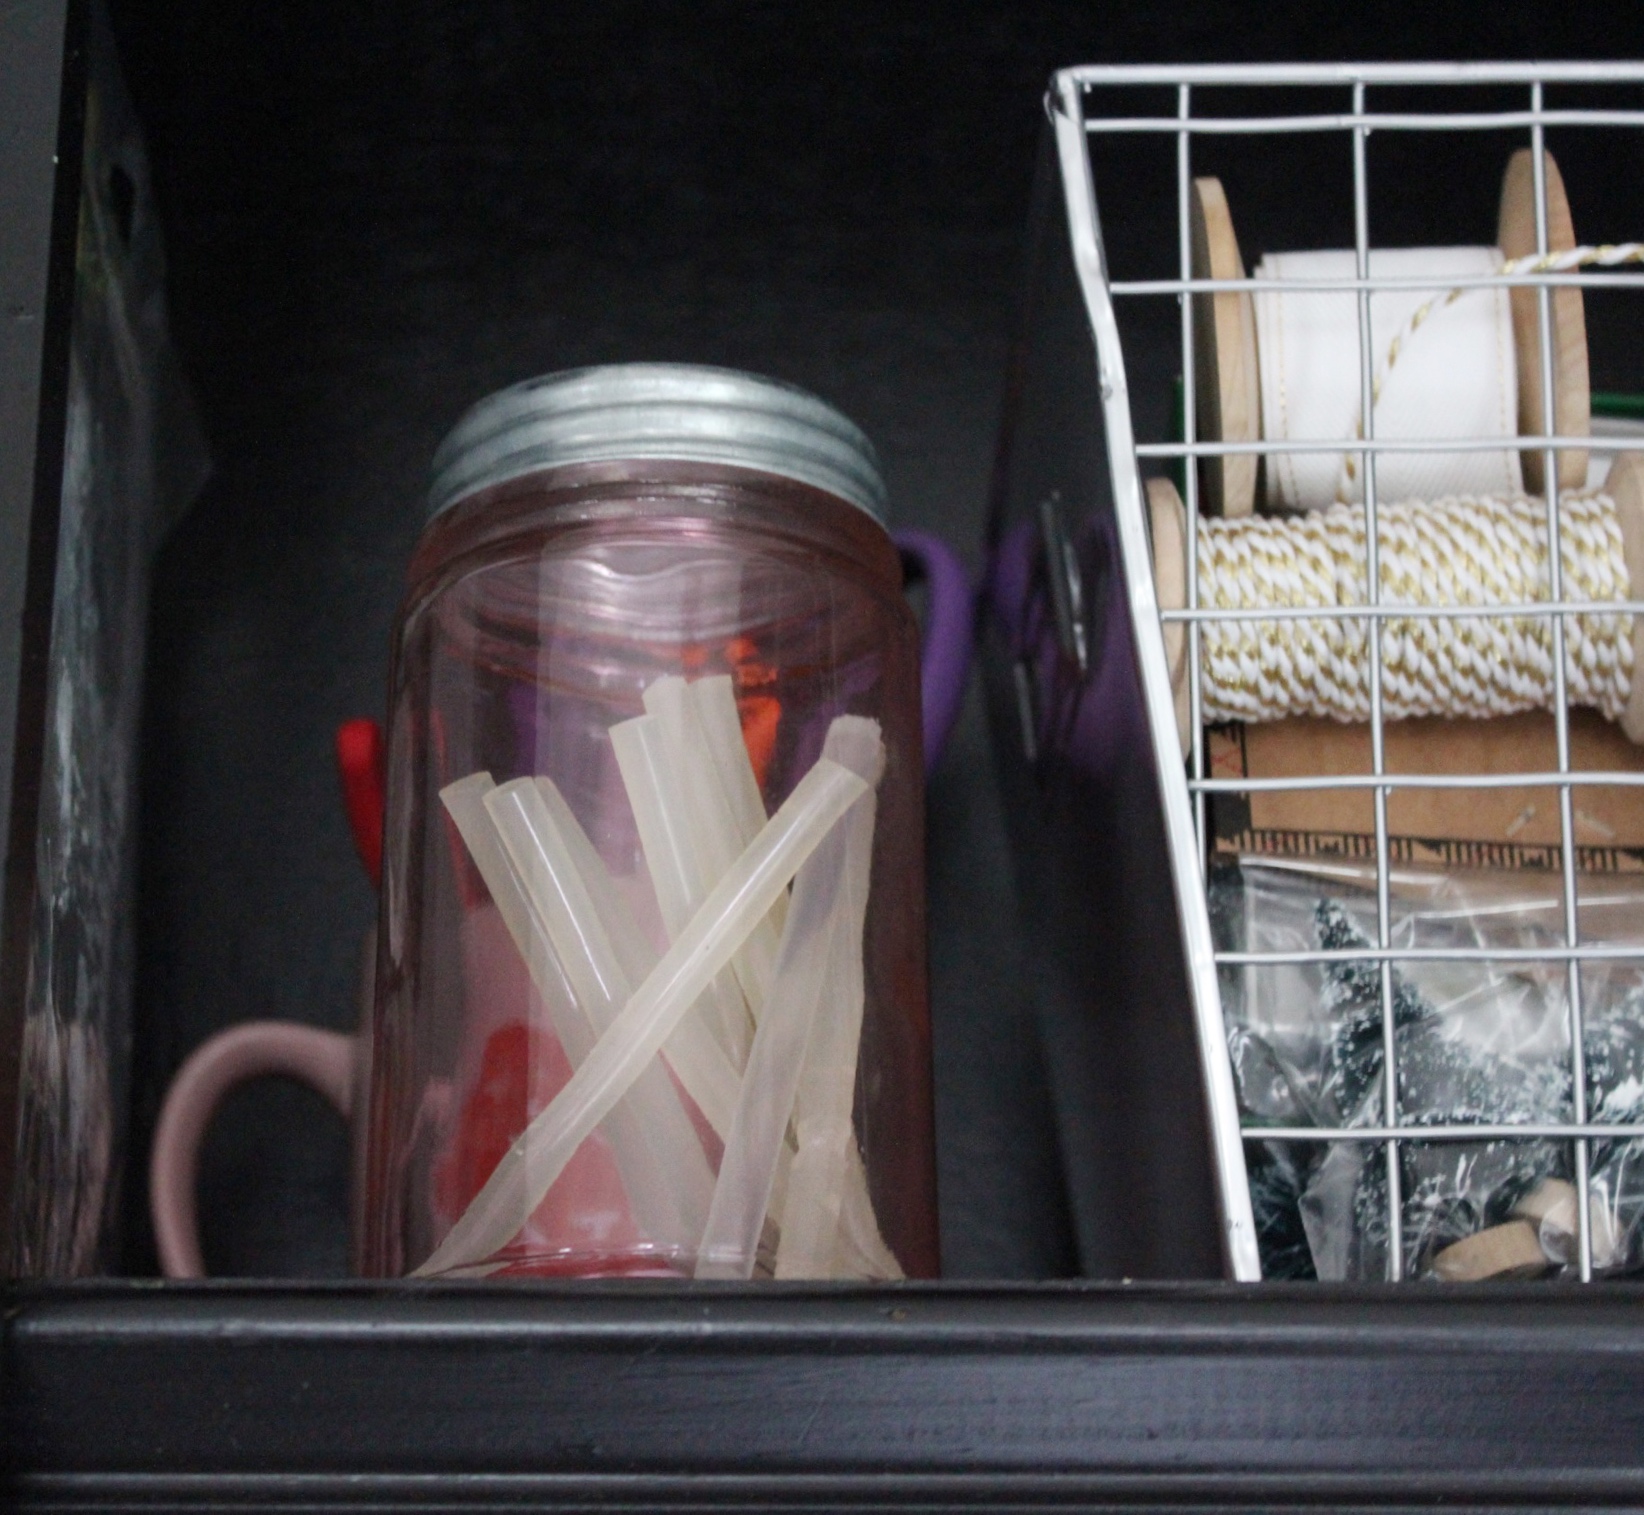
The top right is a whole bin dedicated to Christmas bits and bobs, my glue sticks and extra scissors.
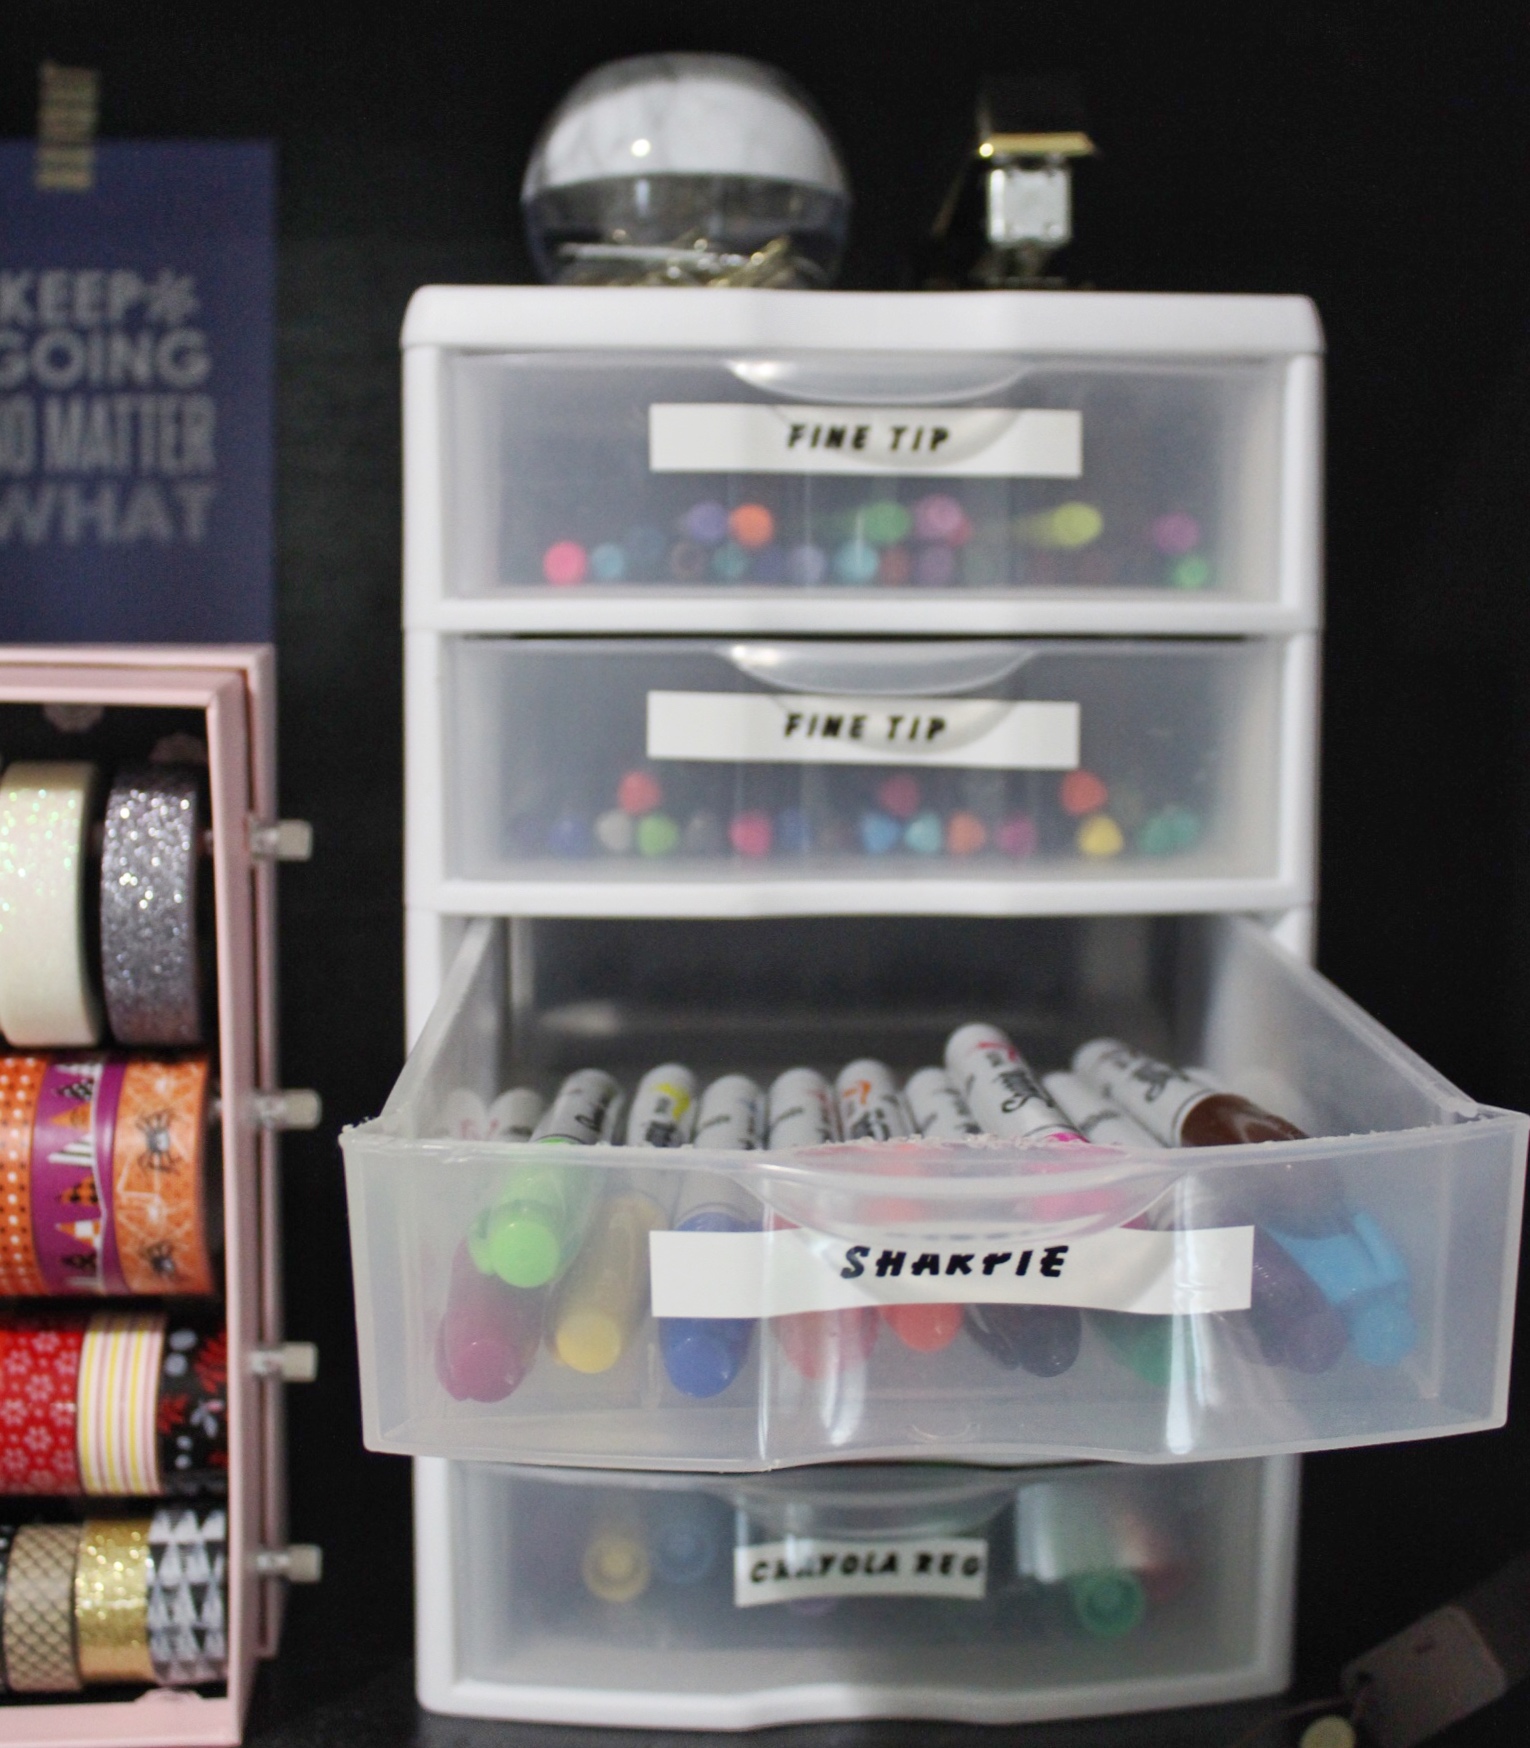
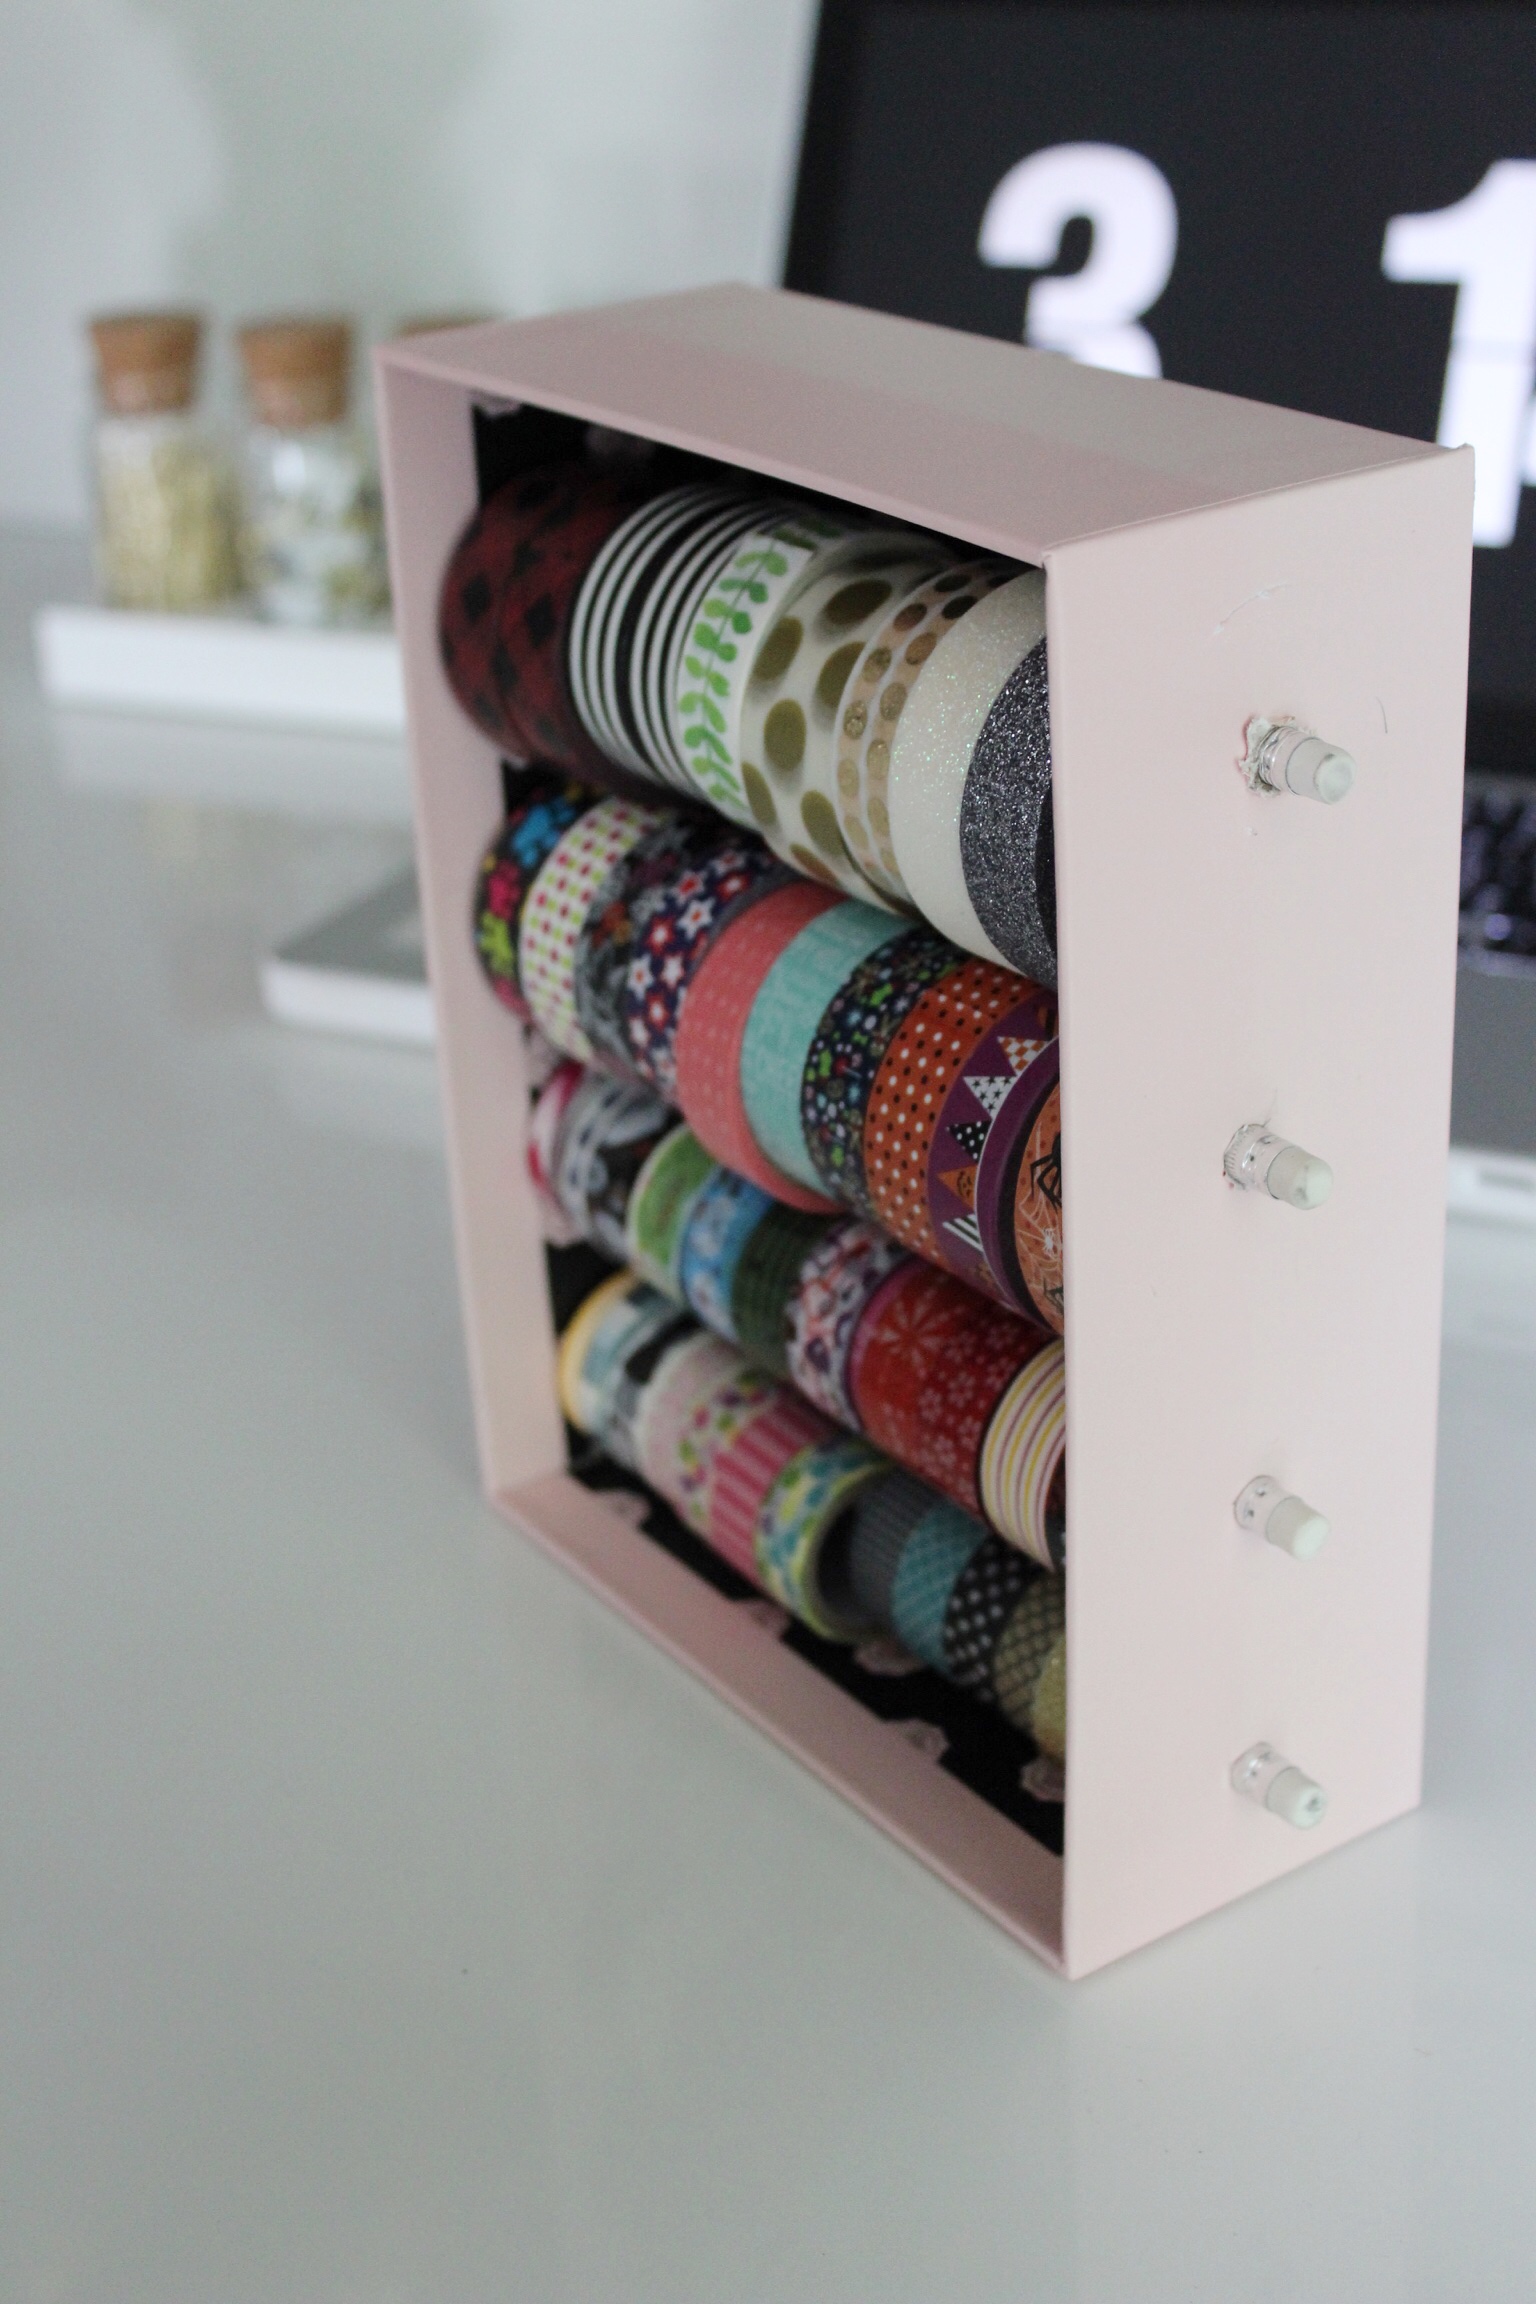
The bottom right is my washi tape, pens and markers. This is my favorite shelf by far! Seeing all of my markers and pens all in a dedicated area just gives me all the feels. I even broke out my label maker for this one! Next level stuff over here!
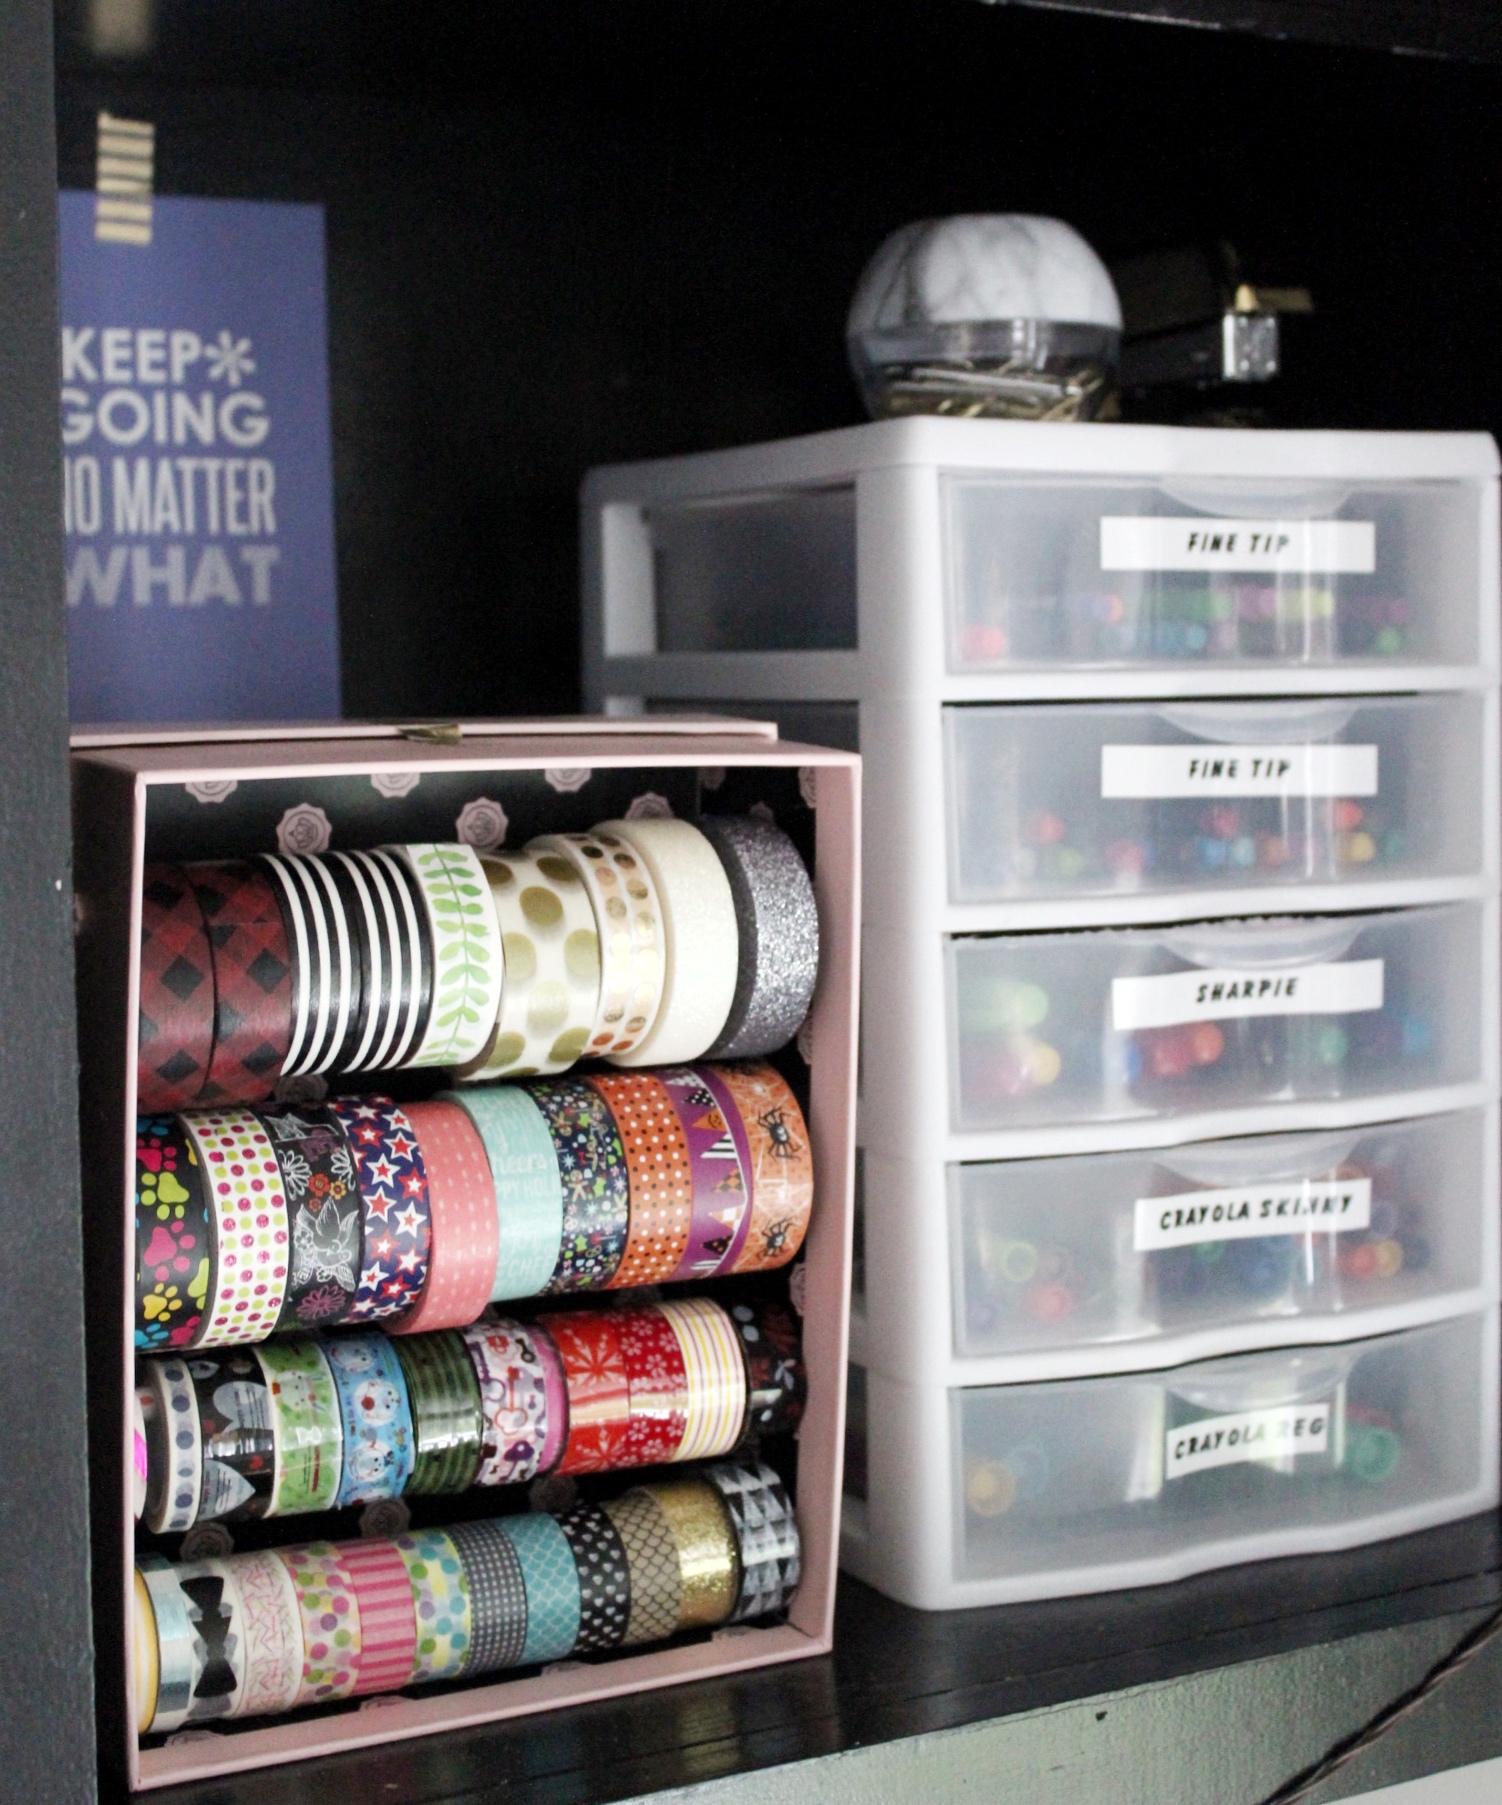
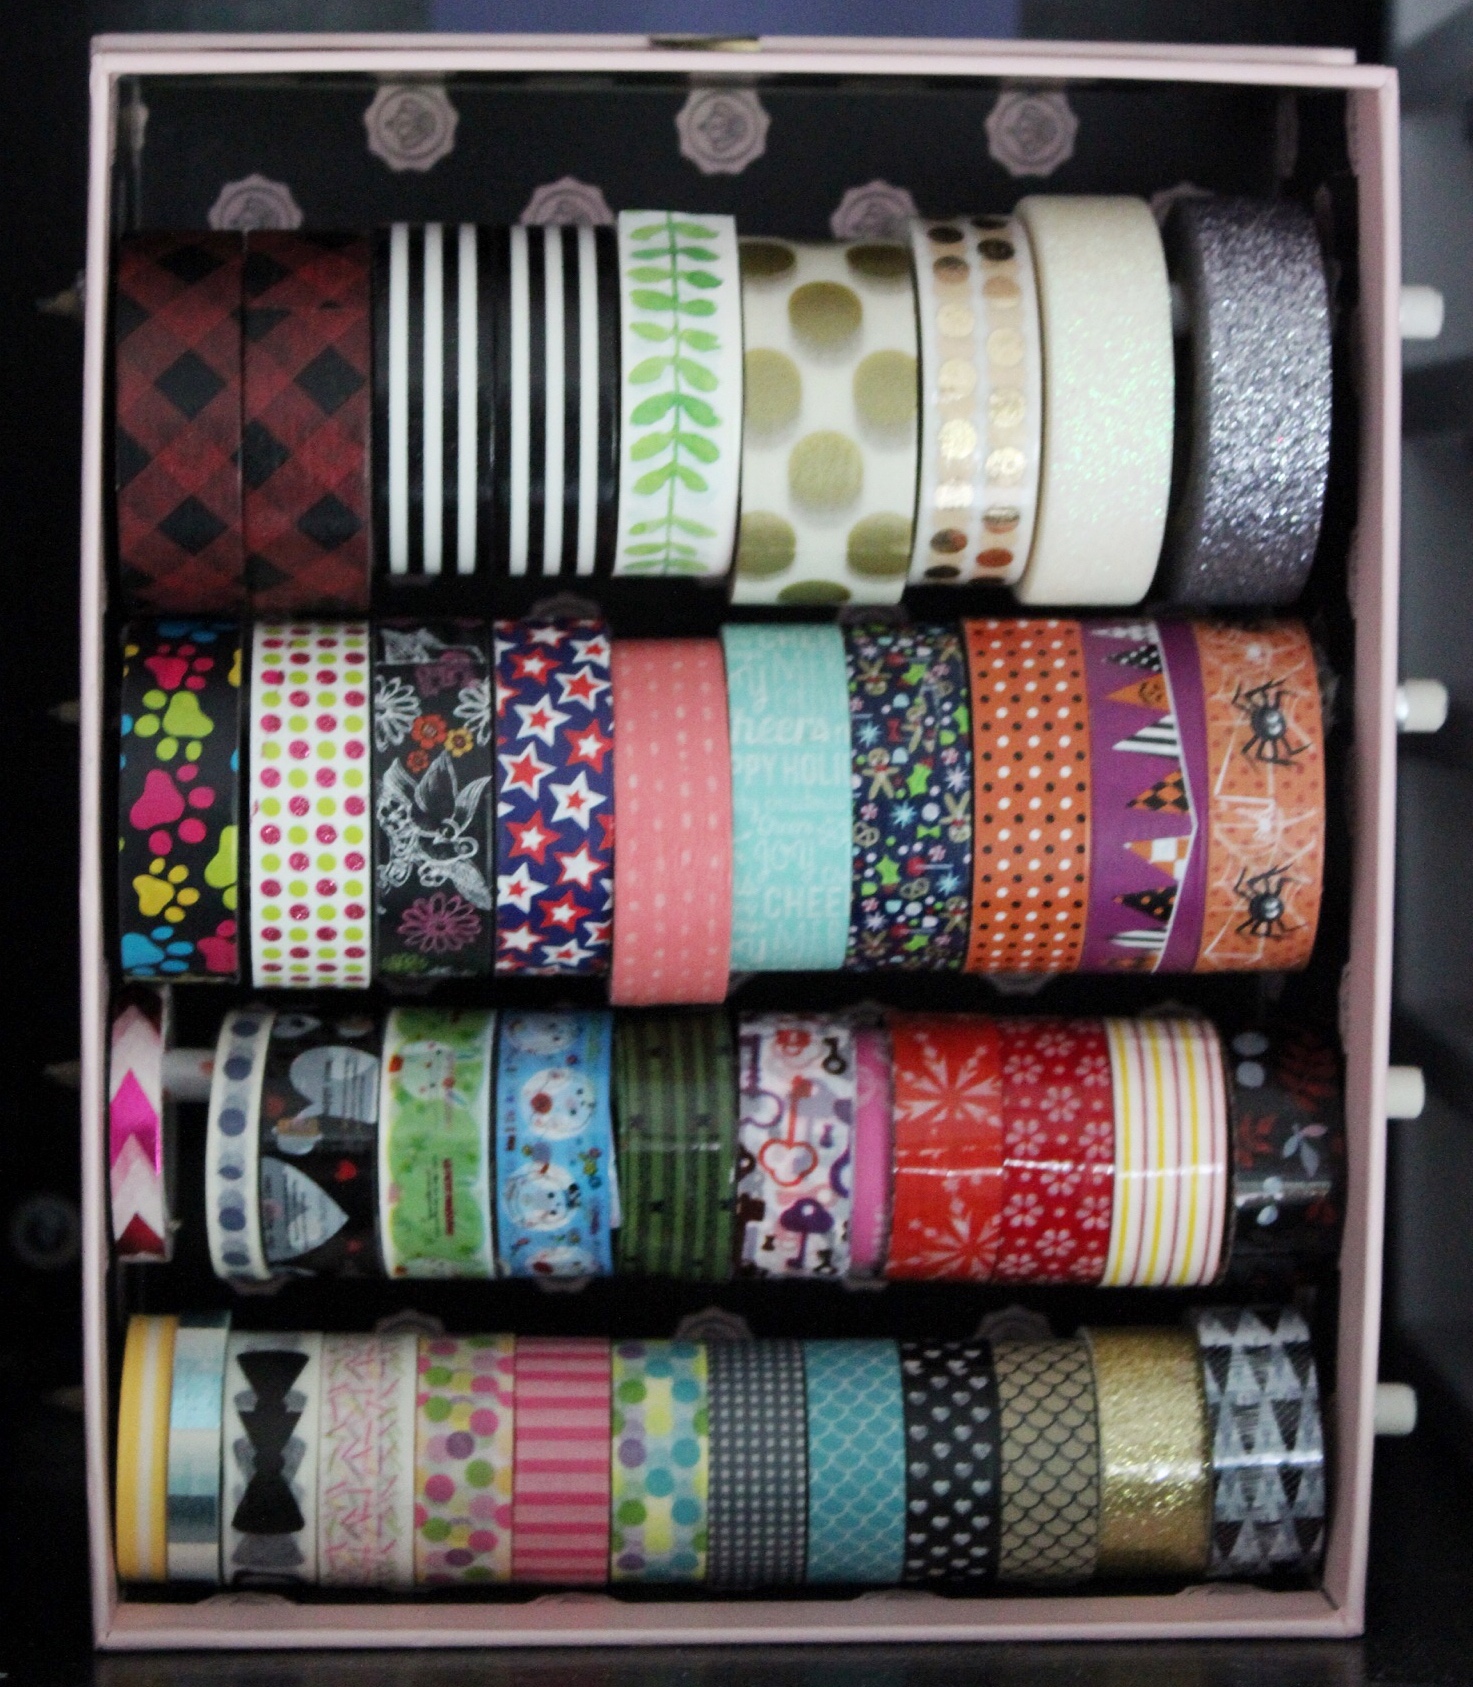
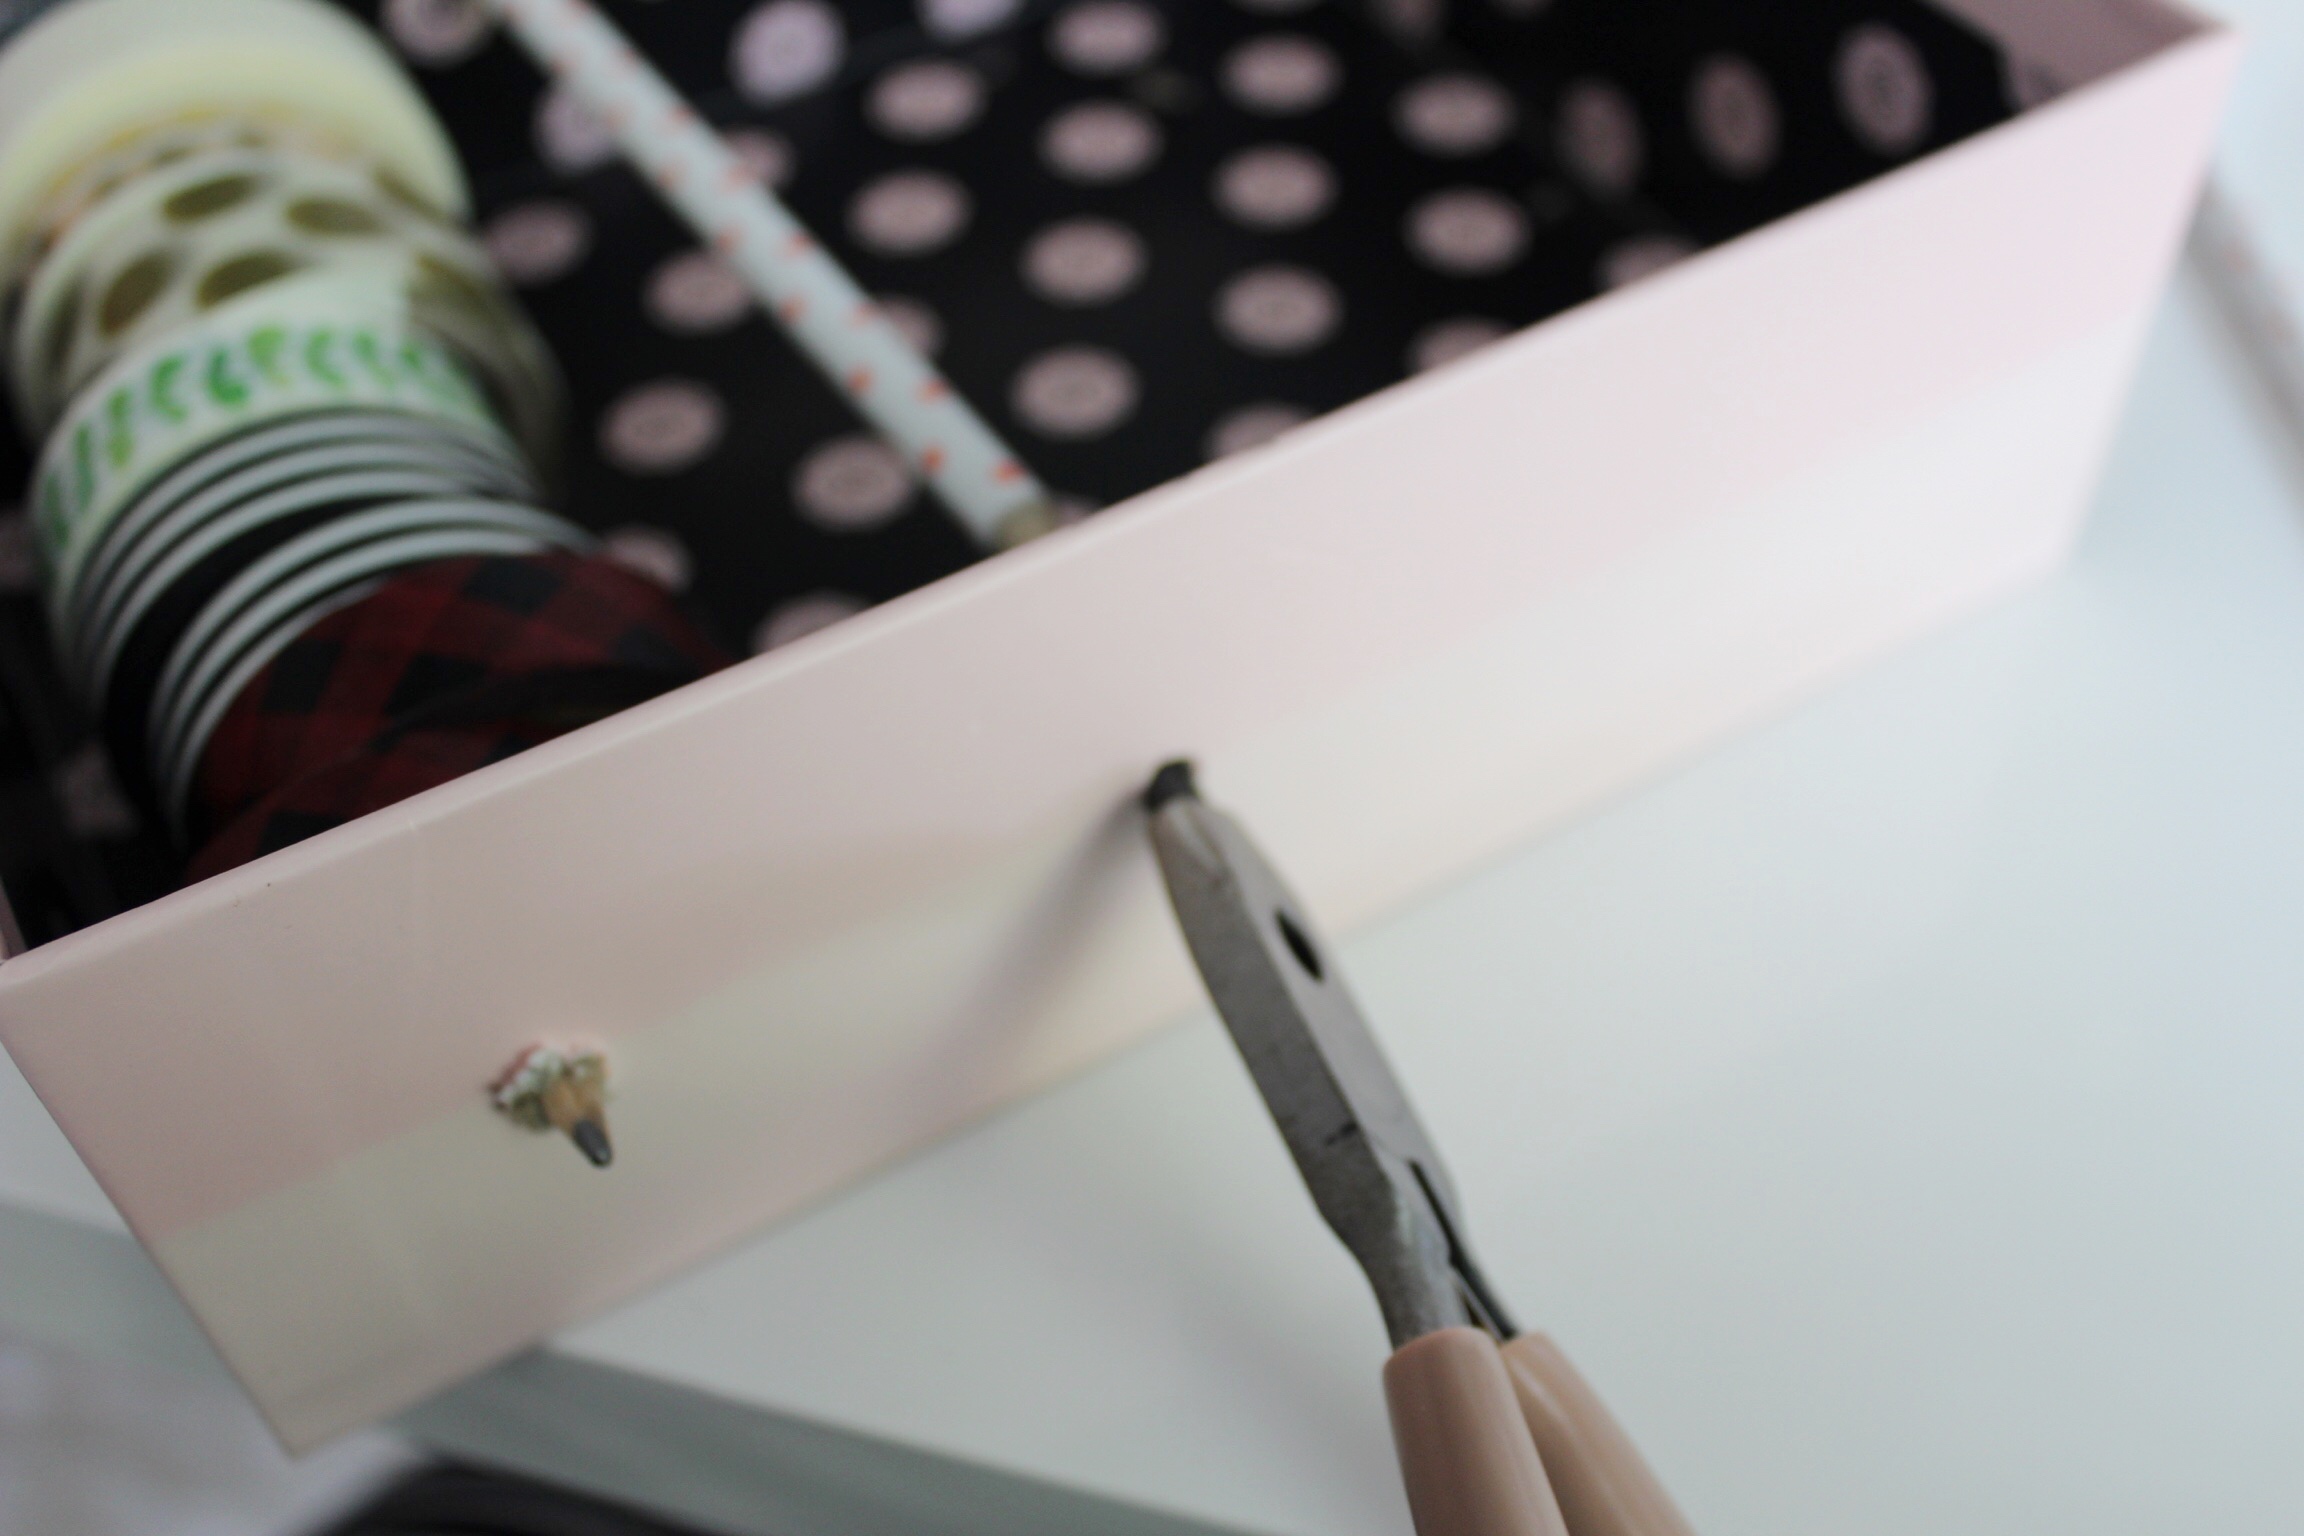
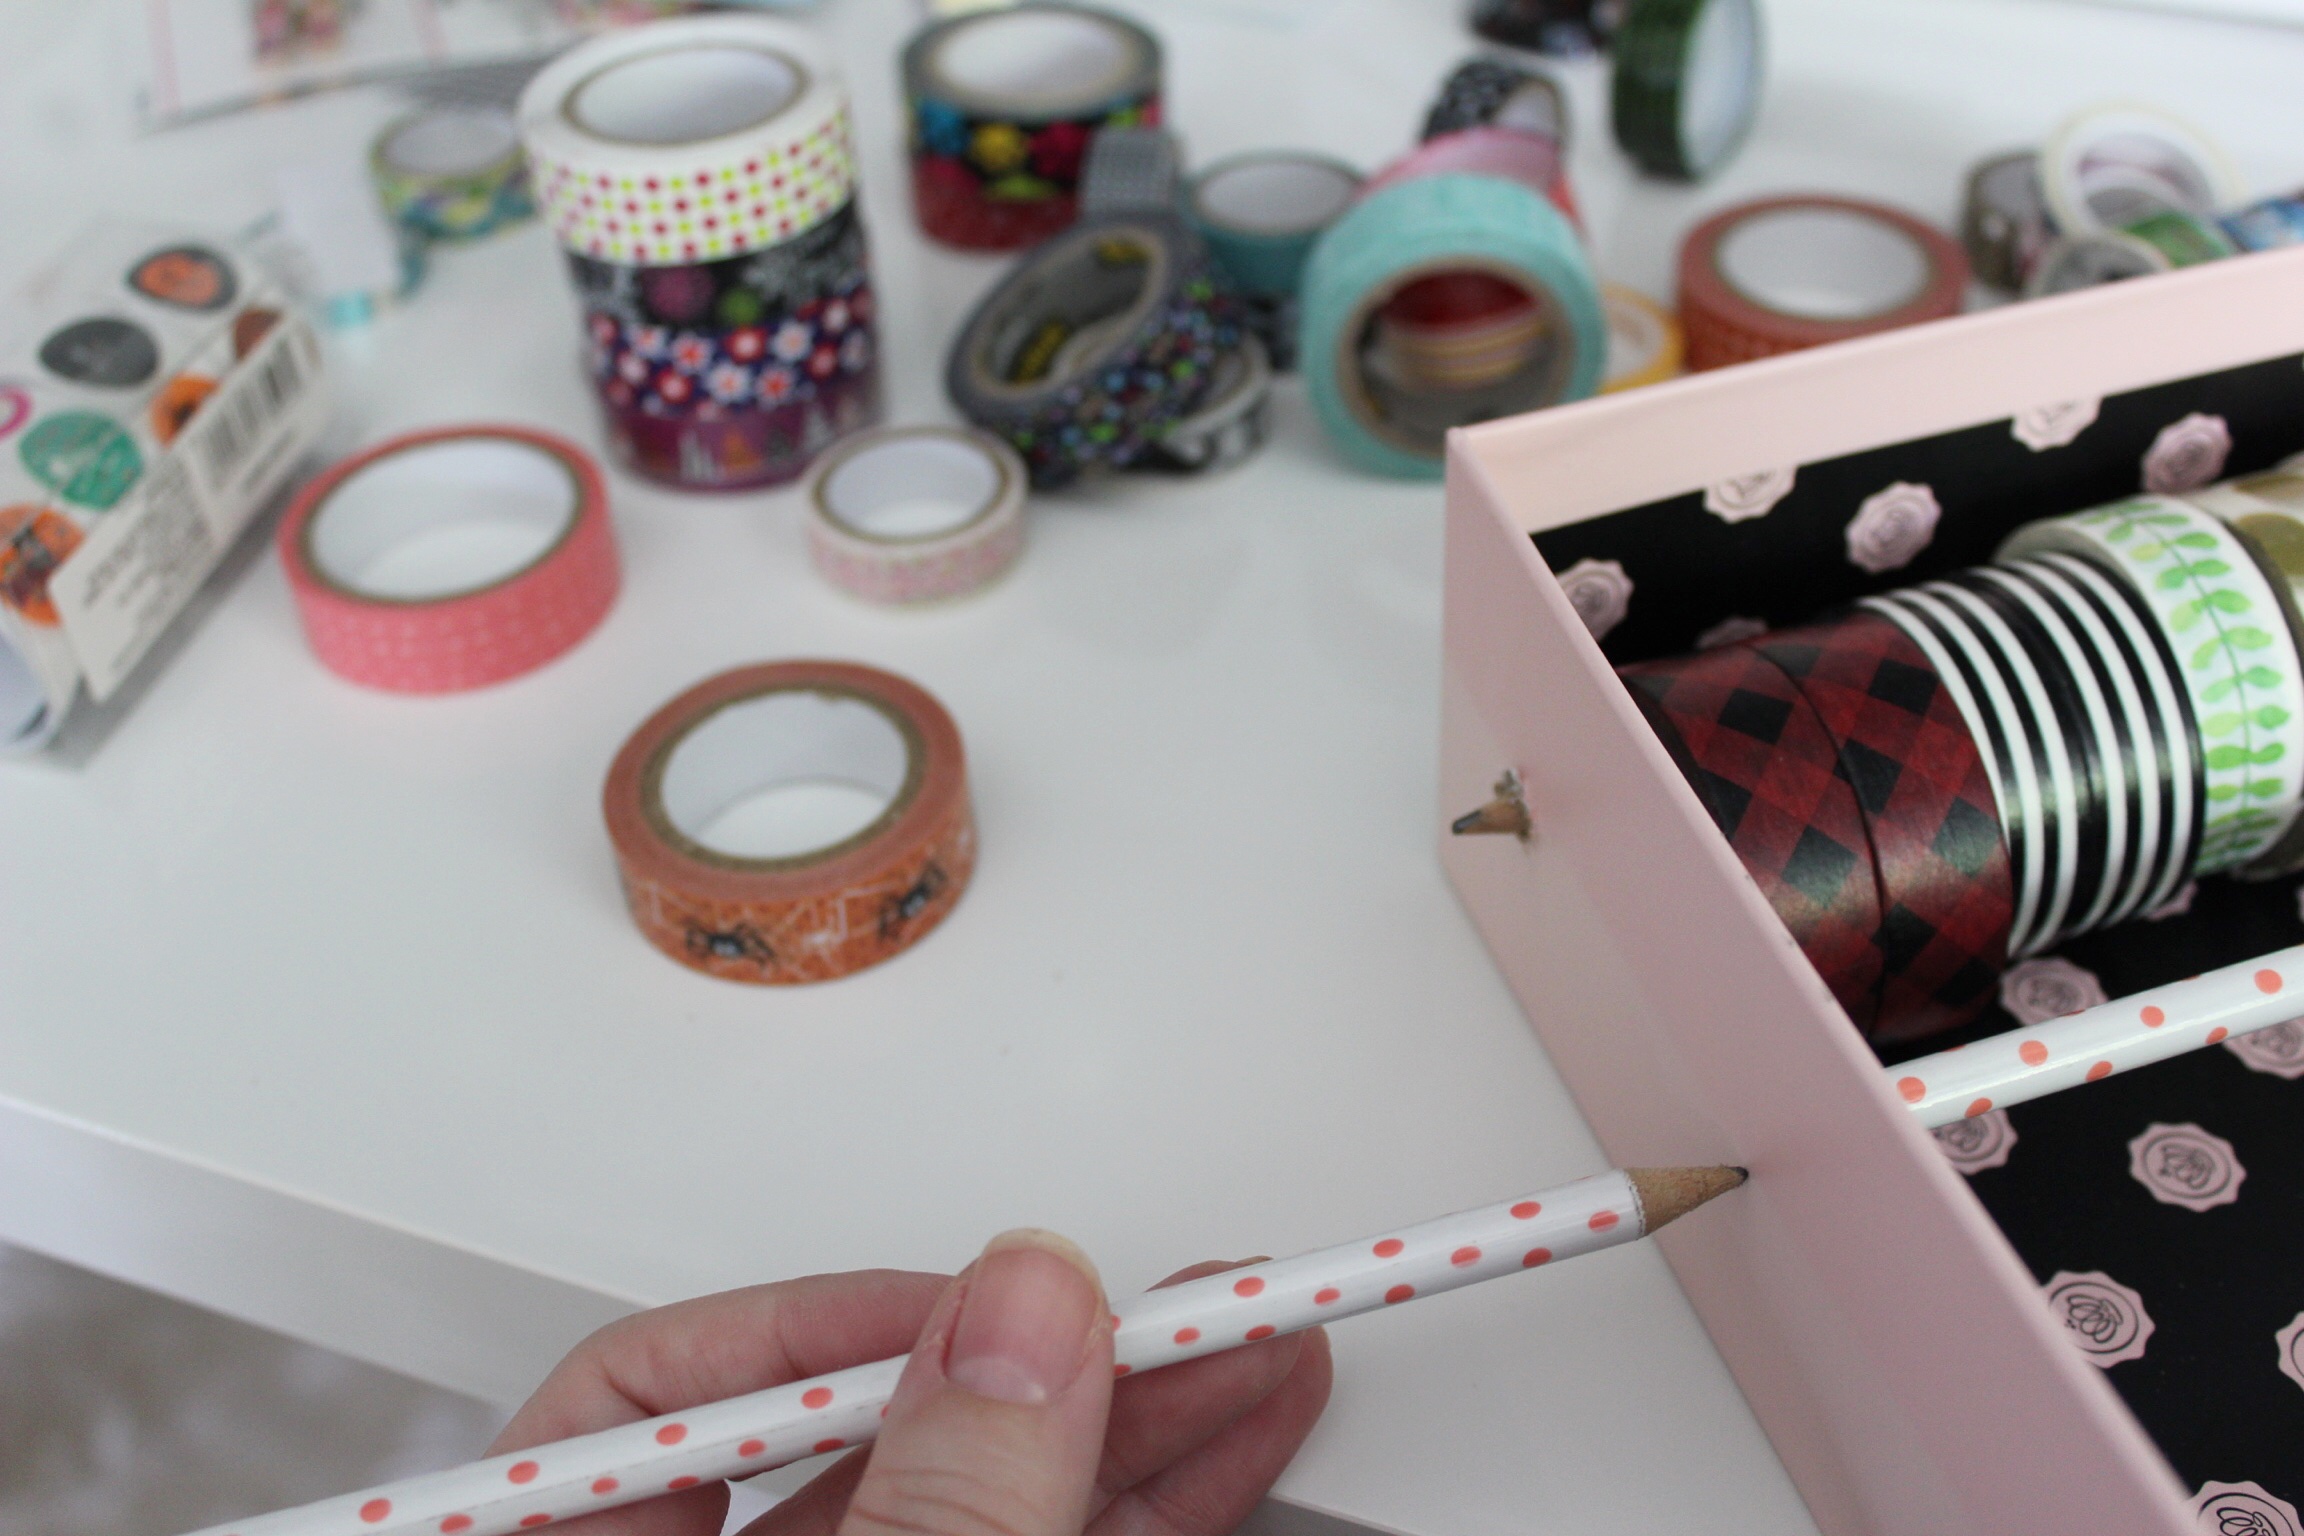
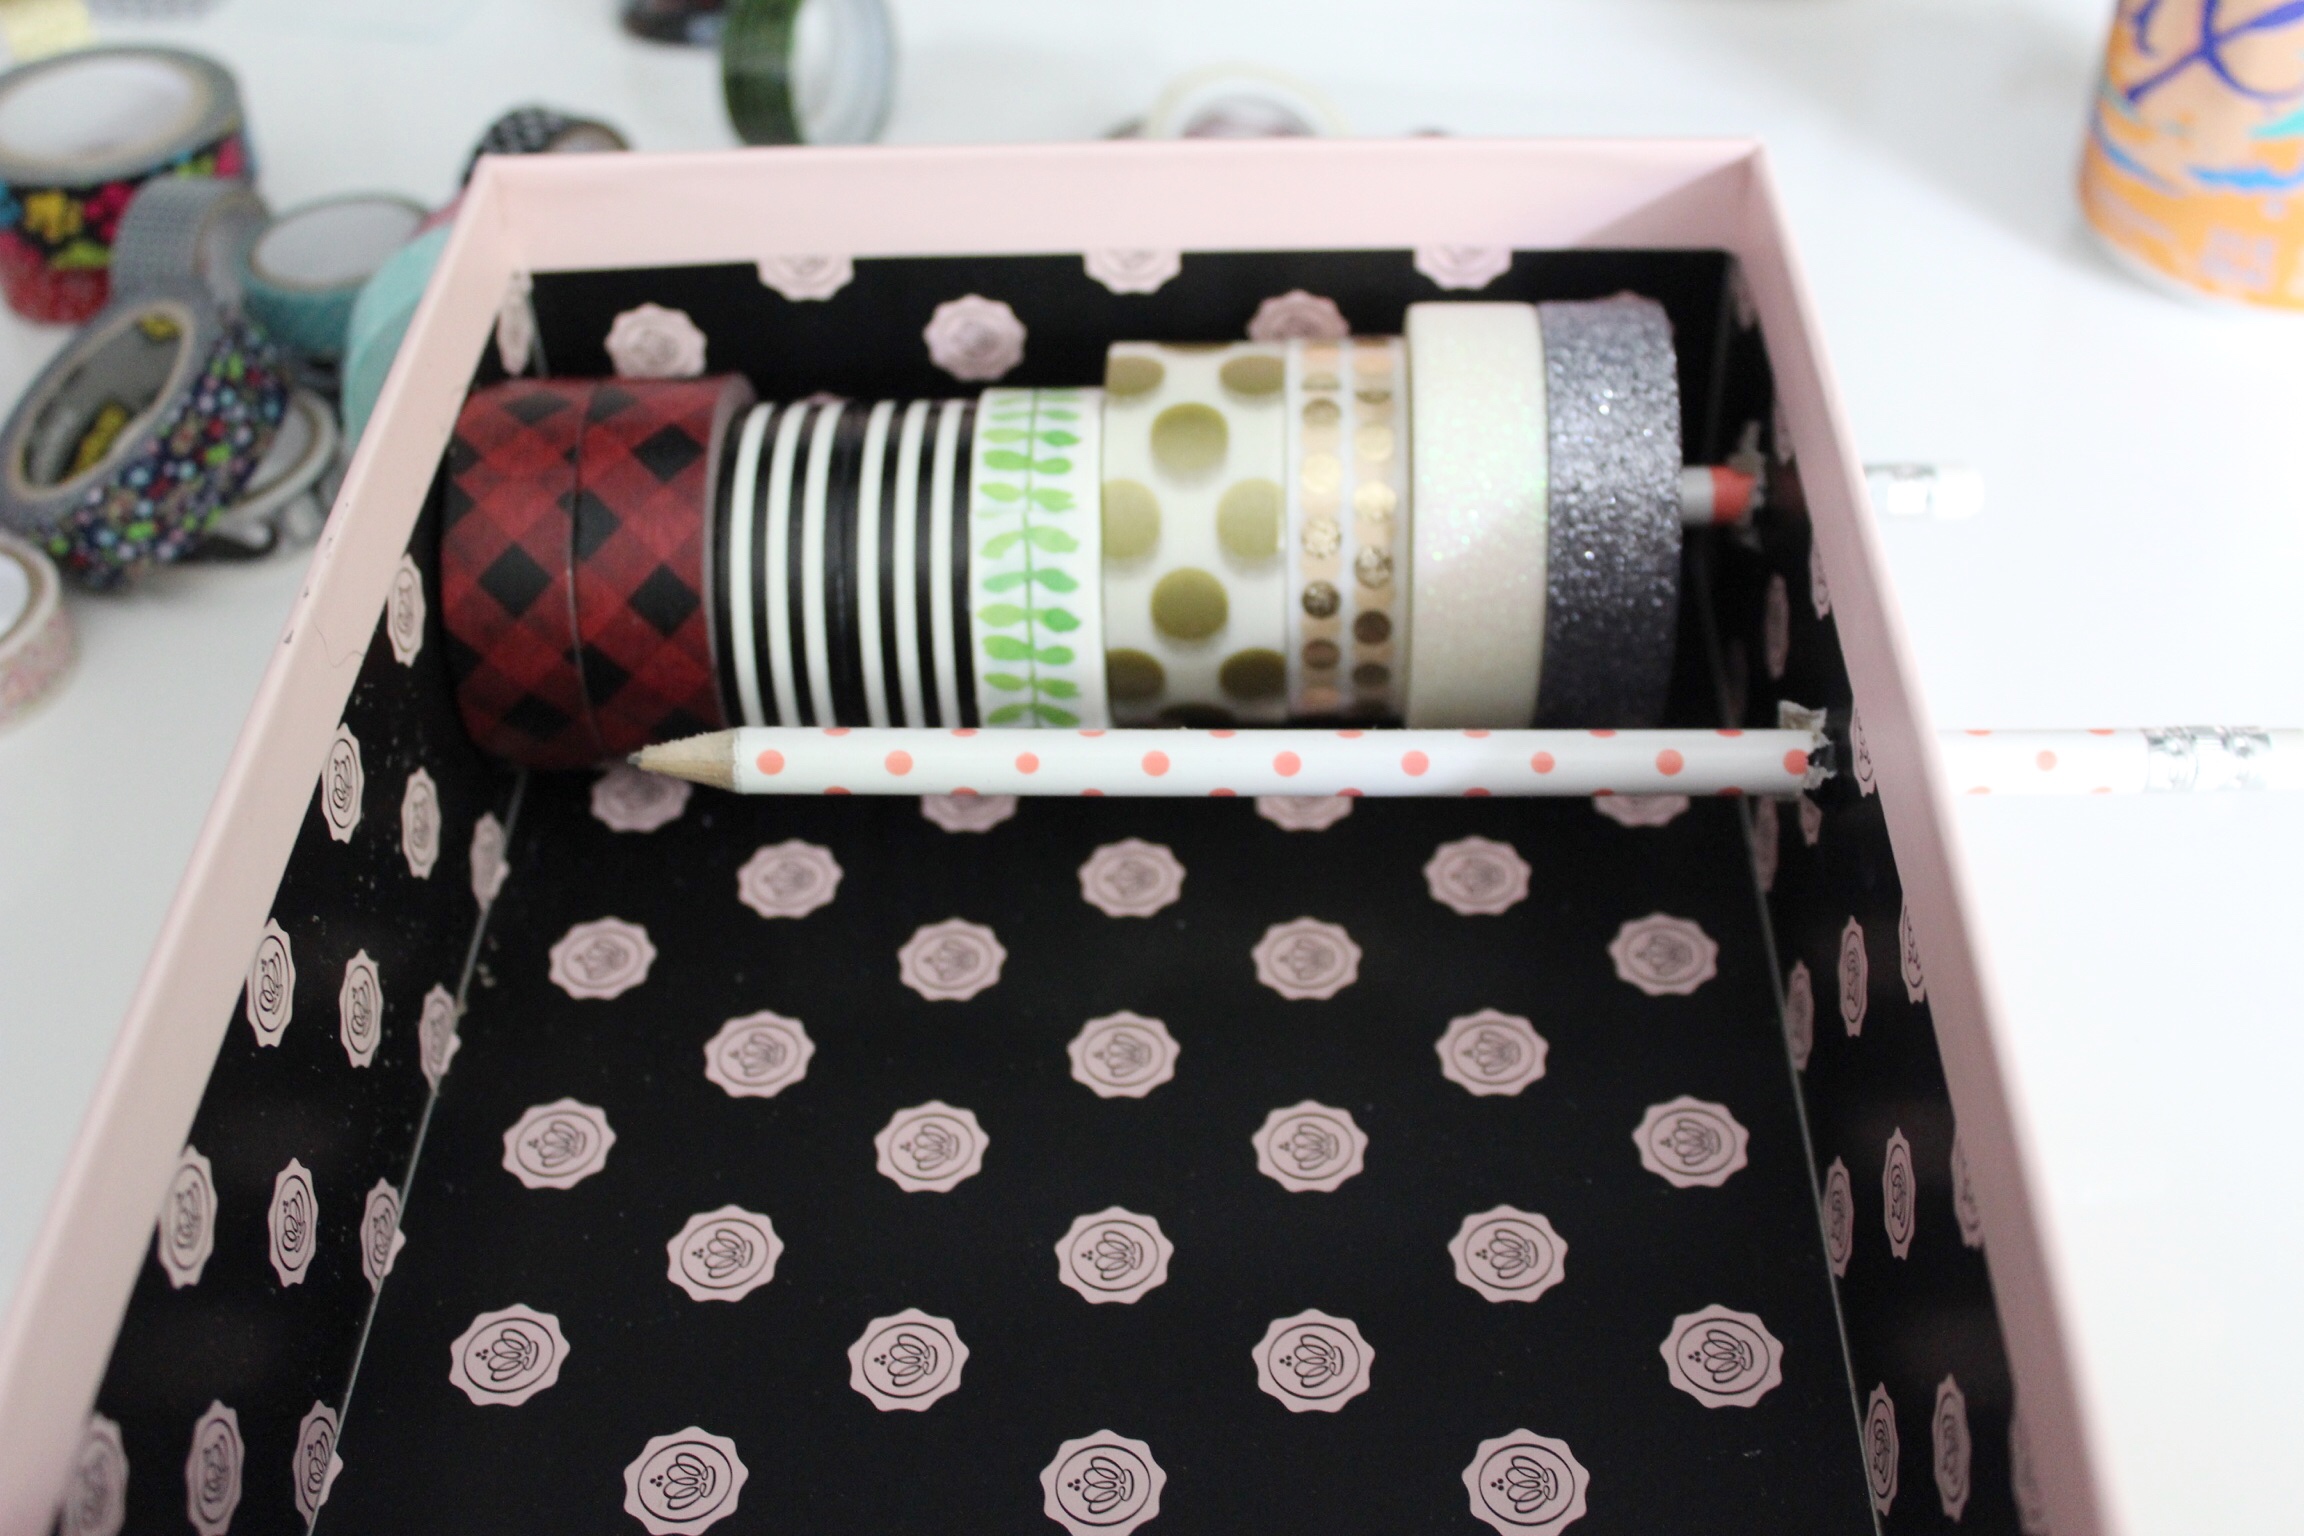
I also made this cute little box to display all my washi tape. Before I had it all crammed in a tin and I had to go through each one to find the one I needed, but now I can see all of them on display.
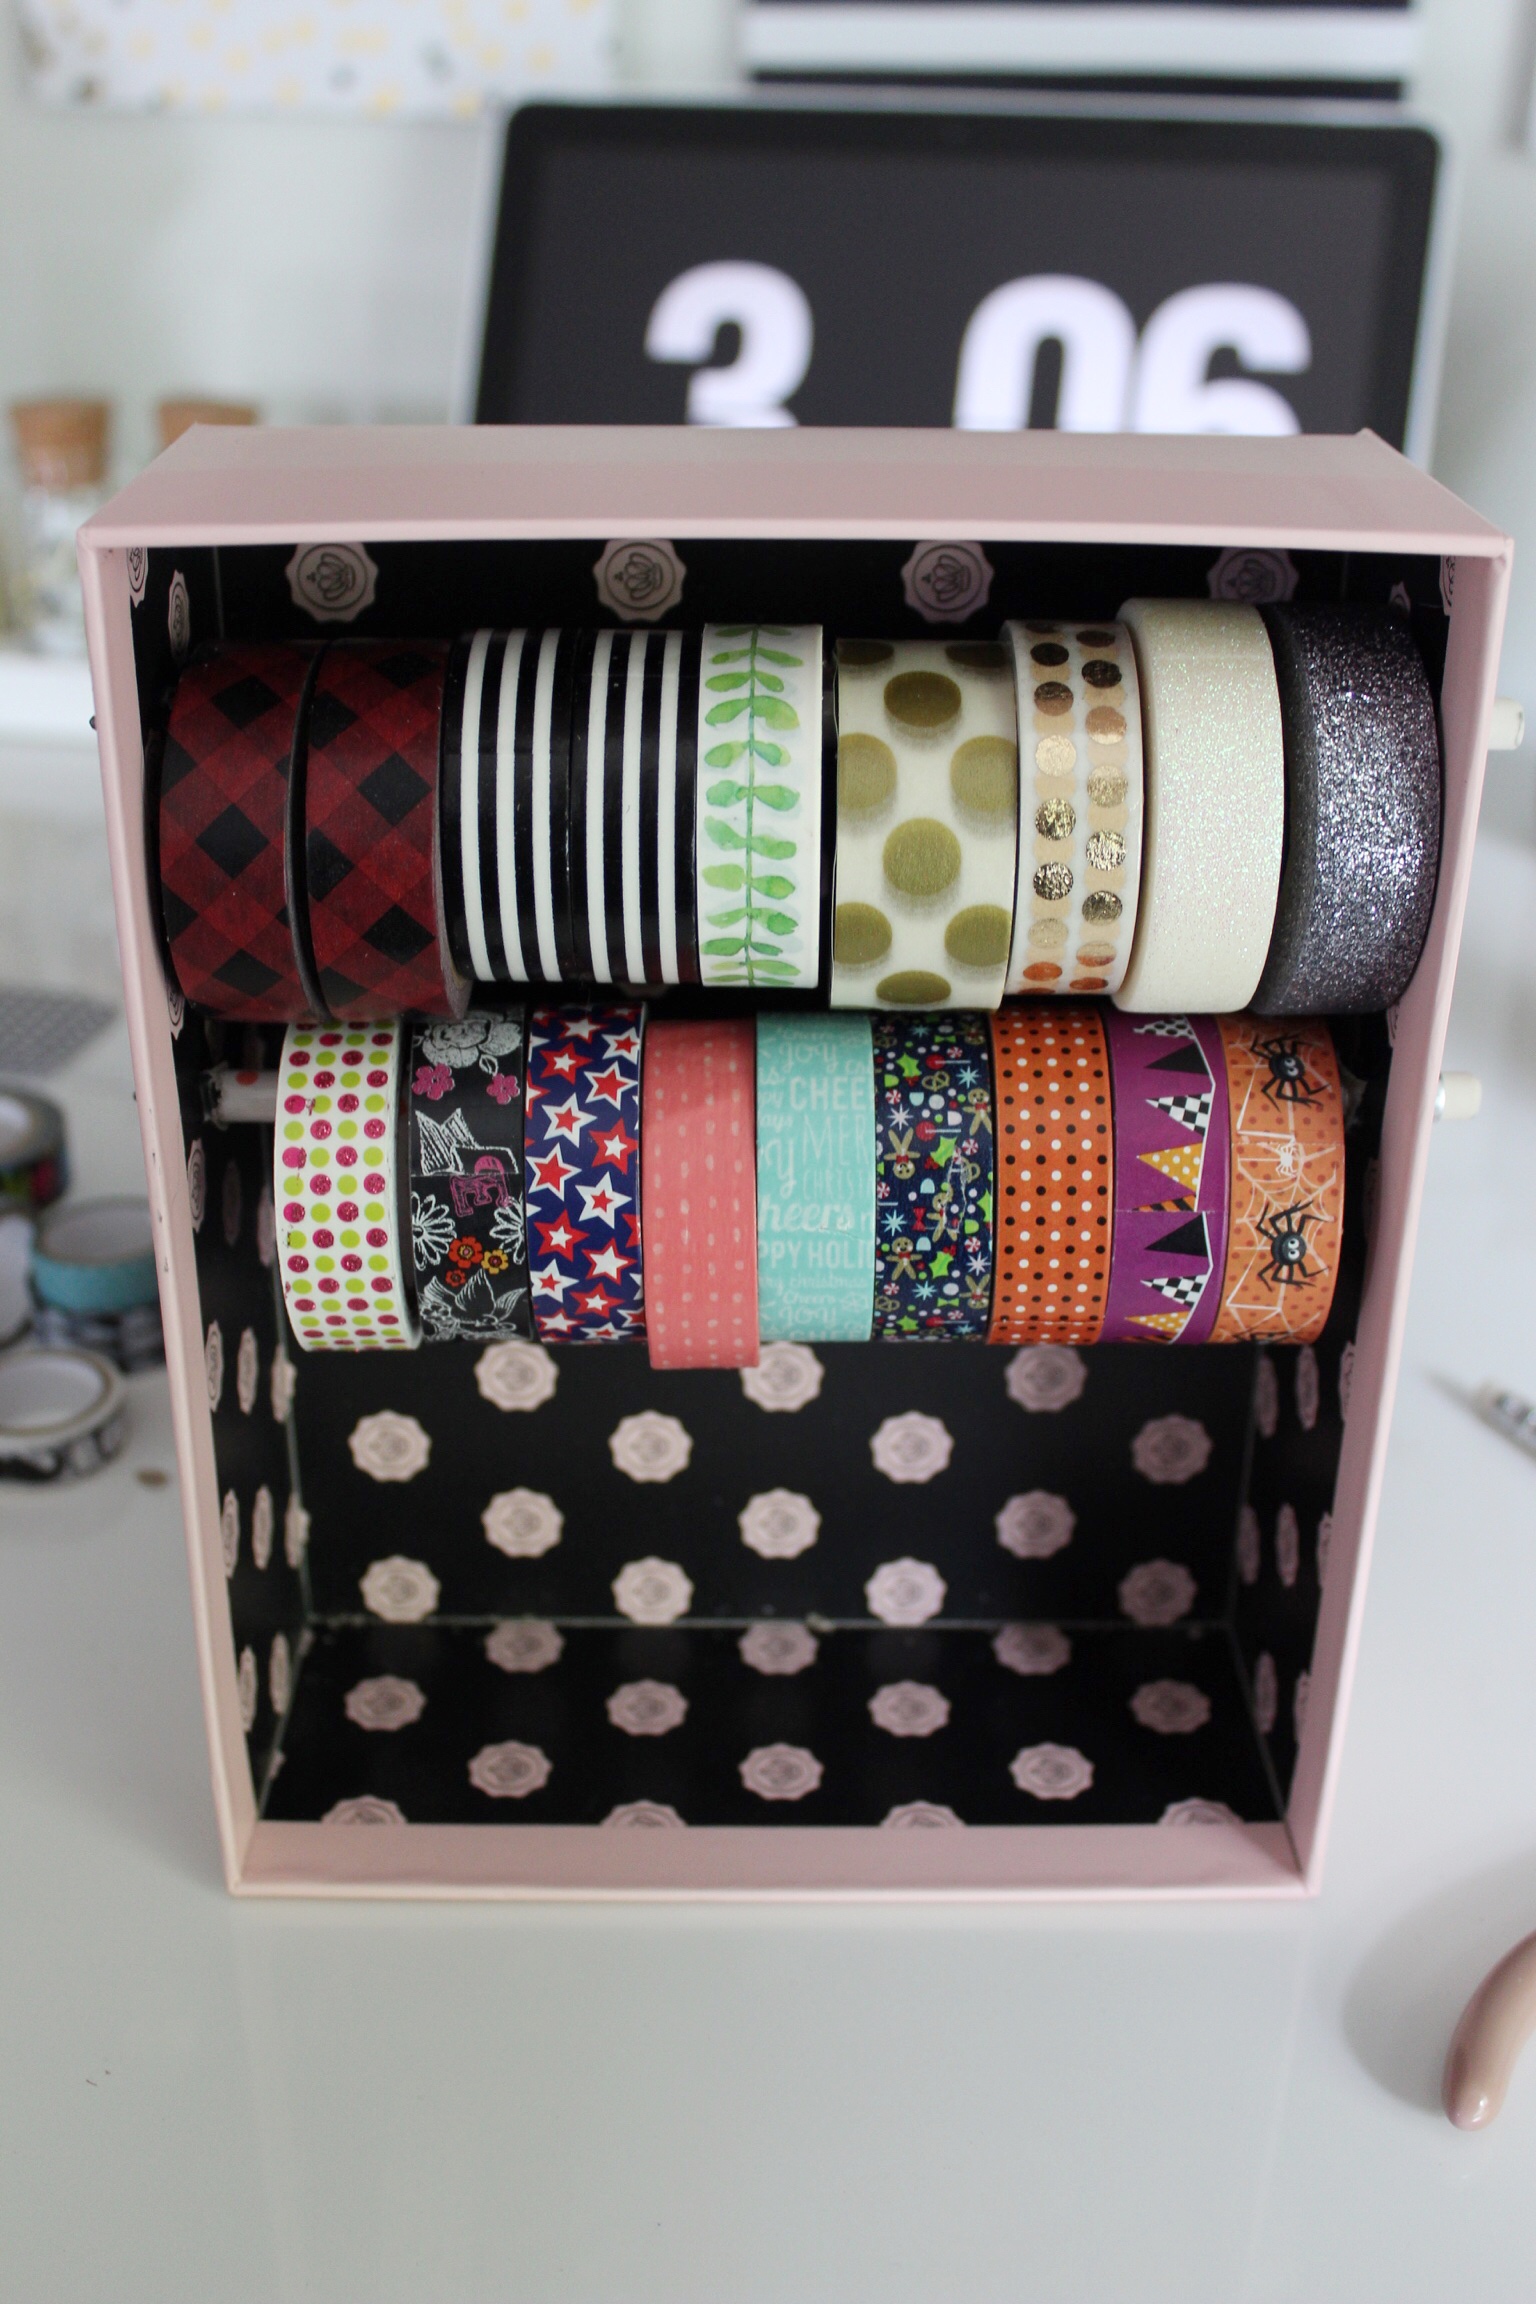
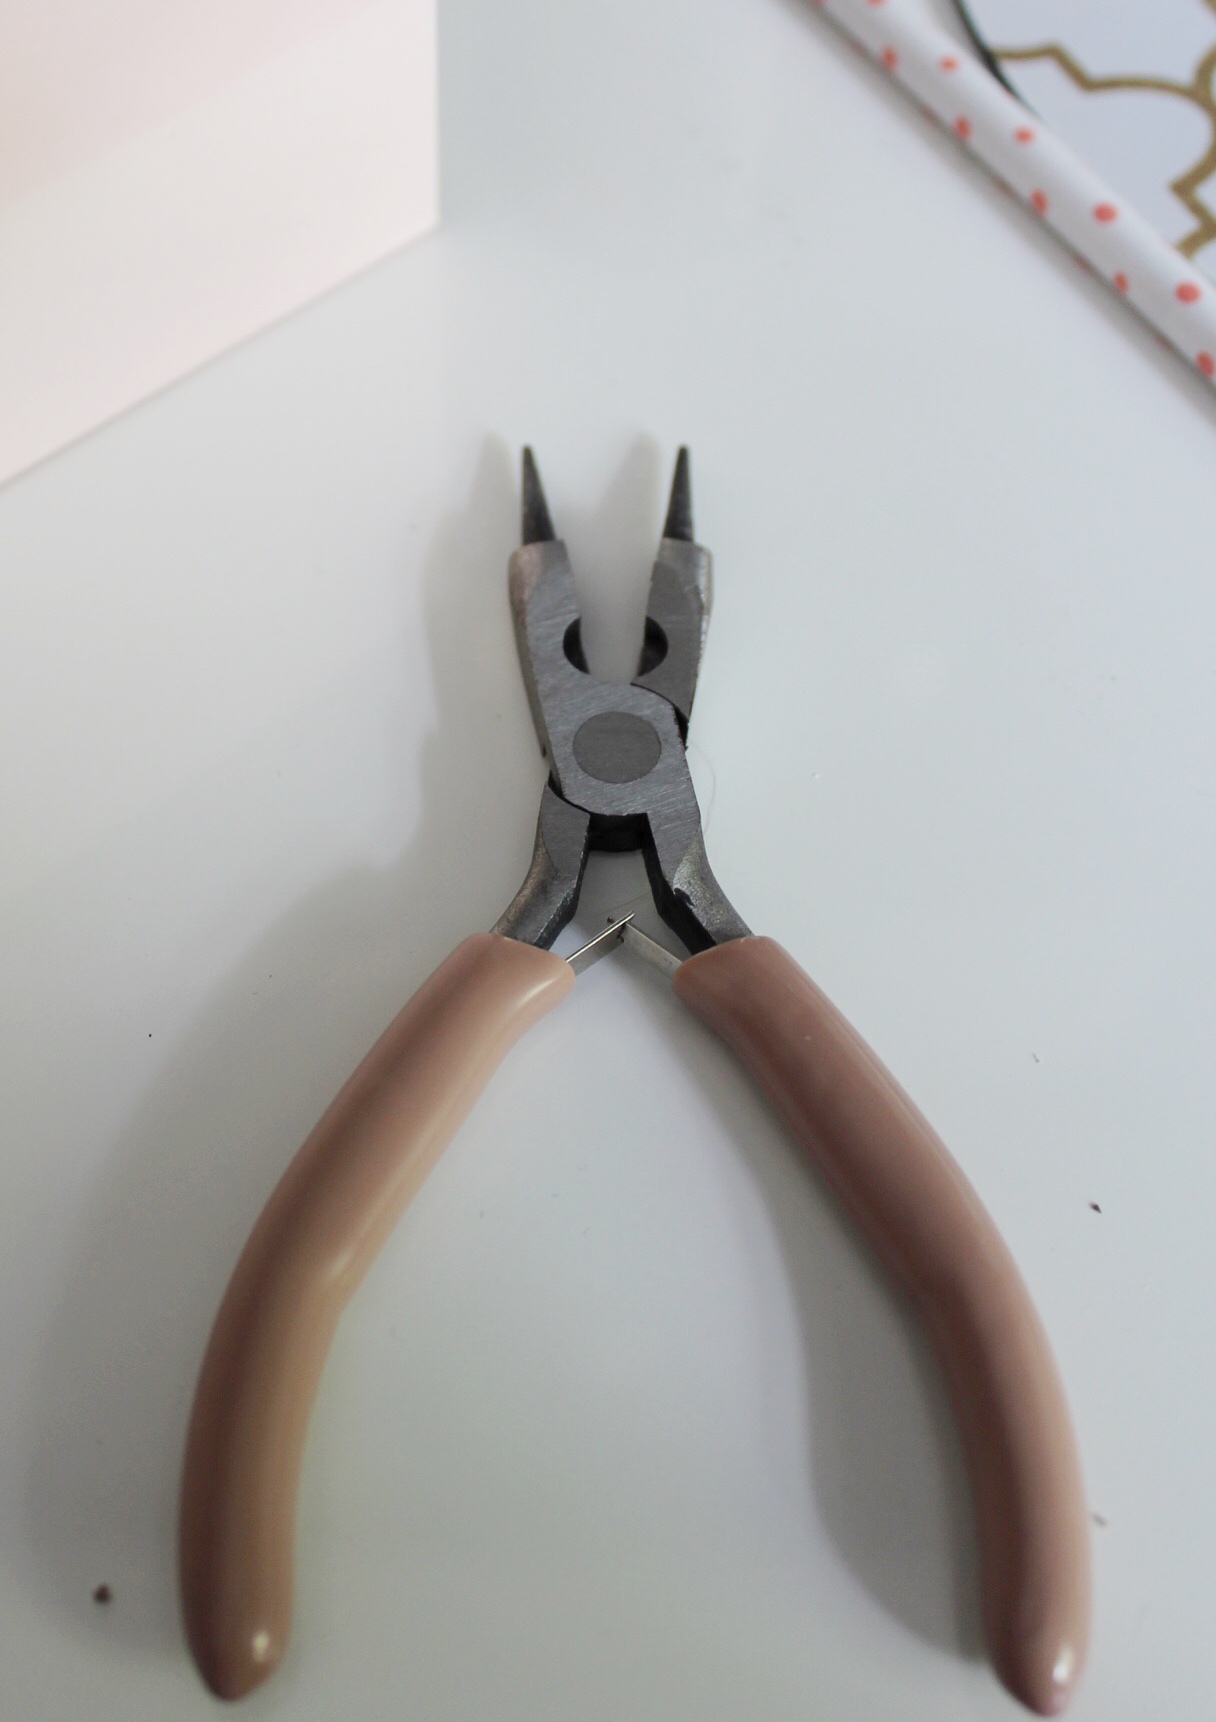
I punched holes in this box using these needle nose pliers and twisted the pliers around a few times so it made a perfect hole for the pencil. I punched the pencil through and then drew a mark on the other side so I knew where to make the hole on the other side. Then I just loaded the washi tape rolls on the pencil and poked the pencil through the other side of the box. Easy peesy!
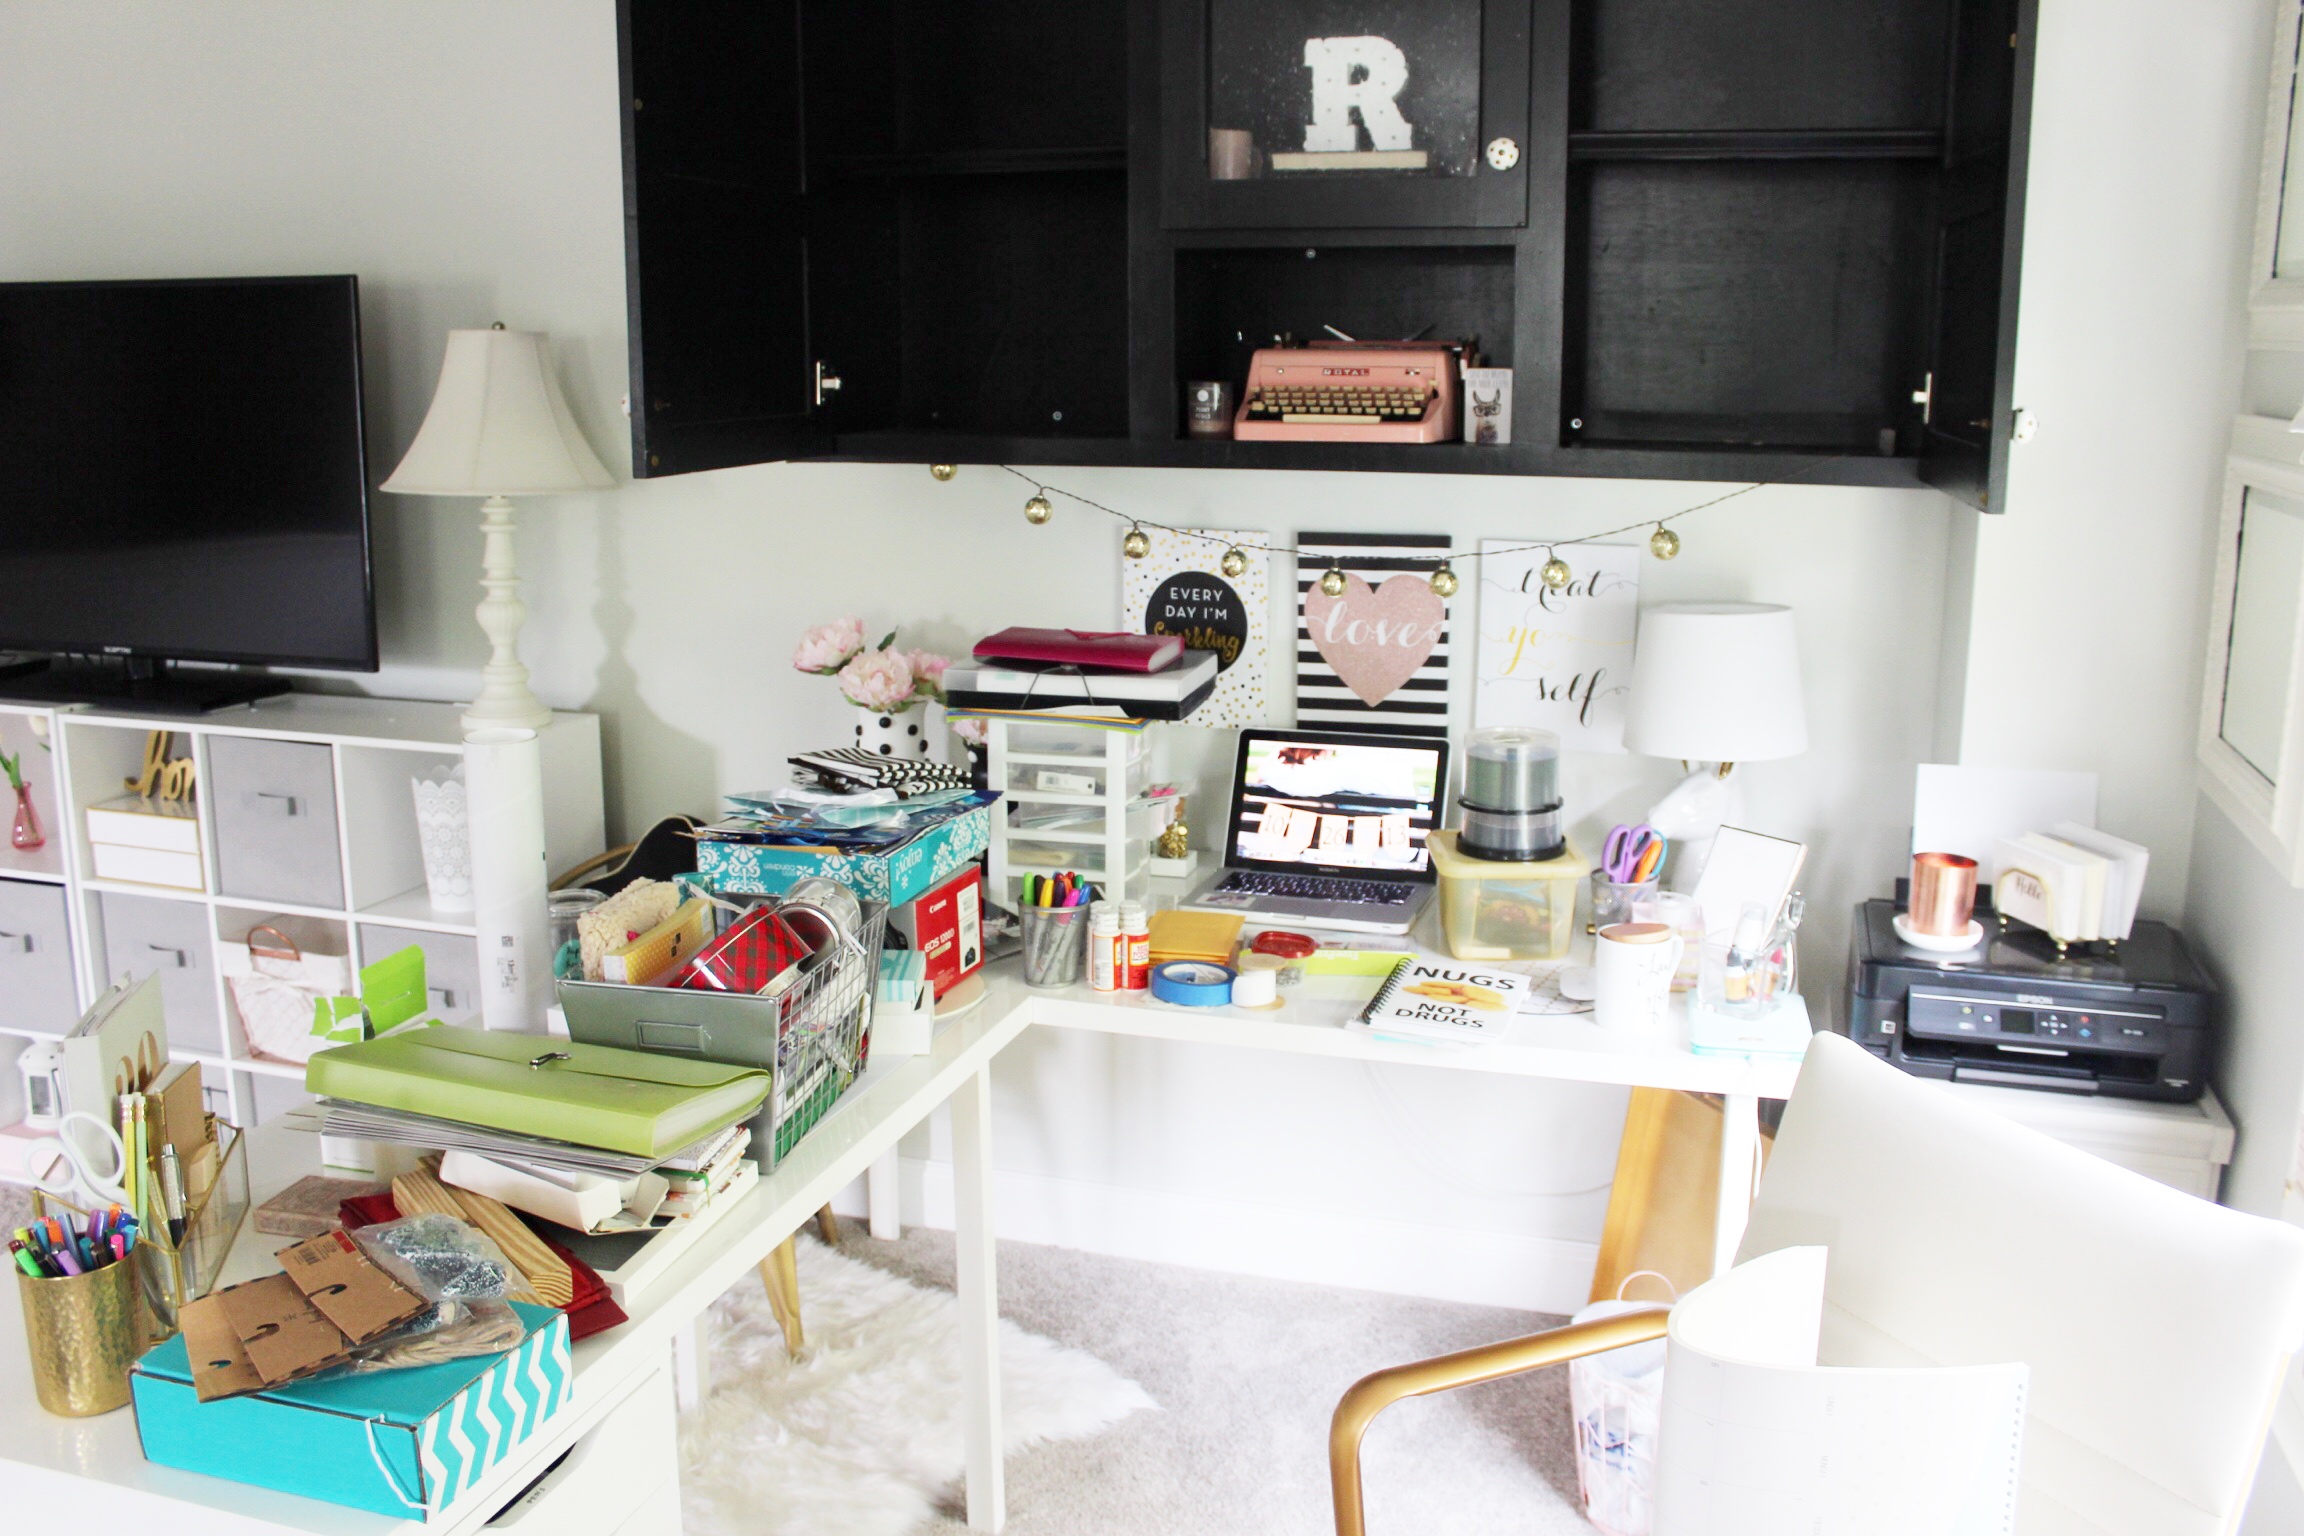
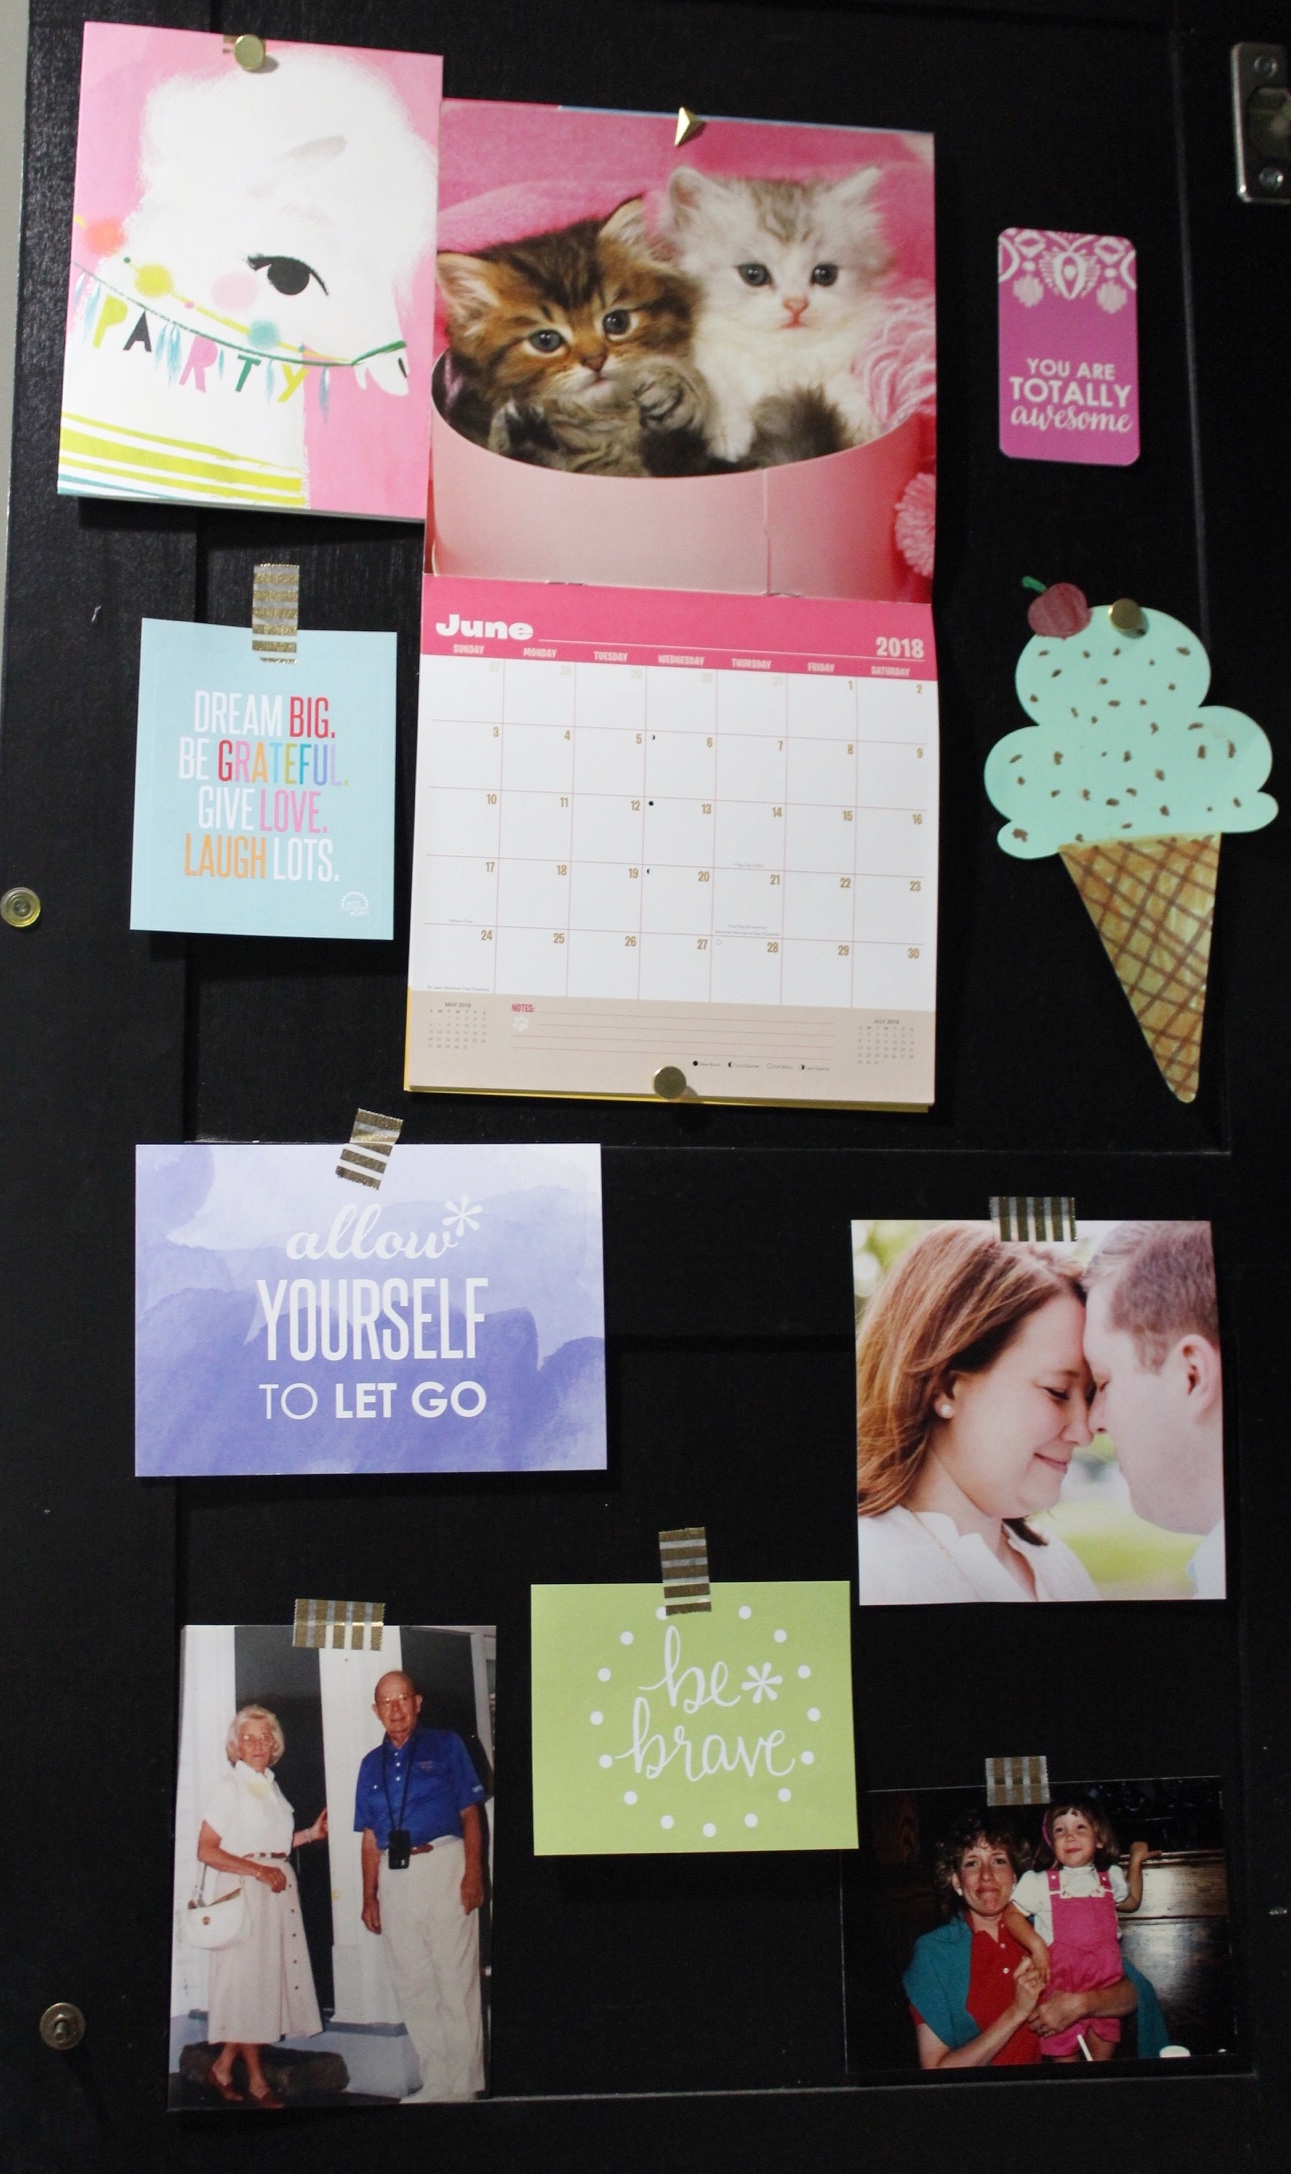
On the left door I decided to put up some of my favorite photos, some inspirational quotes, an ice cream cone made by my nephew, and of course a cute kitty calendar. I’m going to add to it throughout the year with anything I find as inspirational and have it serve as a mood board. I love opening this cabinet and seeing things that make me smile!
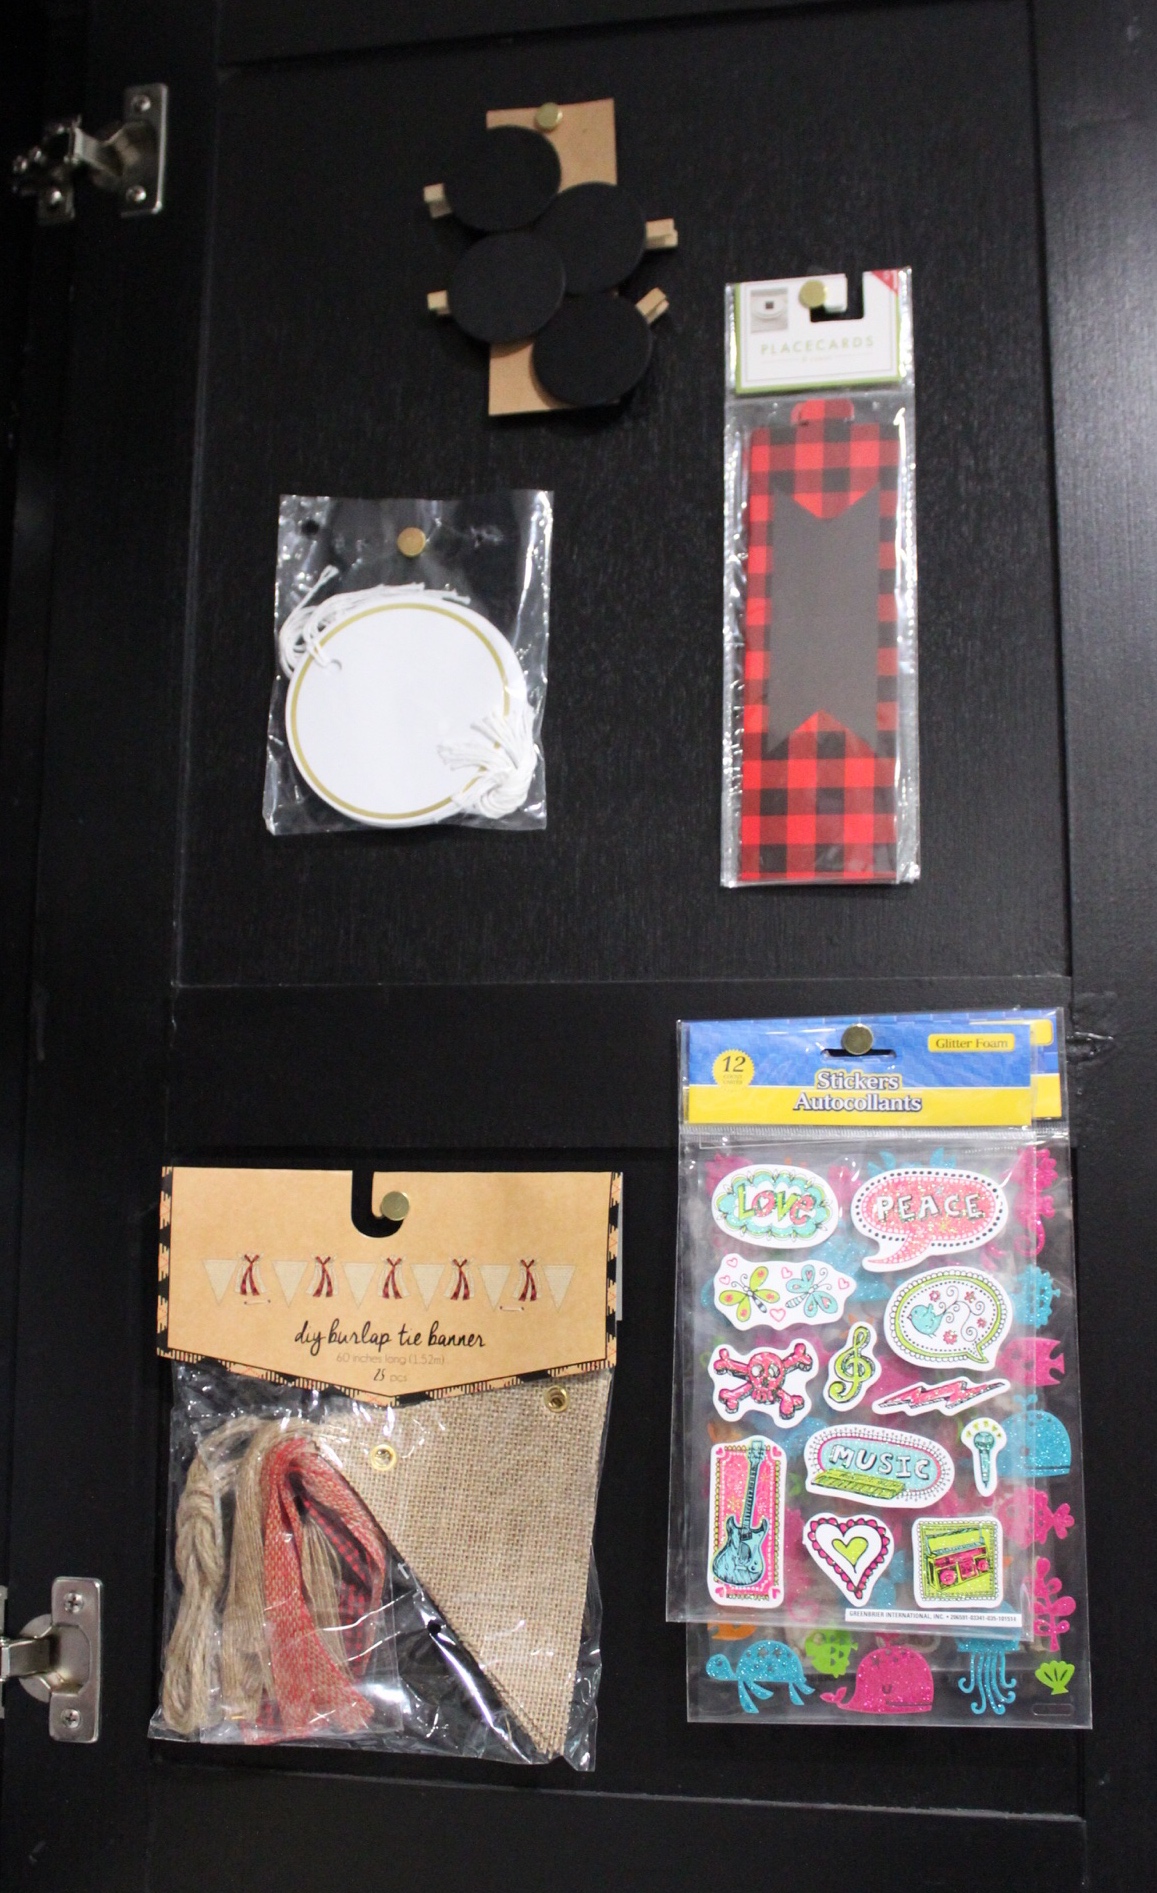
On the right door I hung up some of my banners, stickers, gift tags and place cards. That way they are in my face and I won’t forget that I bought them from the Dollar Spot at Target 3 years ago! I’m so notorious for this…like oh yeah…I have 20 bags of bottle brush Christmas trees that I bought on clearance! Can anyone relate?
There you have it party peeps! My new crafting cabinet! Now let’s see how long I can keep it like this. 🙂 Thank you for flying by today and I hope y’all have a wonderful weekend!
xoxo,
Robyn 🙂