Reverse White Washed Distressed Furniture Technique
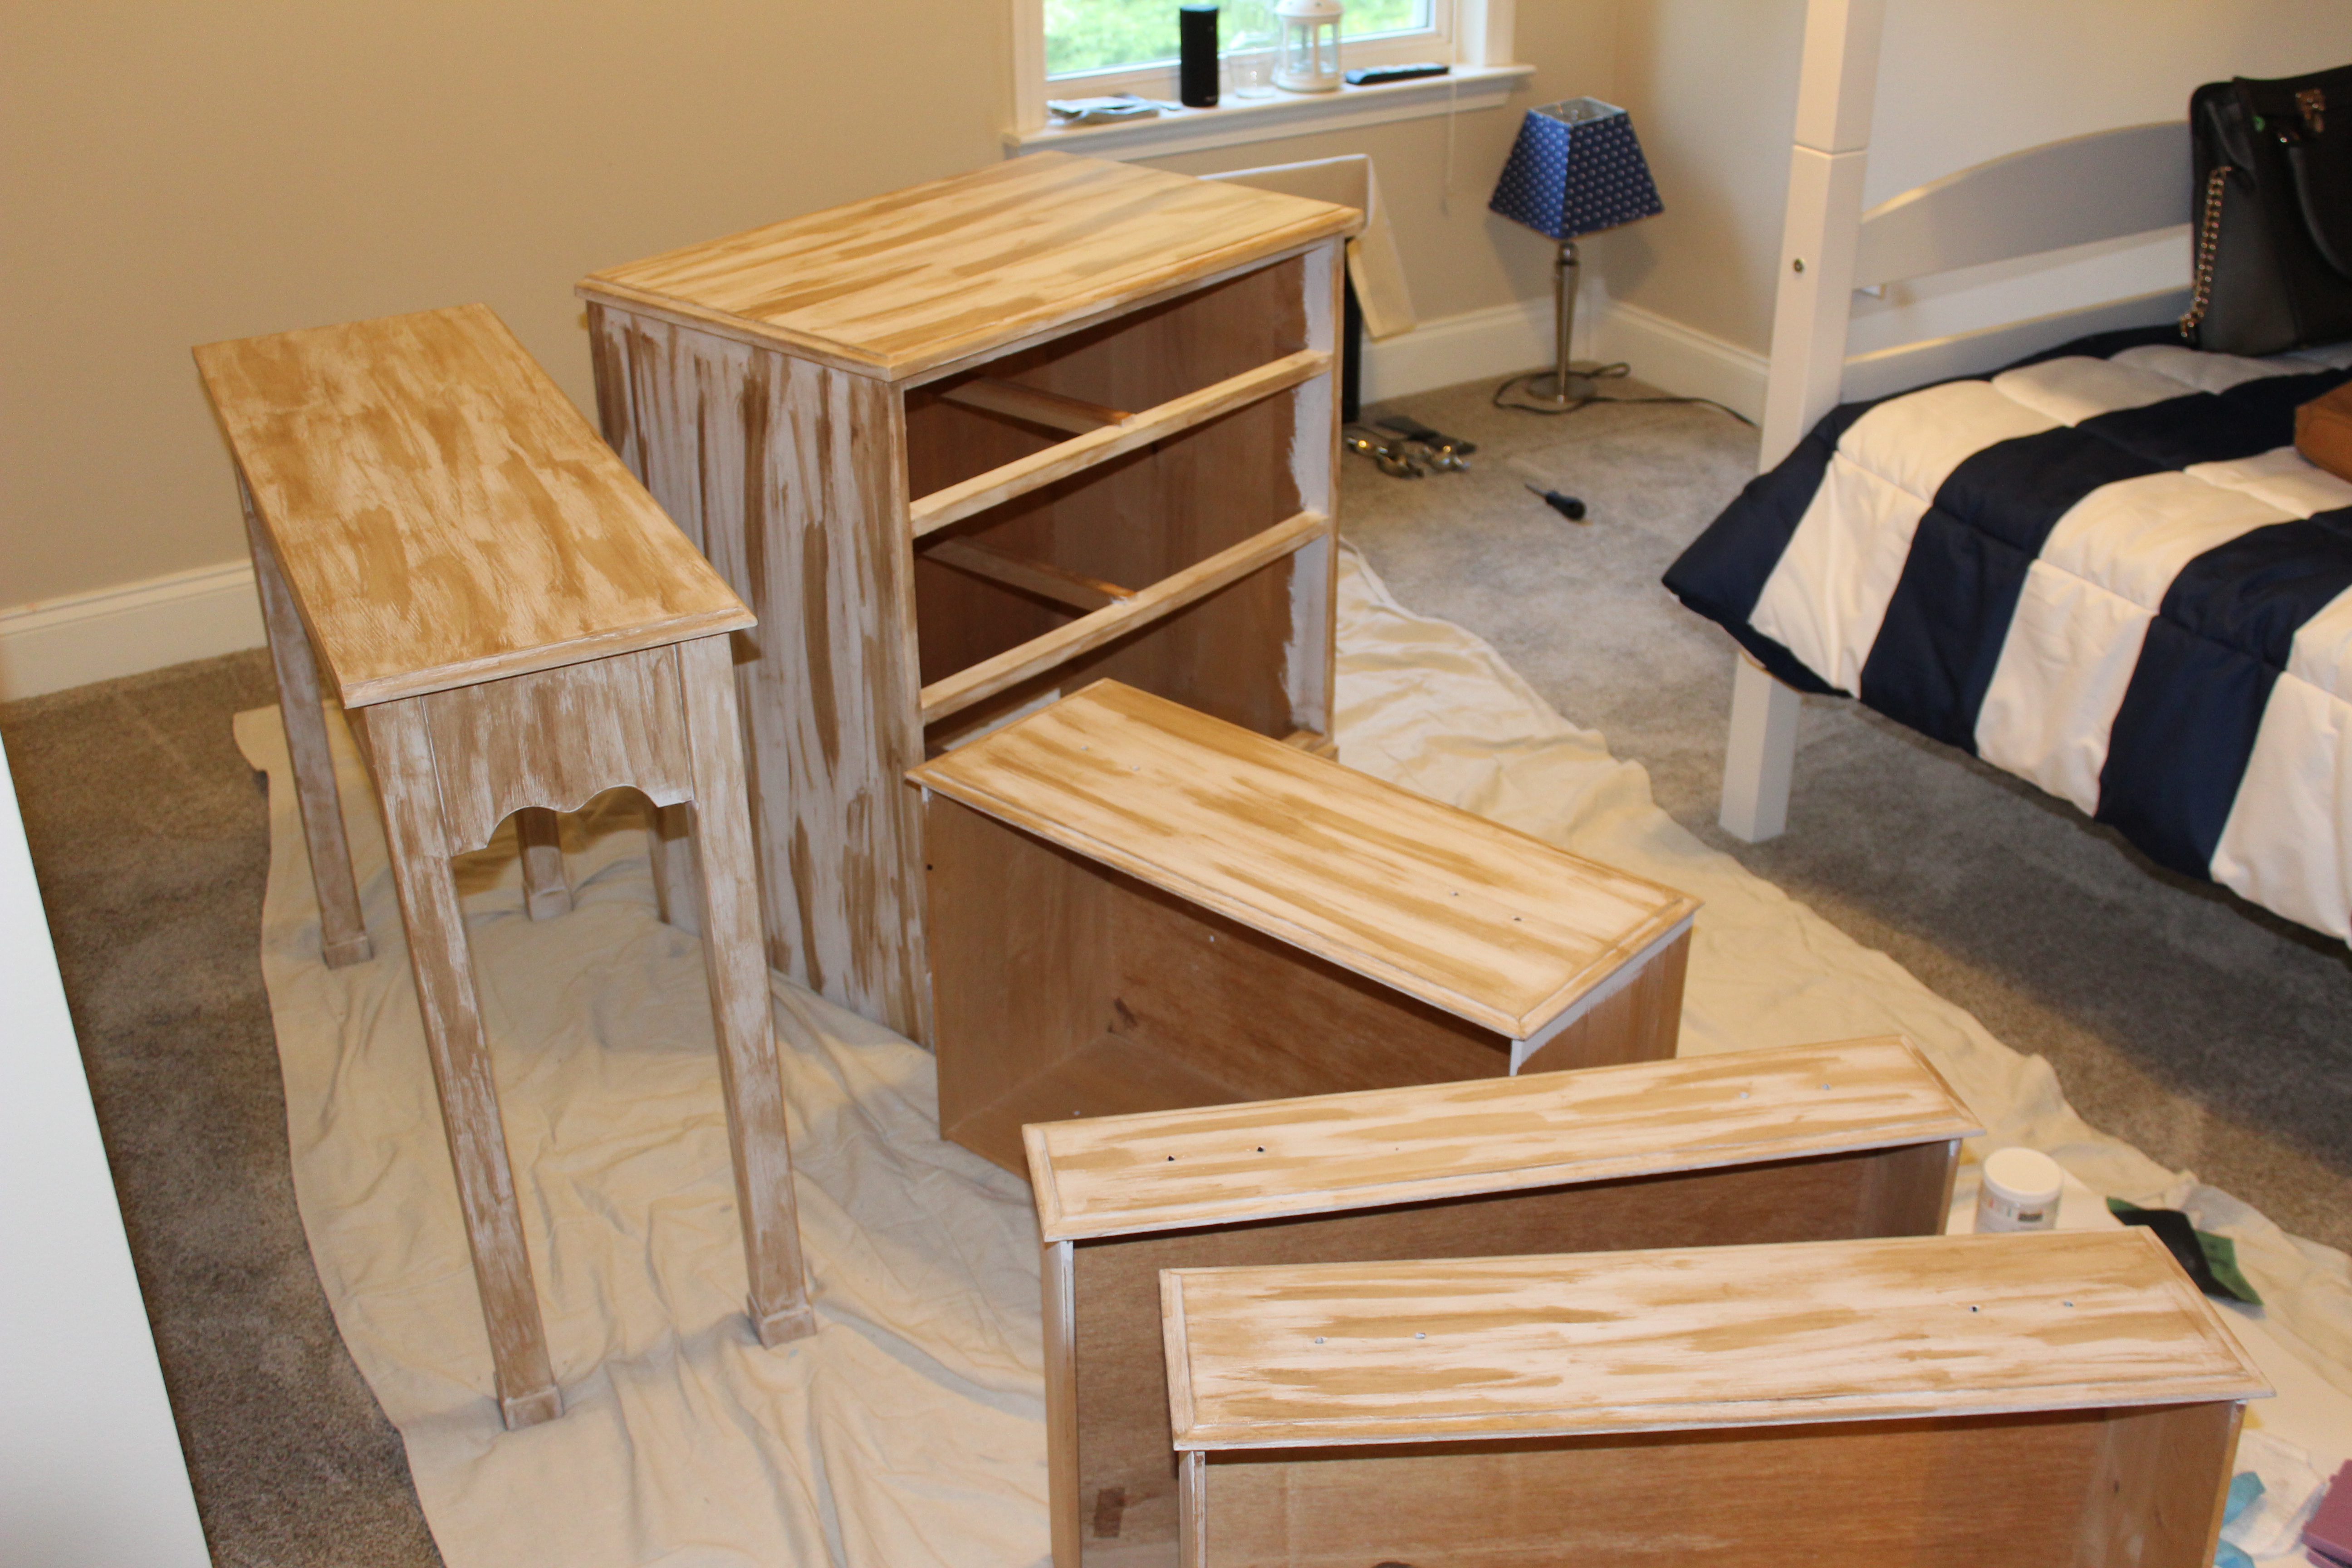
Hey y’all! I finally got back to one of the things that I really enjoy, and that is, refinishing furniture. I had these two pieces of furniture in the back of my mind for awhile now, but I couldn’t really nail down exactly what I wanted to do with them. So there they sat in our guest bedroom for a year just collecting dust and not living up to their full potential. On a random trip to Michaels I picked up this chalk paint in Oyster by Art Minds on sale and decided to give it a try! I also saw their Antique Wax so I decided right then and there that I wanted a distressed light wood white washed look for these two neglected pieces of furniture. So here’s what I did to achieve this look.

Before pics: This dresser has been with me since I was born. I have carried it to every move (13 to be exact) since I was 18. I believe my mom said my dad took it from his fraternity house in college. Its nothing fancy but it holds sentimental value. This is its 3rd makeover.

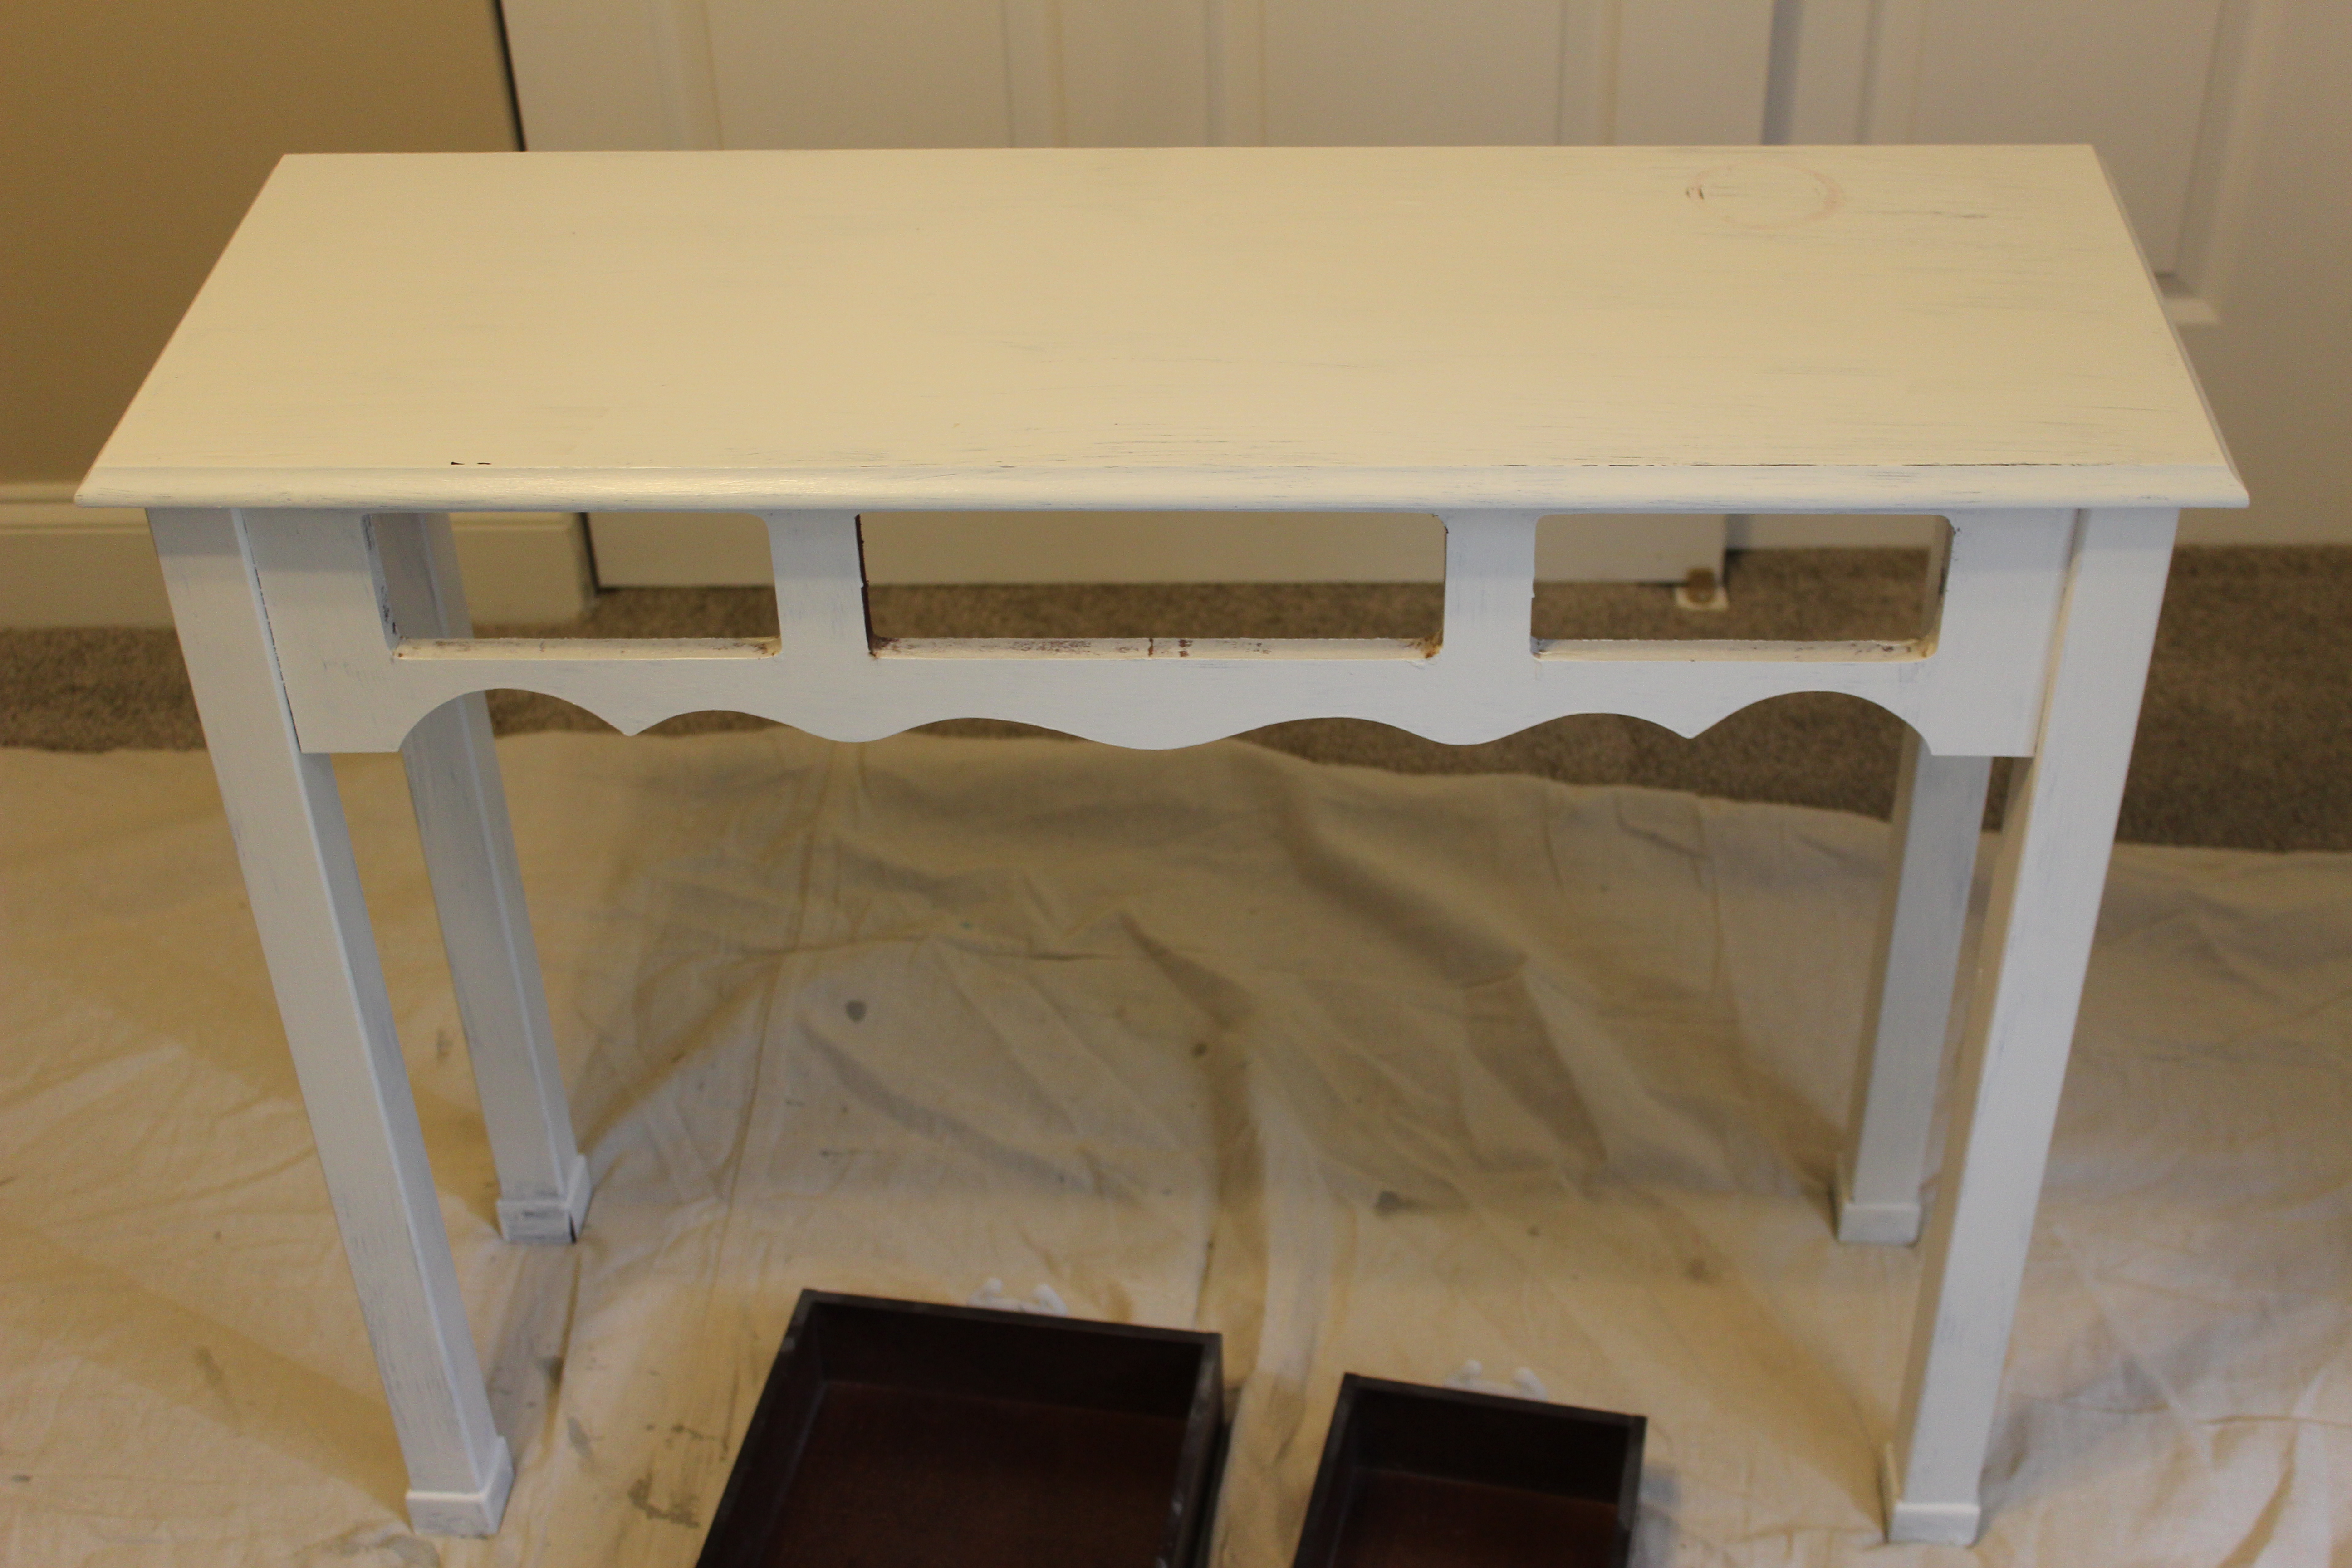
I sanded down both pieces to get rid of any dirt, grime and uneven marks. I then painted one coat of the oyster chalk paint and let that dry. I thought for sure that the black dresser would have needed two coats but nope I was wrong. It only took one coat of paint to cover that black semi gloss paint! Holy Batman is right! I painted these pieces inside so it took no time to dry. After they were dry I took an old washcloth and dipped a small amount into the glaze that I had poured out on a paper plate and just stroked each piece in random non uniform strokes and then wiped away the excess glaze with another towel to give it an old distressed white wash look. Imperfection is key to achieving this look. You want it to look old so don’t be careful or follow rules. Just streak it on and wipe away! I always tell people. You can’t mess it up. It can always be fixed! 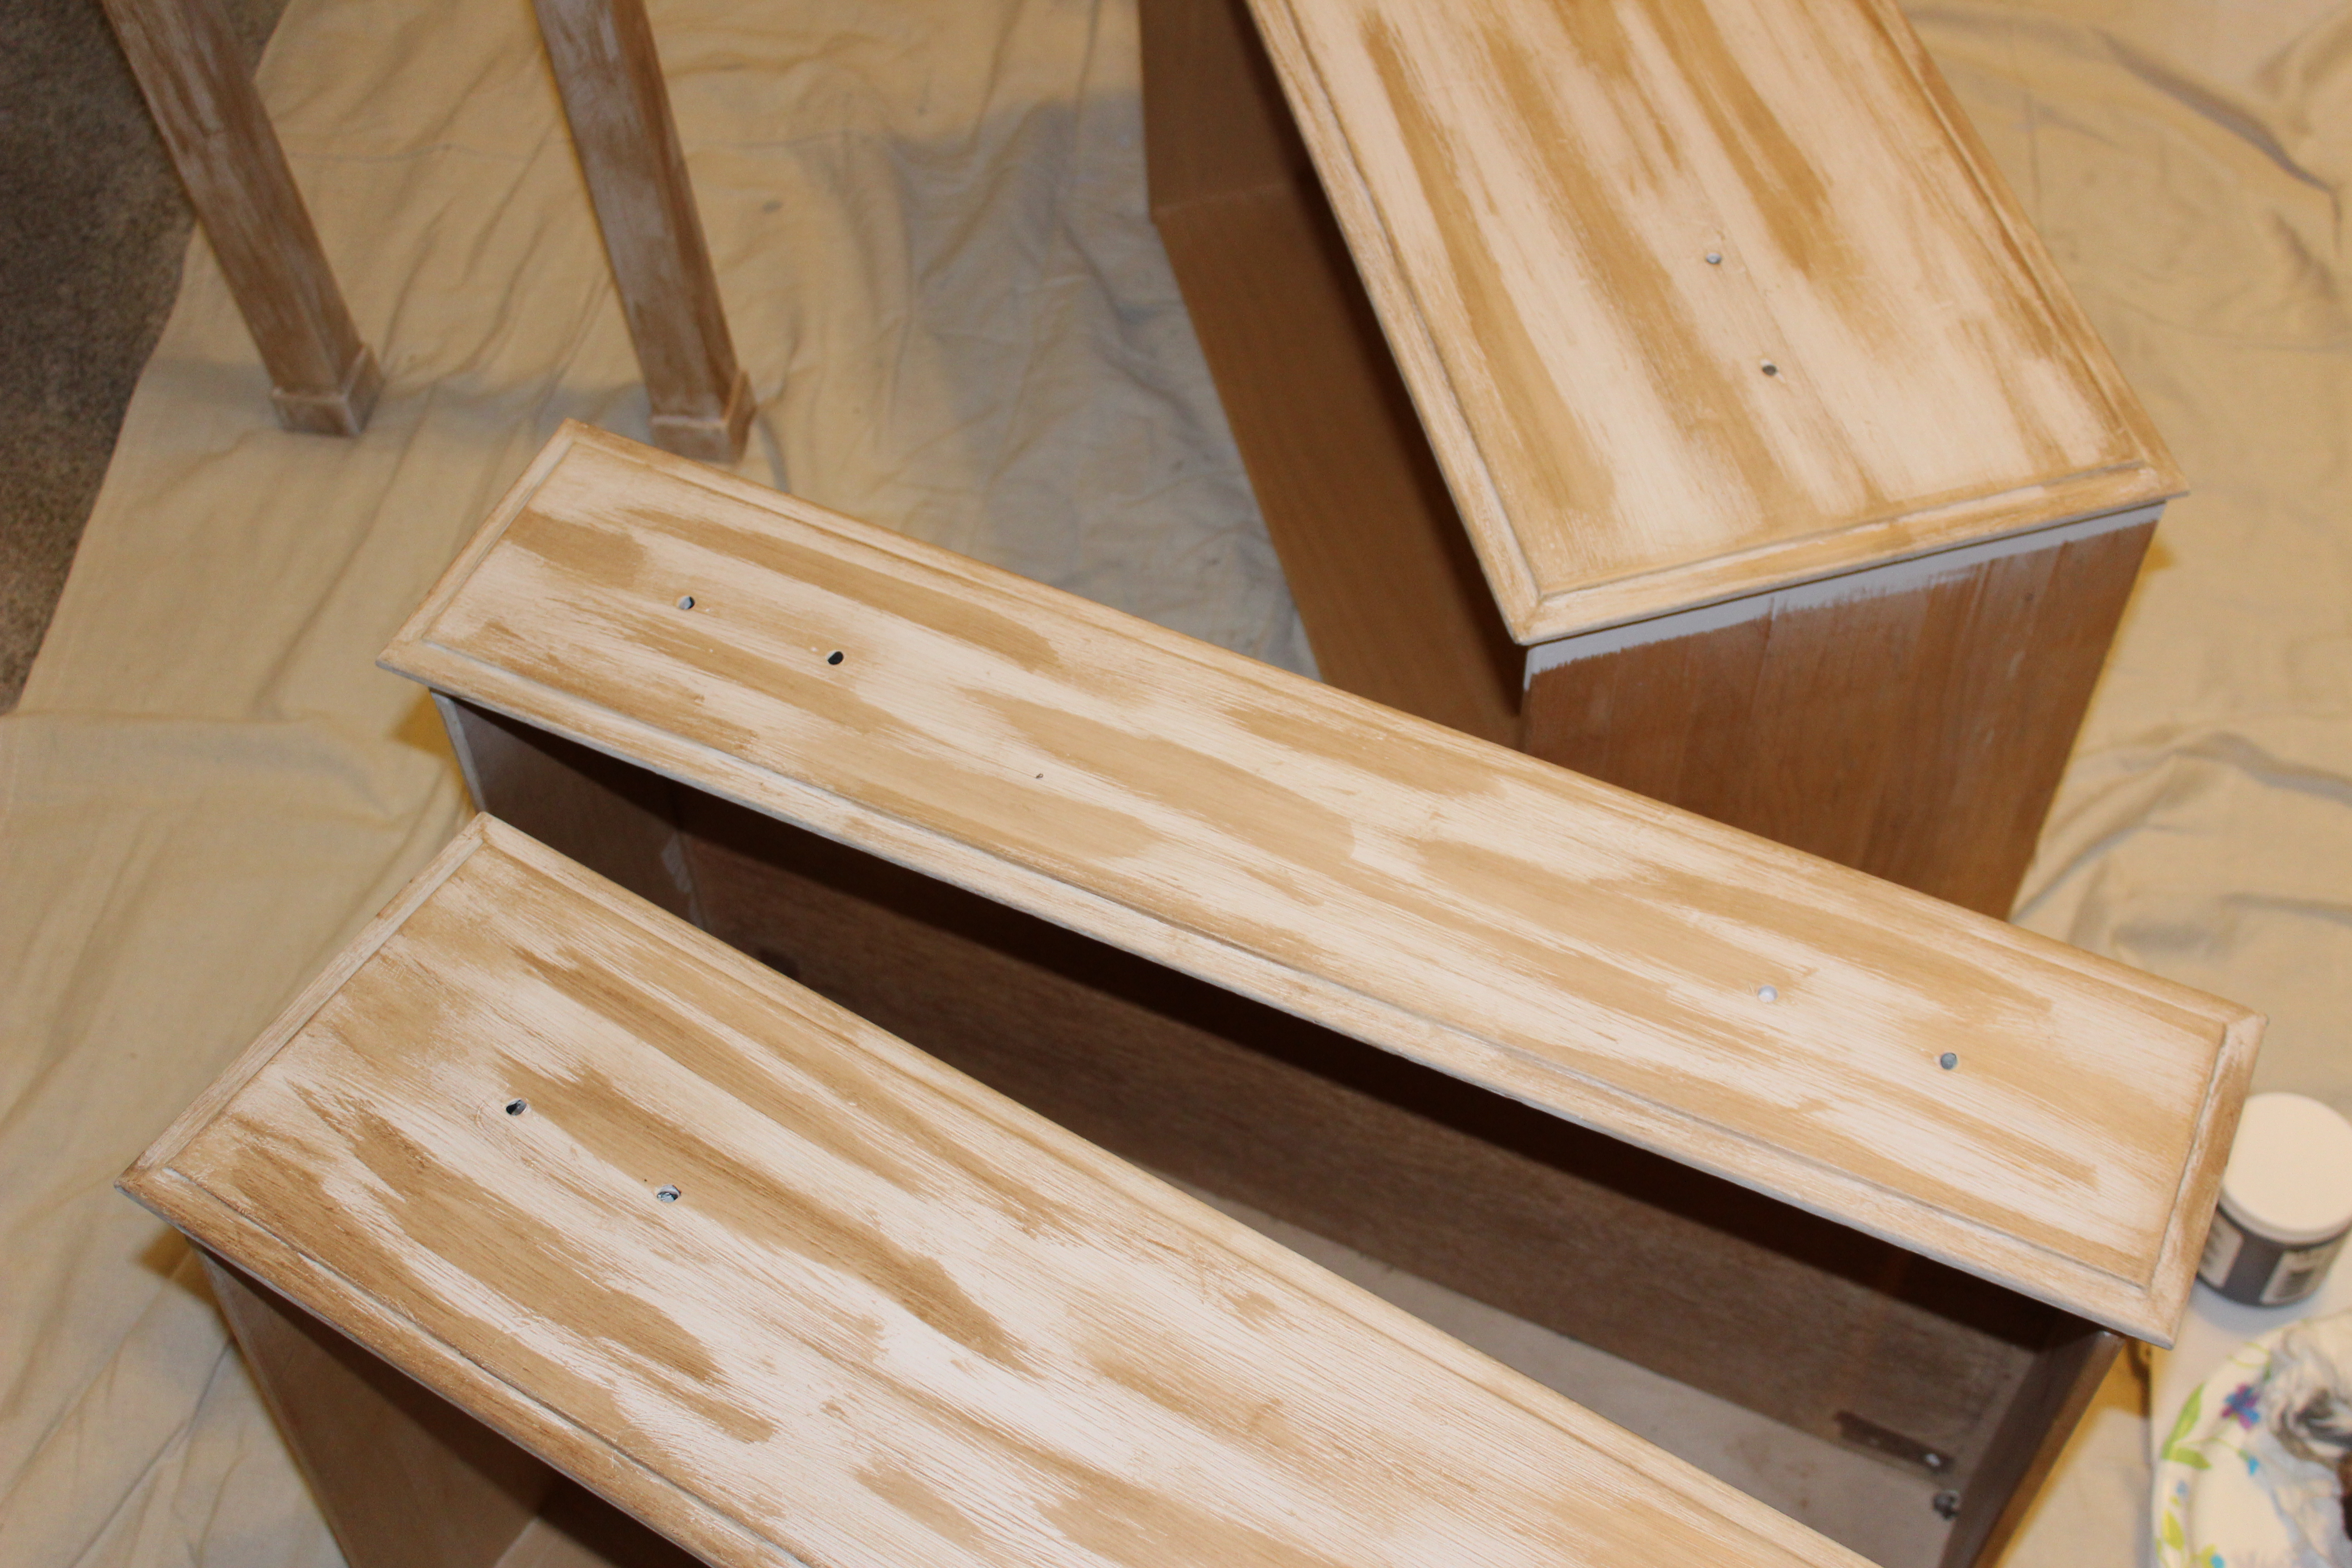

This chalk paint and glaze is so amazing! In my opinion its the same if not a little better than Annie Sloan believe it or not, and a whole lot cheaper.
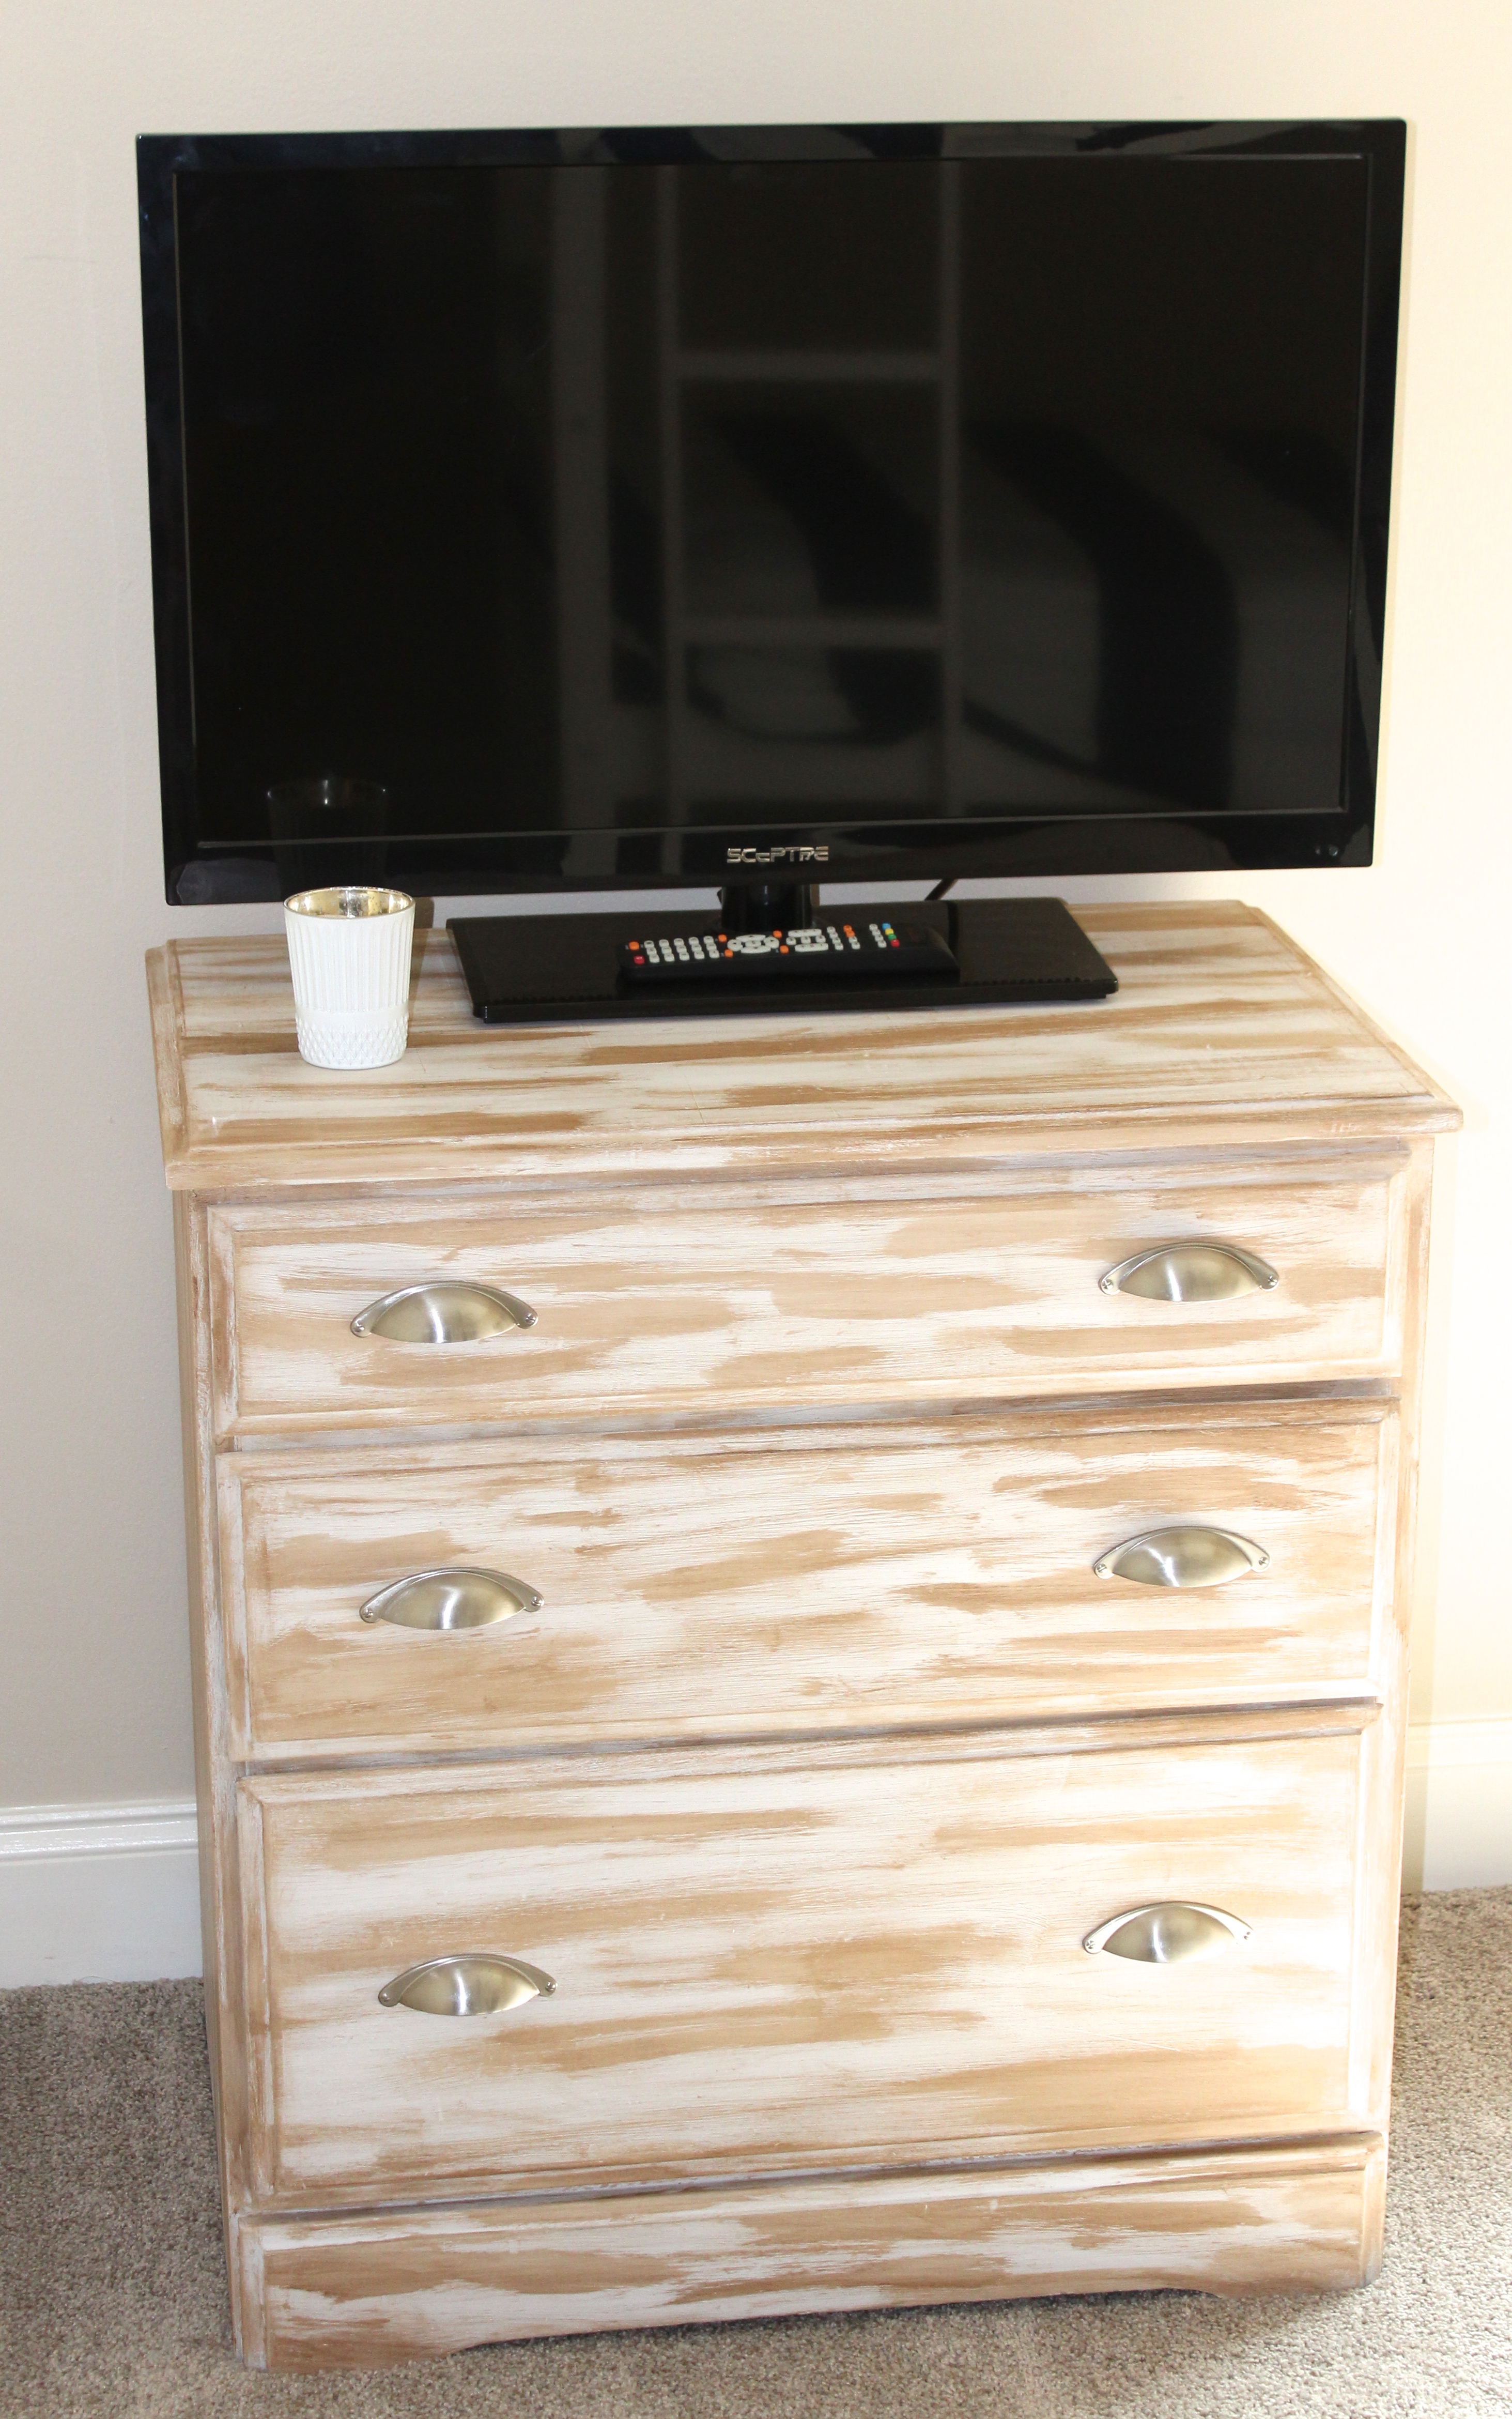

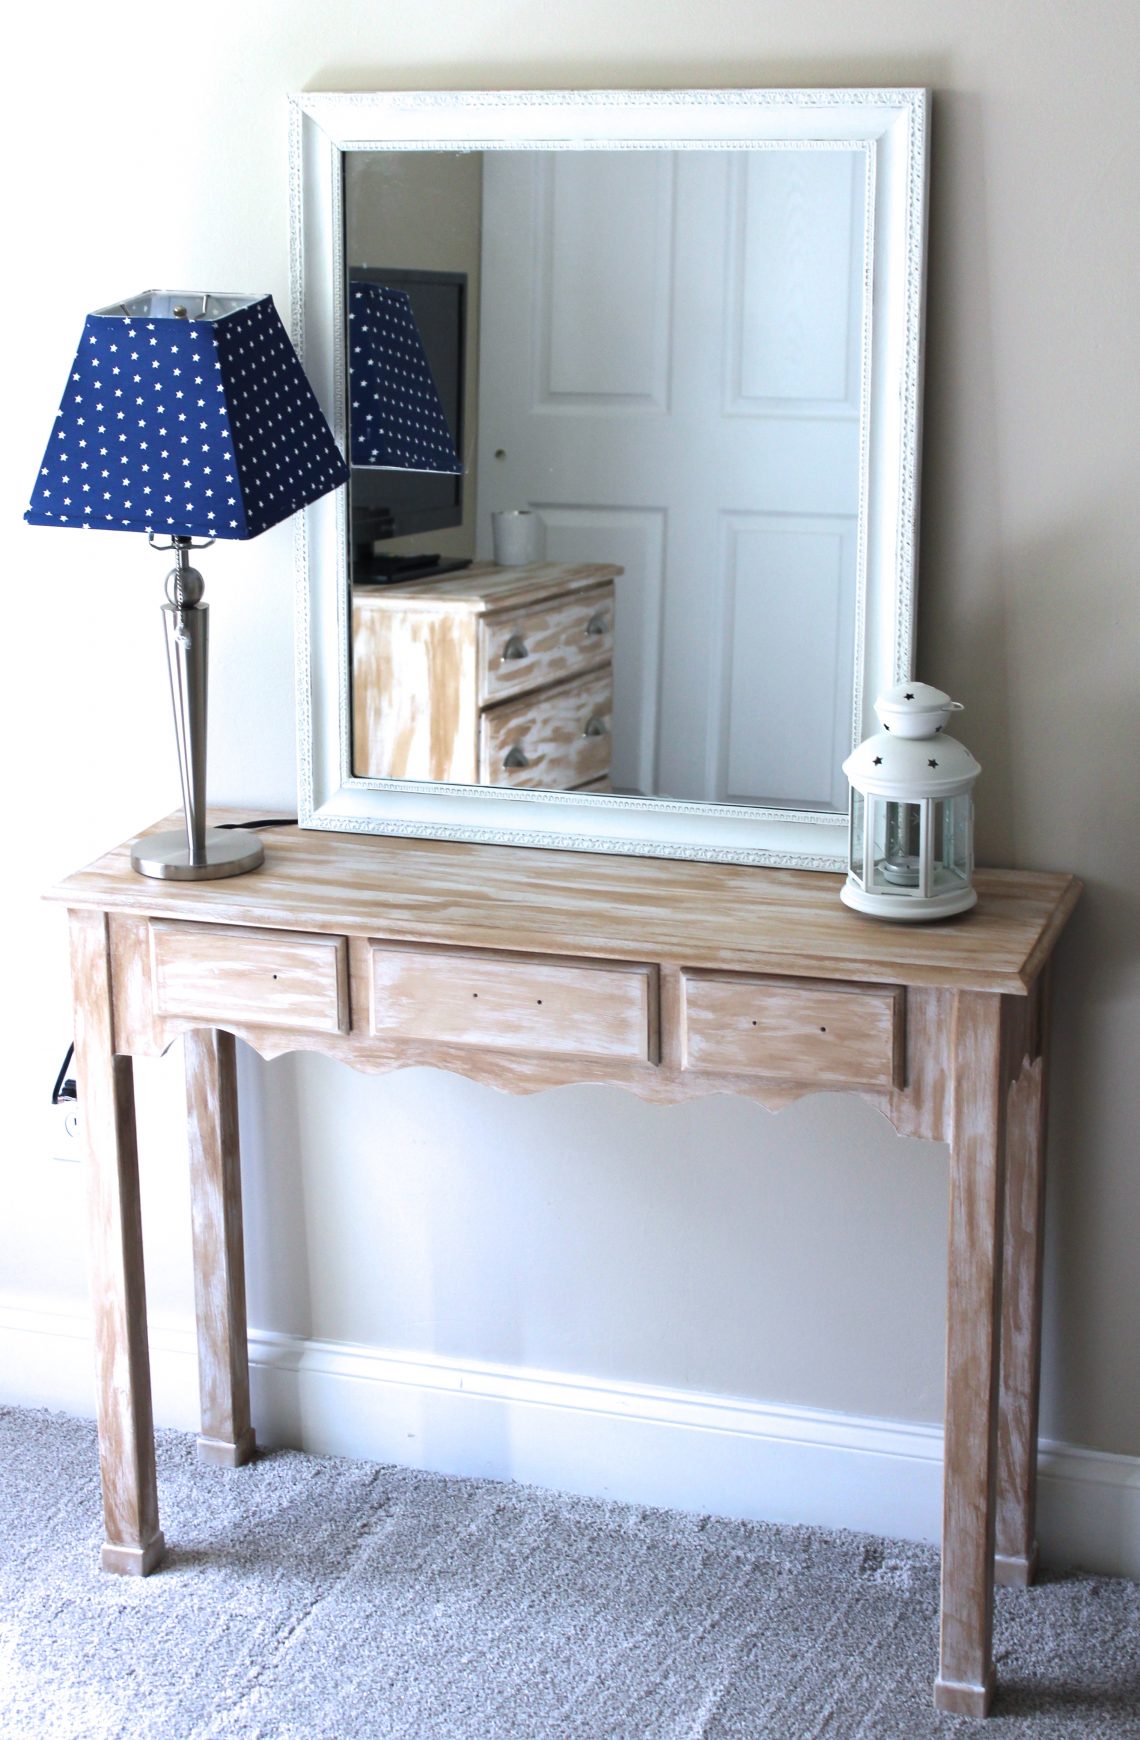
I still need to find some cute hardware for the smaller side table above but it has an odd width between the holes of course. I’m sure I’ll be able to find some cute antique glass ones at Hobby Lobby. All in all I really think they came out pretty cool. I’ve listed the materials I used below if you’d like to give this look a try for yourself. Have fun little birdies!
Supplied Used:
Art Minds Chalk Paint in Oyster
Old washcloth
Cost for project $14
Thank you little birdies for flying by my nest!
xoxo,
Robyn